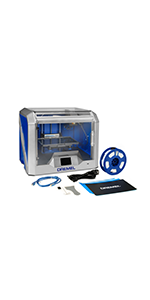
Dremel 3D40 3D Printer Wireless, Printing Volume 254 x 152 x 170 mm, Works with 1.75 mm PLA Filament, 100 Micron Resolution, Full-Colour Touch Display, WIFI and Slicing Software
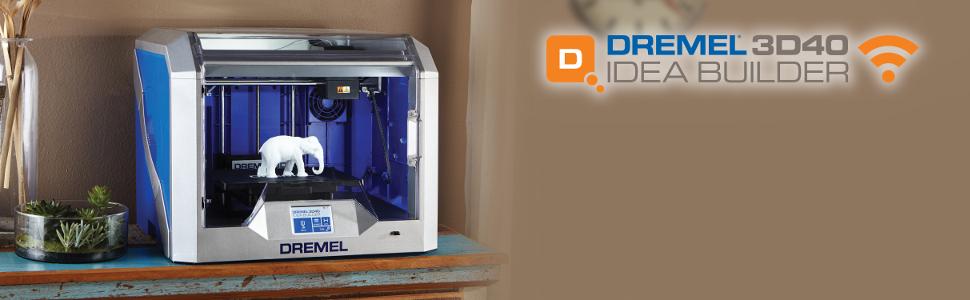
Dremel 3D Printer Bringing Your Ideas to Life
With the Dremel 3D40 Idea Builder, you have the ability to make all your ideas a reality.
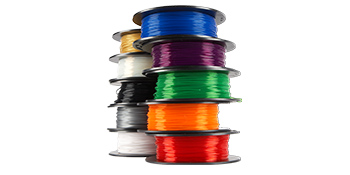
Eleven Colours to Bring Your Design to Life
Dremel filament comes in an array of 11 vibrant colours. Get bold with bright colours or go monochrome with black, white or silver metallic. No matter which colour you choose, you can turn your ideas into full-colour 3D reality. Each spool consists of around 190 metres of Dremel PLA filament, which is plant-based and recyclable.
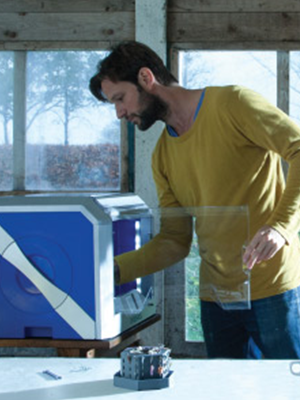
Turn Your Ideas into Reality
3D printing is where an object is created by the printhead or “extruder” by laying down successive layers of melted spool-fed filament, which is then quickly cooled and hardened so that the next layer can be applied until the model is complete.
The Dremel 3D Idea Builder has simplified the process of 3D printing so that everyone is able to try it. Your new 3D printer enables you to take an active role in creating your model as you watch it take shape and grow.
Further Informations
| | | |
|---|---|---|
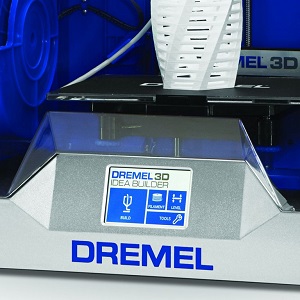
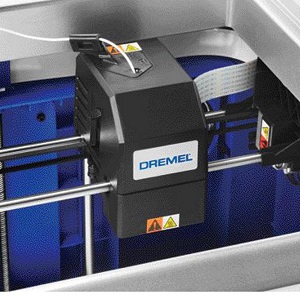
Easy and Safe to UseYou can control everything via the printer’s settings (size and orientation of model, build quality, build time, temperature, infill and speed). The basic adjustment functions (e.g. changing the layout, repair) ensure that your ideas and their transformation into reality are precisely as you imagined. | Get to Know the New Printer OnlineVisit the Dremel website for more information and to discover the full potential of the Dremel 3D world. Whether you are looking to build functional models, new hobby models or something a little more extravagant, you can explore the projects that are relevant to you to find helpful tips and instructions. | Extruder Designed to Minimize CloggingThe design of the extruder helps reduce the print setup time while maintaining an optimal extruder temperature. It also reduces the chance of any clogs or failed builds. |

| | | |
|---|---|---|
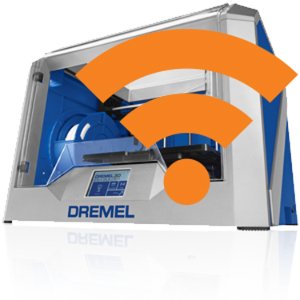
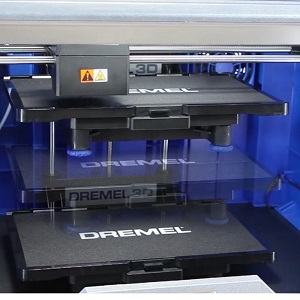
Wi-Fi Integrated 3D PrinterYour Dremel 3D Idea Builder is fully operational even without connecting it to a computer. Your models can be printed wirelessly, or by using the AutoDesk Print Studio Software which allows monitoring your build remotely. | More Reliable Printing ProcessThe 3D40 uses smart sensor technology, allowing effortless, accurate levelling and easy set-up. Thanks to the semi-automatic levelling, the extruder lays the filament evenly – for higher quality build results. | Print Larger Objects with Precision Thanks to Large Build SpaceThe large build capacity means you can also complete bigger projects. The fully enclosed workspace not only protects your model but also reduces the sound of the build process. |
 |  |  | |
|---|---|---|---|
| Recommended Use | Tinkerers, Hobbyists, & Home Users | Beginner 3D Users in education institutions and for home use | Advanced 3D Users in Industry, University and Schools |
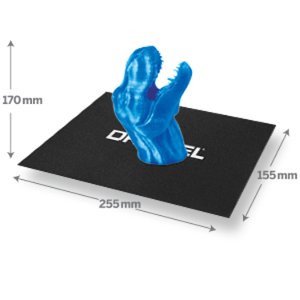
| Build Volume | 23.0cm x 15.0cm x 14.0cm | 25.5cm x 15.5cm x 17.0 cm | 25.5cm x 15.5cm x 17.0 cm |
| Wifi-Enabled | – | ✓ | ✓ |
| Camera Integrated | – | – | ✓ |
| Filament Type(s) Used | PLA Filament | PLA Filament | Nylon, Eco-ABS, PETG, PLA Filament |
| Heated Build Plate | – | – | ✓ |
| Filament Spools Included | 1 x PLA Filament | 1 x PLA Filament | 1 x Nylon, 1 x Eco-ABS Filament |
| Operating Interface | 3.5″ Touchscreen | 3.5″ Touchscreen | 4.5″ Touchscreen |
| Max. Print Resolution | 100 microns | 100 microns | 50 microns |
| Internal Storage | 4 GB | 4 GB | 8 GB |
| Dimensions: | 59.3 x 49 x 47.5 cm; 15 Kilograms |
| Model: | F0133D40JA |
| Manufacture: | Bosch |
Having reached the age of being called a silver surfer (Mid 70’s) it was with some trepidation that I took the plunge to buy my fist 3D printer. I had considered doing so some years earlier but decided against it as it seemed I lacked the necessary skills to to build and program the printers on the market most of which were kit built devices.
A recent need to produce parts for a hobby of mine meant had a need for a 3D printer and after some research and recent keen pricing I took the plunge and ordered the Dremel 3D45.
If I had known how easy the this printer make the whole process I should have taken the plunge much sooner.
Once unpacked the quality of the unit was obvious. The Quick Start Guide was reassuringly clear and had me printing within 30 minutes. There is even a full text manual enclosed for further in depth advice.
Half an hour later I had my first print. The Dremel supplied finger spinner.
Printer software was no problem to load onto my PC and the Dremel slicer program was a breeze to use so much so that I was downloading printable items from the internet and slicing the same day.
The quality and accuracy of the test print Benchy printed in “standard quality” on both the enclosed Eco-Abs and PEG filaments that came in the box was super.
WiFI was straight forward to connect and made the life easy. I also loaded the Dremel recommended cloud software 3DPrintOS which means I can use my mobile and the on printer video camera to keep an eye on the print progress and control the printer. No need to be running up and down stairs to check on the printer for this old boy. It resides in the man cave next to the bed room and is reassuringly quiet in operation.
So the printer is no as cheap as some but its made life easier for me to get up and running with 3D printing with no hassle and in the knowledge that Dremel have a good reputation for after sales service.
No doubt as time goes on I will have my share of failure as most seem to have but so far this printer makes me think it will be more likely my fault than the printer.
It is easy to use, can recommend for beginners if you can afford the cost. The built-in ventilation with carbon filter is a very nice extraI wonder where will I get replacement filters. The Mac software has a horrible memory leak, it consumed 26 Gigabytes of memory in a couple of hours, so you are better off closing the app and let the printer print on its own.
I bought this 3D printer to use at the school where I teach. I wanted to incorporate CAD design and 3D printing into the curriculum and the children raised some money for us to buy this as it was on their wish list.
It is absolutely brilliant, easy to use and the children have been delighted to see their designs come to life. I am very impressed at how long the filament lasts too, you can get loads of things built from just one roll. I have already recommended to other schools in our trust who are very jealous we have one.
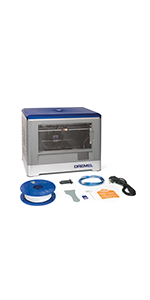
The Dremel 3D40 FLEX 3D Printer is a wireless 3D printer with all the software and accessories included in the kit for you to get started in the world of 3D printing.
So, I’ll start off with saying I’m a complete novice at 3D printing. In fact, getting to grips with new technology is often an uphill battle for me. However, the potential scope offered through 3D printing was too exciting of one to miss out on, so I thought I’d invest some time and energy and try to get to grips with it.
First off, the 3D40 from Dremel is a powerful piece of kit that absolutely has amateurs in mind. Yeah, you can do some nifty stuff with it, but at it’s core, is a design for people without any experience to be able to master (well, to some degree). Although I really have to say from the outset that it will more than likely take a lot of time and patience for you to start achieving the results you want. But as long as you just take each step slowly, and try to learn from the errors, the process can actually be quite enjoyable (well I found it so) rather than frustrating (wellthere were a number of times I wanted to destroy the damn thing!).
The printer prints using Dremel’s PLA filament (a thermoplastic polymer derived from renewable resources). With the kit you get one spool of white filament. You get through this pretty darn quickly with playing around with the printer. So early on you’re probably want to order in a load of different colours (I recommend getting more black than anything else, as I’ve found this is the colour you’ll probably use the most).
Set up of the 3D printer and its associated technology isn’t as complex as you’d have thought. My advice is follow the instructions completely, use YouTube videos to keep the process from getting too dull (and to hear what issues others encountered so you know how to avoid them), and just give stuff a go. In my experience with the printer giving stuff a stab is the best way of finding out how to use the printer effectively. You’re not going to break anything (I didn’t anyway).
The overall quality of the printer itself is pretty decent. You’d expect so coming from Dremel. To be honest, I have a number of Dremel tools, and have always found them to produce high-quality products which you can trust and rely on. This 3D Printer is no exception. The bodywork and overall construction is of a high-quality. Where parts join, there’s smooth and precision joints with no overlap or gaps. The quality of the materials used for making the printer also appears to be excellent. The printer feels tough and resilient to any accidental knocks or bangs. Indeed, it feels unlikely to get damaged easily.
The printer comes with enough slicer software to get you underway and getting to grips with the capabilities of the printer. To be honest, the software is relatively straight forward to use, as long as you take your time familiarising yourself with how it all works and integrates. One thing I have discovered with the software though is that it tries to automate too much. It doesn’t “ask” if something should be adjusted, it just goes ahead and does it. This can be frustrating for you, meaning you have to correct the placement of your parts manually after the software has tried to be too clever.
Early attempts at printing simplistic designs were the very essence of trial and error for me. However, I saw this as a learning game, and noted down my progress so I would hopefully keep learning from the issues and bettering my skills. At the core you have to remember there’s a key interaction between software and a tangible, physical final item. To go from one to the other means you have to get to grips with both aspects (intangible and tangible). After a while I started to see the printer almost as a car engine. You kind of have to understand the physical process and how it works to be able to manually correct any errors yourself. Again, trial and error and get hands on as often as you can when investigating failed prints is the key.
I have had a number of issues which have frustrated me, and made me think this is still an early model. The wireless connection was incredibly hit and miss. I have no such problems with any other Wi-Fi devices in my home, so I know it’s down to the printer itself. In the end I resorted to using an ethernet cable just to stop it from losing its connection all the time. This solved the issue, but I would have preferred wireless.
All in all though, despite the repeated fails and times of frustration, now that my success rate with producing parts and models is far better, I am pretty darn happy with the 3D printer. I just try to keep everything simple whenever using it. I’m no professional, and this is still a piece of kit designed for amateur use, so work within those parameters and it’ll probably work as well for you (in the end).
It produces very good quality prints straight out of the box. I’ve used the supplied reel of ECO-ABS with no failures. I am particularly impressed that the prints do not warp. The dremel filament is expensive but I’ll stick with it for the quality and convenience. I’ll try the PETG nex
Hatte bisher einen Anycubic i3 mega. Der war laut, knarrzig und man musste technisches Verstndnis haben um loszulegen.
Das braucht man beim beim Dremel 3D45 nicht unbedingt.
Er ist fertig aufgebaut. Man schliet ihn an, es wird bei der Installation alles auf dem kleinen Touch-Farbdisplay erklrt und durch die Vorgnge gefhrt inkl. Bebilderung. Man kann praktisch nichts falsch machen.
Die Software um die Druckdaten, die man z.B. bei Thingiverse geladen oder selber erstellt hat mit z.B. Tinkercad, ldt man einfach in die Dremel Slicer Software. Dann ein Klick und er rechnet die Daten um, dann noch ein Klick und die Daten landen beim Drucker der dann loslegt. Klar: man sollte vorher noch Kleber auf die Druckplatte auftragen, damit das Filament besser haften bleibt. Herrlich einfach. Ein wirklich durchdachtes Gert das einfach funktioniert, wie es sollte.
Wrde ich mir sofort nochmal kaufen.
The printer is as very well packaged. After setting it up on the table it didn’t take long to set up. The only issue we had was making sure the filament was correctly fed. There is a mechanism that grips the filament in the print head and I couldn’t find out about it from the instructions. The system sets up the table with little work.
Our first pieces were samples and then we produced our own from SolidWorks. The resolution is what we needed and the print quality is really good.
The system isn’t noisy because of the covers and I prefer the covers to give piece of mind regarding the hot print head.
All in we really like it.
Angefangen bei der Inbetriebnahme: – Gert auspacken
– Transportschutz entfernen
– einstecken und anschalten
– per Kurzanleitung Filament einlegen und Druckplatte kalibrieren
(alles nach Anweisung ber das sehr bersichtliche und beraus
bedienerfreundliche Touch-Bedienfeld.
– Eines der Beispielobjekte aus dem internen Speicher auswhlen und
der Spa konnte losgehen. ….zurcklehnen und die Druck Show genieen!
Dank der beheizten Druckplatte bin ich nicht auf das “Standard”-Filament PLA beschrnkt und habe die Mglichkeit andere Materialien mit anderen Eigenschaften auszuwhlen, was meinen Aktionsradius wesentlich vergrert!
Da einige andere Kunden anscheinend doch Probleme mit ihrem Gert hatten, mchte ich mich hier zu hufig bemngelten Punkten auch noch uern! Meine Fehldrucke konnte ich im Nachhinein immer als Bediener-Fehler oder mangelnde Basiskenntnisse identifizieren! Was keineswegs heien soll das Leute ein Fehlerhaftes Modell erhalten haben.
… jetzt kommt auch noch ein ABER: Auch ich hatte Probleme ohne Selbstverschulden mit einer Original Rolle Filament, die von der Qualitt so schlecht war (Querschnitt) das stndig meine Dse verstopfte! Was durchaus einige negative Flche zur Folge hatte.
Trotzdem gilt: 3D-Druck ohne Rckschlge gibt es nicht!
Doch mein Gert ist jetzt seit 3Wochen im Einsatz und davon mehrere Tage ununterbrochen am Stck! Dabei sind 90% meiner Drucke ber der erhofften Erwartung. Ich habe weder Probleme mit der Haftung auf der Druck-Plattform noch mit der Genauigkeit oder der Umsetzung komplizierter Formen (hufig sogar berhnge ohne Sttzstruktur).
Wer das Geld brig hat, dem empfehle ich zu 100% den Dremel 3D45 ! Ob es sich jetzt um einen Neuling ohne Vorkenntnisse handelt, oder um erfahrenere Anwender, denen der “bersichtliche” Druckbereich ausreicht und die die einfache Bedienung zu schtzen wissen. Das Gert luft ohne Probleme und wenn liegt es an einem Bedienungs Fehler des Benutzer ! 🙂
So und nun das NEGATIVE !
Im Karton liegt ein Gutschein fr 2 Rollen Filament wenn man eine Bewertung schreibt und bei DremelBosch sich meldet !
Auch ich bekam eine Benachrichtigung das ich zwei Rollen bekommen sollte die mit UPS aus Holland Versand worden waren ! Versand Holland nach Deutschland 7 Stunden ! Doch die Firma UPS ist NICHT in der Lage die Ware an uns Auszuliefern noch nicht mal nach 72 Stunden (3Tagen) bei uns abzugeben ! Somit werden wir die Rollen also NICHT erhalten und finden diesen Service von Dremel Bosch SEHR Schlecht und Negativ das solch eine Firma mit der schlechtesten Versandfirma (UPS) zusammen arbeitet !
Bei mir also NIE wieder denn eine Ausrede das liegt an Covid 19 kann nicht sein denn andere Paketdienste liefern auch sofort aus und haben damit KEIN Problem !
Although a bit expensive than some other quality 3D printers in the market, it is super easy to use and produces consistent quality prints. You also get access to Dremel educational resources and training. The printer is very easy to set up out of the box and has got some great features. It isn’t amazingly fast though and if you’re printing a decent size object in high resolution, it could take a couple of days easy!
So far I haven’t had any issues with the build other than some burn marks left on the prints when using Dremel translucent PLA. It happens due to a build-up of filament so I’ll probably have to play with the temperature settings or speed to get that sorted. The printer automatically identifies Dremel filmanets through RFID and also the slicing software will select optimium settings for you but you can adjust them manually if you prefer.
My one complain is that Dremel spools are non-standard spools and come in limited colours. However you can print a spool adapter that will bolt on to 3D40 or 3D45 and allows you to use 3rd party filaments.
Perfect prints straight out of the box. This is a brilliant piece of kit and on the right default settings, can get a seriously good print quality. Love the included sensor level setup procedure.
Not one print has failed yet.
The printer worked straight out of the box, thanks to the levelling system. All the benchmark prints came out near perfect, would highly recommend this product.
Prints very well, the default settings are a bit wrong, but after a couple of prints and a bit of tinkering with the settings, very impressed.
Like any 3D printer, be prepared for a few failed prints, but saying that, once you get it set to your liking it’s a printing factory. I love mine
Der Dremel 3D45 ist nicht mein erster 3D Drucker aber der wohl am einfachsten zu bedienende. Noch dazu in einem optisch hochwertigen und kleinen Gehuse untergebracht. Sebst die Spule steckt mit im Gehuse wodurch diese zustzlich geschtzt ist. Der Preis lsst einen schon schlucken, aber fr mich war es definitiv die richtige Wahl. Nach einigen Wochen des Testens habe ich noch kein Manko festellen knnen das fr mich relevant wre. Der Drucker arbeitet zuverlssig und sauber. Selbst ABS, wo viele Drucker ihre Schwierigkeiten haben, luft beim 3D45 ohne Probleme, fast schon besser als bei PLA. Der Drucker ist tatschlich ein Plug&Play Gert. Auspacken kurz einige Angaben im Display besttigen und los gehts. Anfangs schreckt einen das Display etwas ab da die Touchfunktion nicht mit der Anzeige bereinstimmt. Das legt sich aber direkt nach dem automatischen Update. Fr mich ein super Drucker der zwar etwas teurer ist aber dafr alles bernimmt. Perfekt fr leute die keine lust haben stndig zu justieren.
Der Dremel 3D45 ist ein Drucker, der einfach zu bedienen und von Beginn an super Druckerzeugnisse liefert.
Man muss sich um relativ wenig Gedanken machen. Auspacken, dem Touchscreen folgen und die Einrichtung ist abgeschlossen.
== SOFTWARE ====
Das Drucken kann sowohl ber USB, LAN oder WLAN erfolgen.
Habe mich fr LAN entschieden, da die WLAN-Einrichtung fehlschlug. –> Empfnger des Gerts scheinbar zu schwach (?!)
Super ist die Cloud-Anbindung die ein Drucken ber den Dremel-CoudService ermglicht. Gleichzeitig gibt es viele Beispiel-Modelle zum drucken. (http://printcloud.dremel.com) –> man kann auch verschiedene Modelle in die Warteschlange stellen und dann nach und nach ausdrucken.
Meistens nutze ich jedoch die Dremel-App “Digital 3D-Slicer” unter MacOS zum Drucken. –> einfach zu bedienen und macht was sie soll
=== Kamera ===
Mit der eingebauten Kamera kann man den Druckvorgang aus der Ferne kontrollieren. Dies geht sowohl in der Cloud, der Digital 3D-Slicer-Anwendung als auch direkt im Browser
=============
=== Filament ===
Bisher habe ich nur ECO-ABS und PLA gedruckt. Die RFIDs an den Filament-Rollen ermglichen ein automatisches Erkennen des Filaments, wodurch automatisch die passenden Druckeinstellungen gewhlt werden (Temperatur, …)
Der Filament-Wechsel ist ebenfalls einfach und wird ber den Touchscreen perfekt erklrt und untersttzt.
==============
=== sonstiges ===
etwas komisch war die Auswahl der Sprache beim einrichten. Ich habe mich zwi mal vertippt… Ein mal Franzsisch und ein mal Spanisch ausgewhlt. Es sieht so aus, als ob es hier einen Versatz zwischen Anzeige und Druckerkennung auf dem Touchscreen gibt. Dies war jedoch nur bei der Auswahl der Sprache… Sptere Eingaben sind korrekt und przise.
==============
===== Fazit =====
Der Drucker ist definitv nicht billig, allerdings perfekt fr Leute, die einfach nur 3D-Drucken wollen. Ohne sich zu stark mit der Materie im voraus beschftigen zu mssen. Die Druckerzeugnisse sind bisher stets sauber.
Die verschiedenen Druck-Mglichkeiten (USB/LAN/WLAN) machen ihn zum Allrounder. Ebenfalls die mglichen Druckmaterialien (ECO-ABS, PLA, NYLON, …)
==============
A week after ordering, and following an unexplained delay, the product arrived with box undamaged and printer itself showing no external signs of damage. The integrated touch screen looked fine when the printer was switched off, but when the printer was switched on the screen was clearly broken. See attached images. Amazon technical support arranged for a replacement item to be sent out and covered the cost of postage.
A week later when the replacement arrived it was in good working order. Consequently I’ve updated the rating and review.
+ Very straightforward to set up and establish network connections
+ Clear quick-start guide and intuitive interface meant we started our first print within minutes
+ Digilab 3D software for PC is powerful and straightforward
+ Quality of prints is high
– Filament stops feeding quite often so you really do need to keep a constant eye on print jobs
– Objects can be tricky to remove after printing despite following instructions carefully
Dieser 3D-Drucker hat meine Erwartungen erfllt und ist fr den Privatanwender super geeignet. Der groe Vorteil ist, dass das Gert auf einer geringen Standflche verwendet werden kann. Wenn man die Gertestellflche mit anderen Druckern vergleicht, unterscheidet sich diese nicht sonderlich. Allerdings bewegt sich die Grundplatte bei einigen 3D Druckern, sodass eine grere Flche, als die Stellflche beim drucken bentigt wird. Bei mir hat der Drucker seinen Platz in einem Schrank bekommen. Bei ca. 20 KG Gewicht, htte ich keine Lust gehabt, den Drucker jedesmal aus dem Schrank auf den Wohnzimmertisch zu stellen.
Ein weiterer Vorteil ist, dass das Gert ein Gehuse hat. Dies hlt die Temperatur stabil, was bei bestimmten Materialien beim Druck von Vorteil sein kann und meine Tochter (10 Monate) kann beim Druckvorgang auf das Gert mit den Hnden hauen.
Der Nutzungszhler zeigt 128 an. Bisher hatte ich 3 mal eine verstopfte Dse, die ich mit dem beiliegenden Werkzeug beheben konnte. Dies ist jedesmal bei einer Schichthhe von 0,05 mm oder 0,1 mm passiert mit dem beiliegenden PLA Filament. Seitdem ich die Dse vor Gebrauch von auen reinige, ist das Problem nicht mehr aufgetaucht. Leider muss man wohl bei allen Druckern hin und wieder mit einer verstopften Dse rechnen. Der oft bemngelte kleinere Bauraum hat sich praktisch bei mir noch nie als Nachteil herausgestellt.
Leider untersttzt (noch nicht?) der Dremel DigiLab 3D Slicer (basierend auf Cura) nicht den Sttzstruktur-Blocker und es ist nicht mglich, bei Verwendung, das Licht im Gehuse auszuschalte
Ottima stampante, precisa e semplice da usare. La stampante permette di stampare il pla,abs e petg. Si collega al Wi-Fi e permette la stampa senza inserire la chiavetta. Esteticamente molto futuristica Grazie alle luci a led che illuminano il piatto di stampa. La fotocamera molto comoda dato che permette di vedere lo stato dell’oggetto da qualche altra parte della casa. Con l’ultimo aggiornamento software possibile anche dettare la luminosit e altri valori. Perfetta.
gleich mal vorweg:
es ist mein 2. drucker, weil der erste drucker macken hatte (kalibrierung auerhalb des druckbetts, scheinbar falsche temperaturen, springen des zahnriemens rechts, vorne). kann passieren, kein problem.
aber der support von bosch/dremel hat sich da nicht wirklich mit ruhm bekleckert (beide haben gar nichts getan). die lsung meiner probleme hab ich dank einer sehr engagierten amazon-mitarbeiterin!
gerade eben druckt er mein erstes objekt – direkt aus dem speicher des druckers und das diesmal ohne brandflecken, dafr mit einer funktionierenden kalibrierung.
was ich bis jetzt sehen kann, ist der drucker tatschlich so gut, wie man dies in diversen blogs und foren lesen kann.
wenn er nach meinen tests mit den vorhandenen objekten dann auch noch meine eigenen, ber den cura-slicer von dremel, so macht, bin ich richtig zufrieden.
ich denke, der drucker ist durchaus anfnger-geeignet. wer 2 seiten schnellanleitung lesen kann, kriegt auch seine ersten drucke damit hin.
dieser drucker ist auch definitiv kein “bastel-drucker”. auer auspacken und einschalten mu man nicht viel machen. dafr kann man natrlich auch nicht an der hardware herum basteln. wer das will, ist bei dremel falsch.
wohnzimmertauglich ist der drucker durchaus – ein aktivkohlefilter ist vorhanden, die ventilatoren sind annehmbar leise, der drucker selber knnte ein bichen besser gedmmt sein. mittagsschlfchen wird man neben ihm keines machen knnen …
bekritteln kann ich am drucker selber eigentlich nur, dass man sich fr filament anderer hersteller was einfallen lassen mu. in den druckraum passen keine gngigen 1kg spulen und von auen gefttert bleibt natrlich das tor fr die filamentrollen offen, was eventuell probleme bei der druckraumtemperatur bei empfindlichen filamenten bringen knnte. gut, lsungen findet man dafr z.b. auf thingiverse genug. aber dremel drfte da gern selber ein bichen weltoffener sein.
NACHTRAG 10.09.2020
in 2 tagen kommt (wieder dank der schnellen reaktion amazons) drucker nummer 3. die nummer 2 hat mitten unter der arbeit ihren dienst quittiert und mag sich auch nicht mehr einschalten lassen. netzteil oder board defekt, schtze ich. bis dahin hat der drucker aber wirklich 4 wunderschne objekte erschaffen. wenn er druckt, druckt er wirklich sensationell!
Pleased with my purchase. Having had a smaller 3d printer a few years ago, I wanted a larger, more reliable one to make more things. Having read many other reviews, and being a longtime dremel fan, I went for the 3d45.
It is quite a big unit, and initially I was concerned about its size on my desk. I’ve got used to it, and I’m happy with it. The complete enclosure is nice, and printing over my wifi network is useful for positioning it. Changing the filament is easy, and given me confidence to experiment with more filament materials, and use them more appropriately for the job in hand.
Initial set up was quite easy. Just unpack, plug everything in, level the bed, and you can be doing a test print from the saved files in no time.
I have struggled with the slicing software on my desktop mac though. Currently it doesn’t seem to want to slice any models I try to load up. I tried downloading the pc version of the software on my laptop and it all worked fine straight away.
Print quality of the test pieces I’ve done so far has been good.
Would happily recommend based on my experiences so far.
The USB interface sucks because it can only read FAT32 and sometimes it complains that it cannot find the partitions. Network printing is not working for me because there is no device token for the Cloud printing functionality but quality and performance are awesome. Overall I love the printer. Together with Fusion360, it’s my top hobby at the moment.
If you’re going to buy a 3D printer I’d expect you to do more reading than just this so I’ll give you my overall opinion.
Easy to set up if you select USA. Has most of the features you’ll need like self levelling table. You can you Dremel own filament which sets the temps etc up automatically or save money and buy other brands and print out the extension piece which lets you mount non dremel reels and learn which materials need what temps. It isn’t that hard.
It isn’t amazingly fast (non are) and there is a smell (again not unusual).
I can envisage this being an amazingly useful bit of kit for all sorts of simple things, to produce replacement parts as and when required; stuff breaks all the time in my experience.
I think the range of filaments available from Dremel is unfortunately quite limited; I was disappointed to discover that Eco-ABS is not proper ABS but a modified PLA, not that I really know the difference.
I was tempted to get a Prusa (this would be shipped from Czechoslovakia involving several weeks wait) because of its ability to heat the nozzle to 300 C and offering an upgrade option of ruby nozzle enabling use of abrasive filaments such as carbon fibre and metal powder resin but for now I am content to use nylon filament as produced by Dremel (although unavailable when I last looked) which should meet, or exceed most of my current requirements.
The build quality of my 3D45 seems very good. The “slicing software” that comes with it, which prepares your design for printing, can be automatic which seems completely sufficient for my needs, and although it’s a bit daunting to have to familiarise yourself with so much software it has all turned out to be very straightforward, pleasurable and easy to use. I read a criticism that the 3D45 touchscreen would not respond as quickly as expected but mine seems efficient and quickly responsive, so no doubt there has been a Firmware upgrade.
Overall I am delighted with my purchase which has provided a very easy entry for me into the world of 3D printing. However, Dremel will need to offer other printing nozzle options (higher temperature and greater abrasion proofing) and a wider range of printing filaments (carbon fibre, ASA) otherwise I shall seriously consider defecting to a PRUSA printer in due course.
I do not know what “warmth” and “shear” relate to, prompts provided by Amazon to inform my comment here, but I have awarded four stars reflecting my overall satisfaction.
The picture shows my stripped gear (pale colour) and the black replacement which I recently printed and which is currently working well.
Addendum 10 Aug 2020:
I’m having quite a lot of difficulty printing fairly simple items using Dremel PETG with a success rate of about 5% and with assistance readily available by email, am trying to figure out why my success rate is so disappointing. I don’t yet know if this is user or printer error or maybe due to software glitches, but 3D printing seems to require commitment and persistence.
Another addendum18 August 2020:
After a succession of problems producing quite tricky 3-D prints I discovered: 1) Fusion 360 can produce design faults invisible within that program but identifiable by importing the files to Tinkercad on the Autodesk website where they are immediately apparent and therefore rectifiable. 2) it can be more productive to design one’s own supports than rely on automatic provision whether in Meshmixer or the Dremel 3D Slicer program. 3) User error when custom setting parameters can also lead to fatal errors and is more likely the problem than printer error. After very attentive support from Dremel (and I cannot praise Jean-Pierre Lihou too highly for his help and attention) I think I have identified all the issues which gave rise to my failing prints and which were nothing to do with the inherent capabilities of the printer. I have therefore reinstated my five star rating since I do believe this is an excellent introduction to the world of 3-D printing.
October 2020 update: My printer kept losing the Wi-Fi connection and more often than not, on switching off and on again the IP address would change. I have therefore entered a fixed IP address for my PC LAN and now the Wi-Fi connection is stable and reliable, an indispensable option! There is plenty on the Internet on how to assign an IP address like this.
Bought this recently and wanted to give initial feedback.
This machine albeit expensive provides an excellent advanced 3d printer.
Initial prints have been impressive though I will give a further update in time.
I really like this printer. It is easy to use. I am a huge fan of the flexible build plate, which makes it very easy to remove your projects. My one complaint is that the Dremel spool is non-standard. Their PLA is a bit more expensive, but this isn’t a huge factor. What bothers me more is that they have a limited color selection, so if you want metallics as I did, you then have to rewind other company’s PLA on to Dremel spools to use it. This is very tedious. Otherwise, though it is a great printer.
Reviewed by a neighbour, an engineering tutor, who is using it to print visors fo rthe NHS:
The Dremel Digilab 3D45 arrives fully assembled, in a ‘ready to plug and play’ fashion. This requires minimal technical knowledge/understanding of the function of 3D printers in order to get the system working and producing additively manufactured products. This is essential particularly for the product’s intended use (education), with respect to the time educators may have dedicated to curriculum design and planning, having a system ready to roll is essential. As is, it must be said, the Digilab slicer. This is a free software in which the design file (normally STL), is loaded into and prepared for the printer. In this review, the machine has been used to manufacture PRUSA Visors (PPE for NHS), therefore it has been thrown into full production, producing 4 visors a day using the supplied PETG material. The machine comes with two rolls of sample materials from the supplier, which will inevitably be the most compatible for the machine, however, the real test lies in the implementation of third-party materials with the system and whether this will produce the same results as the manufacturers recommended source.
As mentioned, the printer itself is delivered with two things required to be fitted before printing.
1) Power source input
2) Material filament
3) Use of glue
It does not get more straight forward than this when it comes to 3D printing, which makes this machine ideal for those that are new to the hobby, or for educational establishments that aim to have students work with these. A lovely feature that appeals to my technical side is the RFID recognition of filament material. Although this is only going to be available on the more expensive filament coils, this allows for the machine to read the type of material that has been loaded, therefore applying the recommended print settings for the build. Again, accelerating any set-up time.
A number of options have been included in this system to allow for the uploading of jobs. The three routes are;
a) USB
b) Ethernet
c) Network (WiFi)
The route preferred by myself is uploading a g-code file onto a USB, which then slots into the machine and is executed. What is advantageous about the Network compatibility is the remote access function, allowing the operator to receive updates on the progress of jobs whilst away from the machine.
A problem that has been faced when implementing 3D printers into educational establishments is their continual noise. As jobs are running it is difficult to reduce the noise of fans, belts and motors. What Dremel have achieved by enclosing the entire system produces low noise. In comparison with some more expensive machines (such as the Ultimaker 3), which has an open top, there is less dampening of noise. When producing work in a classroom, the noise can be distracting and quite frankly irritating, particularly when jobs take 2+ hours. Again, another string to the bow of the 3D45.
Reliability is a key issue in 3D printing. With the Dremel 3D45, the initial run was satisfactory, and, keeping the settings constant, continued to deliver a constant quality print for a number of days. Issues arose when the extruder became blocked, however, by following the well-detailed manual alongside the YouTube tutorials delivered by Dremel, the issue was overcome and printing continued.
Having used the 3D45 for a week, continually producing PPE equipment, the only negative that should be highlighted is the bed size. This will inevitably restrict the designs that can be produced on the printer, although scaling is key in prototyping, the printer suitably meets the criteria for its intended market.
My thanks to my neighbour for this thorough review. I am delighted that the machine has been put to such good use.
Installation minimaliste et extrmement facile.
Le fait que tous les composants soient dans un coffre rend l’ensemble ais manipuler.
Rglage du plateau (qui peut prendre beaucoup de temps sur d’autres modles) est un jeu d’enfant, 10 secondes en suivant les recommandations de l’cran tactile.
Logiciel intgr performant, wifi + possibilit d’avoir accs au cloud et de suivre en direct par votre navigateur ce que filme la camera intgre au chssis. Possibilit galement de charger les modles et de les prparer en ligne et de lancer l’impression distance. POur cela il faut conserver la langue anglaise pour avoir le token qui permet de s’inscrire sur le site.
J’ai imprim la grenouille test, rsultat trs bon pour une imprimante filament, ras, pas de fil qui coule, tout est trs net.
Seul bmol, le temps ncessaire l’impression a t rallong d’au moins 20 minutes, en plus de l’heure et demi prvue. Visiblement je ne suis pas le seul. Sera sans doute corrig par patch.
A ce sujet, la machine, une fois connecte au wifi se met jour automatiquement, il suffit de cliquer sur le bouton correspondant et elle tlcharge directement.
Possibilit de charger galement dans la mmoire de la machine les modles prfrs (en cas de production de srie par exemple).
Lgrement bruyante, mais largement moins que des plateaux ouverts.
Le ventilateur est fort, mais l’on peut rgler dans le Slicer fourni pour chaque impression le vitesse du ventilateur.
Le slicer est une version simplifie et optimise de Cura, qui permet, associe aux filaments d’origine, de lancer l’impression avec des pr rglages en deux temps trois mouvements. Personnellement j’adore cette simplicit.
On peut accder plus d’options si on le veut pour personnaliser intgralement chaque impression, ce qui permet de ne pas tre l’troit.
Attention cependant, la machine n’accepte, capot latral ferm QUE des bobines de 500 grammes Dremel. Pour pouvoir utiliser des bobines gnrique de 1 kilog par exemple il faut installer un dvideur proximit et ouvrir le capot suprieur par exemple, du coup l’on perd l’intrt de la machine ferme.
J’ai fait un stock de bobines Dremel (avec puce qui permet la machine d’appliquer les bons rglages) car mme plus chres, sur une consommation raisonnable, cela permet d’avoir un systme complet autonome et quilibr.
Pour des matriaux plus techniques et varis, je vais adapter un systme extrieur.
Cette machine va me servir dans le cadre de ma R&D et pour la production de petites sries ou objets.
En gros je dirai que c’est un produit trs homogne, trs bien pens, facile utiliser et de bonne facture.
Le seul bmol, qui vaut la cinquime toile, est l’obligation d’utiliser des bobines propritaires plus chres pour bnficier de cette homognit. Dans mon cas, cela ne pose pas de problme.
On conseille donc!
Lo que ms me gusta es que no me tuve que tirar la vida aprendiendo arduino ni marcianadas. enciende e imprime, con la misma, sin ms. Instalas el slicer de dremel (que es el de cura con los dibujitos de dremel) y a darle.
He impreso una burrada de cosas, la he tenido encendida en impresiones de ms de 90 horas, se ha acabado el plstico, y ella sola lo detecta, para, la cargas de nuevo y a seguir imprimiendo.
La calibracin de la cama es tan facil que hasta un mono podra hacerlo, y con un soporte para bobinas externas, puedes imprimir con plastico de cualquier marca.
La calidad (0.05mm) es una autentica burrada. si necesitas usarla, que ya te digo yo que dudo que lo necesites. Eso si, el tiempo de fabricacin sube absurdamente, pero si necesitas hacer algo en lo que no quieres que se noten las capas, lo consigu, no hay duda.
El nico contra que le puedo dar, es que la cama podra ser ms grande sin variar las dimensiones externas de la impresora (cosa que seguramente pase en la 3d50) pero bueno, todava no he ido a imprimir nada para lo que esto me haya supuesto un problema, y cuando llegue, pues habr que partir la pieza en dos y luego pegarla… que se le va a hacer.
De verdad, si puedes comprarla cuando el precio est ms bajo (a mi me sali sobre 1000 por los impuestos de canarias) a pesar de ser una mquina “cara” cumple excepcionalmente con todo.
De momento, y espero que siga as, cero pegas.
Wow – das ist die passende Zusammenfassung meiner bisherigen Erfahrung und Zufriedenheit mit dem Dremel 3D45 IdeaLab Drucker!
Fr meinen Einstieg in die phantastische Welt des 3D Druckens war mir ein Drucker wichtig, der sich einfach in Betrieb nehmen lsst und zuverlssig arbeitet. Und so bin ich nach einiger Recherche auf einschlgigen Seiten zum Thema 3D Druck und Testberichten auf dieses Gert von Dremel gestoen. Die Firma kann ich schon vom Multifunktionswerkzeug (meines aus dem Jahr 1999 tut immer noch seine Arbeit). Sicher ist ein 3D Drucker mittlerweile auch fr wenige Hundert Euro zu haben (insbesondere wenn man einen Bausatz erwirbt), beim Model von Dremel rechtfertigt, aber aus meiner Sicht folgende Punkte den Mehrpreis”:
– das wertige, robuste Gehuse, welches auch optisch einen guten Eindruck im Bro macht
– die Fronttre und der Deckel, die einen grozzigen Einblick in das Innere erlauben (der Deckel wird sogar durch einen stabilen Mechanismus in der letzten Position gehalten)
– Filter in der Lftung
– Vier Filamenttypen, die speziell auf den Drucker abgestimmt sind, bzw. der Drucker erkennt anhand eines RFID Tags den verwendeten Typ. So entfllt erstmal das Herumtfteln bis man brauchbare Ergebnisse hat
– beheizbare Druckplatte, bei dem mit Klebestift gearbeitet wird
– die integrierte Kamera erlaubt das berprfen des Drucks aus der Ferne. Dies ist vor allem bei langen Druckvorgngen fr mich interessant
Meine persnlichen Tipps bzw. Erfahrungen:
– nach jedem Druck reinige ich die Druckplatte grob und trage dann eine neue Schicht mit dem Klebestift auf (mindestens im vorher bedruckten Bereich)
– immer man ich die Druckplatte entnommen habe starte ich sicherheitshalber die halbautomatische Nivellierung (auch wenn unmittelbar vor dem Druck ein paar Niveau-Punkte auf der Platte gecheckt werden)
– nach ca. 5 Drucken reinige ich die Platte komplett wie im Handbuch beschrieben und trage den Klebestift neu auf
Und sonst noch:
– das Vorbereiten der Drucke mit der beigefgten Slicer Software klappt ohne Probleme – schn auch, dass die Software auf Mac und Windows quasi identisch ist
– Das bertragen der Druckdaten ber WLAN klappt bei mir auch super – so entfllt das bertragen per USB-Stick
– Filament anderer Hersteller habe ich noch nicht verwendet
– Schn wre fr mich ein kapazitives Touchdisplay, anstatt des verwendete
Been in constant use since it arrived validating component designs before manufacture. Invaluable tool for our Formula Student project.
Ausgewhlt habe ich den Drucker hauptschlich, da es einer der wenigen Drucker ist, der funktionale Teile aus Nylon drucken kann und gute Bewertungen bei der Druckqualitt hat.
Das war mir den hheren Preis im Vergleich zu Einsteigermodellen wert.
Zunchst einmal die guten Seiten des 3D45:
Die Druckqualitt des 3D45 lsst bei mir keine Wnsche offen. In der feinsten Einstellung sind keine Layer mehr zu erkennen.
Ich hatte bislang noch keinen fehlgeschlagenen Druck, sofern ich ber die ersten 2 Lagen hinaus gekommen bin (mehr dazu spter).
Die Software (der Slicer basiert auf einer angepassten Version von Cura) ist einfach zu bedienen und liefert gute Ergebnisse.
Das Einrichten und Kalibrieren des Druckers ist kinderleicht.
Dank des beheizten Druckbetts, der geschlossenen Druckkammer, der Filamentkhlung und guten Default-Einstellungen hatte ich bisher keine Probleme mit Warping oder Stringing.
Die Lautstrke ist zwar deutlich hrbar, jedoch nicht weiter strend.
Der eingebaute Luftfilter mit Aktivkohle ist nochmal ein groes Plus fr die Verwendung in Wohnrumen.
Das Benutzerinterface des 3D45 ist bersichtlich und mit Ausnahme der winzigen Buttons zum Schlieen von Fenster (mehr dazu spter) gut zu bedienen.
Das hauseigene Filament von Dremel kommt mit RFID Erkennung. Der Drucker whlt nach dem Einlegen des Filaments automatisch die richtigen Temperatur-Einstellungen fr die Druckdse und das Druckbett passend zum eingelegten Filament.
Das gelingt meistens – gelegentlich schlgt die Erkennung jedoch fehl.
Bei erfolgreicher Erkennung wird das Drucken fr Anfnger quasi idiotensicher – man zahlt dafr natrlich den etwas hheren Preis des Dremel Filaments.
Man kann die automatischen Einstellungen jedoch bei Bedarf bergehen und der Drucker lsst sich auch mit “fremden” Filament betreiben.
Nun zu den negativen Seiten des 3D45:
Ich hatte bisher schon fters Probleme mit der Anfangshaftung des Filaments, trotz der mitgelieferten Klebestifte. Dies liegt womglich mehr an mangelnder Erfahrung meinerseits und weniger am Drucker selbst.
Hier htte ich mir von Dremel jedoch einen Ratgeber zum Umgang mit verschiedenen Filamenten gewnscht, um den Einstieg in das Thema zu erleichtern.
Das Internet bietet zum Glck viele Informationen zum Thema.
Das Display verwendet eine resistive statt der mittlerweile blichen kapazitiven Touch-Erkennung.
Die Buttons auf dem Display (z.B. das “x” zum Schlieen eines Fensters) sind zum Teil recht klein und schwer zu treffen. Hufig bentige ich hier mehrere Anlufe, um ein Fenster zu schlieen.
Dies ist nicht mehr ganz Zeitgem.
Die Netzwerkfunktionen des Druckers lassen sich ausschlielich mit der Dremel Cloud Lsung verwenden. Diese lsst sich zudem nur dann aktivieren, wenn man dem Drucker weismacht er stnde in den USA.
Will man die eingebaute Kamera ohne die Dremel Cloud verwenden oder erstellte Modelle direkt auf den Drucker laden, hat man leider Pech gehabt.
Das mitgelieferte USB Kabel funktioniert leider berhaupt nicht. Zwar wird der Drucker als USB Gert erkannt – machen kann man jedoch nichts damit. Auch nicht mit der Dremel eigenen Software.
Dies ist sehr bedauerlich – die 3D Modelle mssen immer umstndlich ber den Umweg mit dem (mitgelieferten) USB-Stick auf den Drucker kopiert werden.
Das ist zwar kein Drama – aber vllig unntig.
Ich persnlich bin zudem nicht daran interessiert meinen Drucker mit dem Internet und der Dremel Cloud zu verbinden – und wre viel mehr an einer Integration ins lokale Netzwerk interessiert.
Die vorbereitenden Prozesse vor dem Druck sind sehr schlecht durchdacht.
Der Druckvorgang luft wie folgt ab:
1. Kalibrierung der Druckplattform (1:51 Minuten)
2. Aufwrmen des Druckbetts (3:21 Minuten fr 80C)
3. Aufwrmen der Druckdse (2:10 Minuten fr 255C)
4. 3D Druck beginnt
Jeder Schritt wartet auf den Abschluss des vorherigen Schrittes – daher dauert es knapp 7:30 Minuten bevor der Drucker tatschlich mit der Arbeit loslegt.
Technisch gesehen wre es trivial die Kalibrierung und das Aufwrmen gleichzeitig durchzufhren und die Wartezeit insgesamt auf 3:21 Minuten zu reduzieren. Dies verschwendet bei jedem Druck ber 4 Minuten Zeit fr nichts.
Fazit:
Ich bin mit dem Drucker zufrieden und kann ihn durchaus weiterempfehlen.
Ein paar Dinge (fehlende Netzwerkfunktion, lange Aufwrmzeit) sind jedoch sehr strend und unntig kompliziert.
Having had an FDM machine 5 years ago, this update was a dream to set up. Super simple plug and play, simple bed leveling, and networked. Test cubes measured +/- 0.05 mm, providing printer is on a really sturdy table. The printer looks a bit cheep with the plastic housing, but cant fault it otherwise. IF your looking for a cheap, no fuss printer this would be a great product.
I’ve never done 3D printing before, but this comes with everything you need to get started. You can download templates online and get going straight away. Before you start it is worth thinking about where you want to put the printer – it is fairly noisy and smells of hot plastic so you don’t want it in a room you’re sitting in.
noter :
Les +
– Packaging soign et robuste.
– Manuel de mise en service
– 2 bobines de filament fournies + spatule avec bords arrondis pour dcoller pices imprimes + cl USB Sandisk 16go + cable USB + outil de dsobstruction.
– Tout est protg car l’imprimante est entirement ferme, la bobine de filament se trouve galement l’intrieur de la machine.
– Trs peu d’odeurs lors de l’impression grce au systme de filtration.
– Design matriel et de l’interface soigns.
– Connectiques intressantes, WIFI et camra intgre pour surveiller l’impression en temps rel.
– Plateau facilement accessible et amovible.
– Systme de mise niveau du plateau trs simple et pratique.
– Trs bonne qualit d’impression ( mettre videmment en regard avec la qualit de la ralisation du modle 3D)
Axes d’amlioration :
– Gaine pour passer le filament depuis la bobine lgrement difficile d’accs.
– Machine bruyante (systme de ventilation/filtration).
– Dmarrage de l’interface un peu long.
– Niveau sonore.
Conseils utilisateurs :
– Installer l’imprimante sur un support trs stable, sinon les mouvements internes de la machine + les vibrations peuvent perturber le bon droulement de l’impression.
– Prendre garde lors du dballage de l’imprimante : les consignes indiquent qu’il faut lever le plateau manuellement pour extraire les cartons de protection, mais il n’est pas mentionn qu’il faut l’abaisser ensuite (risque de toucher la tte d’impression lorsque la machine se mettra en route).
I’m new to 3D printing, but not 3D modelling. I received my Dremel 3D45 last week and I’m pleasantly surprised how easy it was to get going. The printer arrived well packaged, and the setup didn’t take long at all. I spent quite a while researching 3D printers and what I could justify financially… I am pleased with my choice. IMO it’s priced reasonably at this time (although I suspect that in the future the price of 3D printers will come down). Anyhow it’s much cheaper than many of the alternatives.
I was able to print a model I build in blender (open source 3D modelling software). I measured the result with digital calipers and the model is within 0.05mm accuracy, which is ample for my needs.
I don’t have much experience with print quality but the result is perfect for my prototyping needs with a little sanding on some rough edges here and there… but I think this is normal.
The touch screen is a bit small for my hands, so typing in my wifi key wasn’t super easy, but this is probably a one time event so don’t see this as too bad. The software could do with a little refinement but these are minor gripes!
Personally I think this product is great buy, and I would recommend it. Loving it … Thanks Dremel!
I highly recommend this printer. I read the reviews and I can see why someone with a lot of experience might get frustrated. for a new to 3d printing novice like me this machine provided me with the tools, designs and ability to produce good quality models with ease.
The touch screen is good. The camera hasn’t got the best quality but to quickly check the progress of your build it’s fairly suited. The designs that come with it are great but there are plenty of free 3d designs online.
The 2 free rolls of filament are great and enable you to get printing straight away. The builds take time but they are well worth the wait.
The printer itself is very stylish and I can’t wait to experiment more.
Also musste der neueste her.
Lieferung: Schneller als angekndigt, super verpackt, nichts kaputt.
Aufbau: Problemlos, da alles schon fertig. Nur noch Filament einlegen und Druckbett ausrichten. Das geht dank Halbautomatik wesentlich schneller und genauer als mit der alten Technik. Top!
Software: Bei Dremel herunterzuladen, etwas gewhnungsbedrftig. Aber brauchbar. Ansteuerung des Druckers ber WLAN problemlos. Gutes Feature: die eingebaute Kamera. Damit hat man nicht alles aber das wichtigste im Blick.
Noch eine Verbesserung zum vorhergehenden Slicer: Sttzkonstruktionen knnen automatisch hinzugefgt werden. Ebenso eine vergrerte Auflageflche bei kleinen Bauteilen. Gute Idee.
Druck: Wesentlich leiser als der IdeaBuilder (mag aber auch an den ausgeleierten Lagern gelegen haben). 4 Qualittsstufen. Erstes Bauteil in “High Quality” und aus ABS kann sich sehen lassen. Dauert zwar, aber wegen der geringen Lautstrke kann das Gert problemlos auch nachts drucken. Durch die RFID-Erkennung des Materials (leider nur von Dremel und damit etwas teurer) keine weiteren Einstellungen ntig.
Fazit: Teuer aber gut. Mal sehen, wie es in einem Monat und mehreren Stunden Dauerdruck aussieht.
Aprs 6 mois d’utilisation et de comparaison avec d’autres imprimantes 3D que j’utilise dans un FabLab, je peux enfin faire un retour sur cette imprimante 3D Dremel et affirmer que oui, elle est chre, mais elle a des atouts majeurs, dont celui d’une trs bonne qualit d’impression.
Ses atouts :
+ Connectivit : avec de l’USB, de l’Ethernet et mme du WiFi, on peut s’y connecter facilement et par exemple la mettre sur un rseau. Ce qui donne alors tout son sens la camra HD qui permet de suivre l’avance de l’impression distance.
+ Camra HD : permettant de suivre l’impression distance et en cas de problme d’interrompre l’impression. Mais il n’y a pas de dtection automatique en cas de problme.
+ Silencieuse : on n’entend pas grand chose lors de l’impression, d’autant que les capots limitent bien le bruit. Et comme on peut la commander distance, l’idal sera de la mettre dans un local technique.
+ Polyvalente : on peut utiliser toute une gamme de fils de qualits diffrentes (nylon, ABS, PLA et PETG), mais surtout on peut changer de fils (pour changer de couleur par exemple) pendant l’impression, ce que ne permettent gnralement pas les imprimantes d’entre de gamme.
+ Finesse : les pices sont imprimes avec une finesse de l’ordre de 50 microns. On ne voit presque pas les couches, et si on utilise du nylon qui est plus souple, elles disparaissent. Et la plupart du temps, les pices sont imprimes sans avoir besoin de support.
+ Drouleur de fil automatique : le fil est guid et se droule tout seul, ce qui n’est pas le cas sur les imprimantes d’entre de gamme.
+ Le logiciel Dremel accepte les formats 3D les plus rpandus.
Ses dfauts :
– Le logiciel propritaire Dremel a une prise en main pas trs intuitive de prime abord. Il faut s’accrocher un peu avant de le matriser et de comprendre comment imprimer autre chose que les exemples fournis.
– Lourde et encombrante. Forcment, avec un tel quipement, on est loin d’une imprimante d’entre de gamme bien plus lgre, mais c’est normal. Donc, moins pratique dplacer.
Pour les photos, j’ai imprim un des modles fournis : le requin qui jaillit de l’eau. On voit sur la vido la structure alvolaire l’intrieur du modle.
Et sur les photos, on voit que l’ensemble est trs fin. Au toucher, on distingue peine les couches.
J’ai imprim d’autre objets par la suite sans problme, en ABS et en nylon, le nylon tant plutt utilis pour les pices qui demandent de la prcision et qui ne sont pas trop complexes (pas un personnage par exemple, sinon il faut prvoir des supports). Attention, avec le nylon qui est difficile utiliser pour les dbutants (ce qui n’est pas propre cette imprimante).
Cette imprimante 3D Dremel est chre, mais c’est le prix de la qualit. Si vous avez les moyens d’y mettre ce prix, c’est vraiment un outil performant, une fois la prise en main du logiciel passe.
Grce cette imprimante 3D on peut crer des objets ayant un volume maximal de 25,4 cm X 15,2 cm X 17 cm, ce qui laisse pas mal de possibilits en termes d’objets crer.
Cette imprimante est l’volution d’un modle prcdent. Le nouveau modle possde un plateau flexible, d’o le terme “FLEX” dans son nom.
Le plateau flexible permet de retirer plus facilement l’objet imprim, cela tait parfois problmatique avec l’ancien modle.
C’est ma premire imprimante 3D donc je ne pourrai pas la comparer moi-mme avec un autre modle.
L’installation est facile, il y a juste brancher l’imprimante, charger un modle 3D, mettre le fil de plastique et c’est bon !
L’utilisation de l’imprimante se fait via un cran LCD propre l’imprimante, soit depuis un PC, via WIFI. On peut donc utiliser le rseau sans fil pour envoyer le modle imprimer ou passer par une cl USB.
La qualit d’impression est trs bonne je trouve. Et le temps d’impression est acceptable.
There are definitely cheaper 3D printers available but if you are looking for one that just works straight out of the box, produces great results, is well-designed, and safe to use for a variety of ages, then a Dremel model is right for you. I have this model, the 3D45, and the slightly cheaper 3D40 Flex.
Both are very similar but the 3D45 can print in a wider array of materials (PLA, ABS, nylon) and has a heated glass print bed. It also recognises automatically what filament you are using (provided that you have bought the Dremel accessories range with the built in rfid tag).
I attach a picture of a test print Voronoi Dachshund which shows the great kind of details these printers can achieve.
First of all this is a Dremel which means that it is made by Bosch and all the usual Bosch quality is there. It is well made, very easy to set up and easy to print your first demo item.
A few more details about the printer, then I will cover off the tips for new users.
The initial setup was done via a series of picture in the quick reference guide and instructions on the touch screen. |Installation of of the required PC software was provided both on an included USB stick, a very small one both in size and in capacity). the only issue that I have is that I don’t seem to be able to print from my PC despite everything saying that the printer is connected and working; I can even view the real time web cam within the printer to check on status of printing. I haven’t managed to fix this, however the work around is to save the required file onto the USB stick and then print from the stick (it plugs into the front of the printer).
So, what can you do with this???
Well, I suspect the first thing that anyone does is to print off one of the demon items on the provided USB stick. I printed the lion’s head and, in as little as 9 hours, it had printed successfully (to a very high standard).
I have also downloaded models of satellites from the NASA website and these also print well.
But, you are going to want to design and print things of your own design. If you can already do this, then skip the rest of this review. For other starters (like I was a few weeks ago), here is my suggestion. Assuming you are using a standard Windows PC, you can download the free Microsoft 3D Builder software. Fairly simple, but adequate for initial use. To help you use it, Microsoft have helpfully provided a tutorial for it (just search on line for it). I found the best way was to watch it all the way through first and then, a second time, do a step at a time with me using the 3D software to achieve the same results. At the end of this, Microsoft want you to send off your file for printing by them, however you have a shiny new Dremel printer, so let’s use that instead. So save the file in .STL format somewhere on your C: drive. Now exit the 3D Builder software. Now fire up the Dremel software and read in the .STL file. You can now play with quality and things like that. For your first attempt, try something small; print at lowest resolution; and don’t mess with colours. Once you’ve done that, save to the USB stick. Unplug the USB stick from your PC and plug into your Dremel printer. Go through the instructions on the touch screen of the printer and all should be well.
I hope this helps.
BTW – the printer is highly recommended.
Ma premire imprimante 3D, mais, mme si je n’ai pas de base de comparaison, il n’en demeure pas moins que la qualit est bien l :
Emballage impeccable, avec la buse parfaitement cale
Ensemble ferm pour protger de la poussire, et des manations (la porte vitre du dessus permet d’accder la tte sans problme)
Possibilit de connexion wifi, ethernet, mais peu bosser hors connexion via l’interface USB (installe dans le garage)
Ecran tactile facile utiliser
Silencieuse.
Tous les accessoires sont fournis
La plaque flexible permet de dcoller facilement la cration
Bien sr, l’impression 3D dbute, un peu comme la micro informatique dans les annes 80… Donc l’intrt est avant tout ludique et ducatif (c’est d’ailleurs le premier march de Dremel). Mais je suis convaincu que l’impression 3D sera la prochaine rvolution industrielle (et mdicale), donc autant apprendre tout de suite (aprs tout, ma carrire professionnelle a dmarre par des lignes en Basic sur un ZX81 et ne se porte pas si mal…)
I have been thinking about 3D printing for quite some time especially after seeing some of the interesting brackets that can be made to aid mounting mobile phones to drone controllers and I had bought such a mount that had been printed on such a device.
What I did not realise is that to make your own creations you have to master 3D CAD Modelling software (none of which is provided).
The last time I used CAD was Autocad 13 and we only used that to create 2D projects and electrical drawings.
So you may wish to dabble with 3D Cad before you buy a printer (unless you just want to print existing designs).
Now the printer.
It can connect to your network by WiFi or direct ethernet which is what I went for.
However, the setup wizard does not seem to know about the ethernet connection and still wants you to setup to WiFi. I know the connection was working as it updated the firmware.
So I never did run the wizard and the component parts of that can be run separately anyway.
The touch screen is not the best and trying to select the “United Kingdom” twice I got Finland and no option to navigate back. Fortunately it lets you pick English language under Finland.
This was all in vain as for the “Cloud” print options are only present if you set the country to “United States”.
The printer needs to be on a nice firm table so table wobble does not interfere with print quality.
Also even with its charcoal filtered fan some filaments seem to smell, contains VOC’s so good room ventilation is a good idea.
Applying just the right amount of glue stick (provided) to the glass table is another skill and needed to stop the print job moving during printing and reduce it curling up (warping) and the material contracts.
Getting the finished product off the glass with the provided scraper is also a challenge and the glue cleans off with warm water and a microfibre cloth works well to dry/clean the glass for the next project.
If the filament runs out mid job it does let you load a new roll and I also ran out of one colour so you can get an interesting colour change in your project.
Some prints I have done can take over 20 hours….
On the very first thing I wanted to make from scratch I met one of the printers first limitations wanting to make a tray to go on the bottom of a bird feeder to catch the seed.
I used Tinkercad to create it but the printer limits the diameter of a round tray to 154mm (object limits are 254x154x70) and so lots of bird seed still ends up on the lawn (but it helps).
Assuming you told the printer you are American you can use the dremel print cloud which I used to check and slice the job before it sends it to the printer also allowing you to view the job printing with the built in camera.
The printer comes with two rolls of filament and have managed to spend three figures buying some more (all PLA green, red, orange, blue and pink).
You can even 3D print a spindle so you can use other vendors larger rolls of filament with the printer.
Check on youtube and I found Adam Savage “Tested: Dremel 3D45 3D Printer!” a good place to start.
You may also get some filament bargains from a UK high street catalogue stores online clearance outlet site.
Some of my filament was designed for the previous model so no auto RFID filament type identification but it is easy to set and is saved even when you turn the printer off (it uses 16 watts when idle).
Most of the items I have tried have turned out pretty good but with some warping (in the corners) and a flowerpot which I had to scale down to print had issues breaking off the support parts (supports are needed print in which on the finished item would be in mid air) but I then realised when scaling down it would reduce the gaps for the supporting items thus they would not break off cleanly.
At the moment I am printing a TARDIS (in pink) from the design linked to on the YouTube video I mentioned.
Version 2 of the Tardis will be in blue.
Some sample jobs are stored in the printers internal memory and on the 16Gb USB stick provided (also has their slicing software on it for Windows and MAC).
Any problems with it? Well yes, the first roll of filament must of got tangled so make sure the filament is not crossed on the roll.
I am generally impressed and it being in a cabinet does have advantages but an open one can cost less and print larger items.
Dremel est reconnu pour la simplicit d’utilisation de ses produits bien finis et robustes.
La 3D40 ne fait pas exception.
La mise en route est simplifie, l’imprimante cherche se mettre jour ds quelle est relie internet.
Ce que nous aimons ce sont les fichiers de projets disponibles en tlchargement, le plateau acier d’impression qui permet de dtacher la pice sans soucis.
Le logiciel Digital 3D est agrable prendre en main pour crer ses propres projets. Mon fils progresse bien plus vite que moi. Il aime pouvoir imprimer en mode brouillon pour tester ses pices.
L’imprimante utilise des fils en PLA: tants encore novice cela nous convient parfaitement.
La fte des pres approchant, ce cadeau high tech est idal pour runir les gnrations autour d’un projet commun.
The printer came very well packed with everything well protected. This is a big printer and has an opening lid section as well as a front door. Once assembled, which is very easy, there’s a short delay after switch on and the printer bursts into life. The printer has USB and Ethernet ports as well as WiFi. I used the LCD touchscreen to connect to my WiFi, the printer then downloaded a software update. The building platform clips into the printer and this can be levelled from the touchscreen. Magnetically attached on top of the building platform is the Flex plate which can be removed and then flexed to remove the printed object, it’s really easy to do. The supplied USB stick, which plugs into the front of the printer has some designs on it, the printer also has some designs built in, and these can be selected and the printer set to print. During the printing process there is a slight smell of melting plastic. The usb stick also has the Dremel slicing software, this can also be downloaded from the Dremel site; this is based on the common Cura program and runs on 64-bit machines only; it allows conversion of various formats to run on the 3D printer. Although very easy to get up and running the printer is very well constructed; this is a versatile machine with lots of potential and I will enjoy exploring its capabilities.
Mme si vous tes totalement novice dans l’exprience imprimante 3 D, cette machine saura vous prendre par la main.
Tout est simple, intuitif, abordable. Il suffit de se laisser guider !
Elle est livre avec ABSOLUMENT TOUT le ncessaire : plaque et films de construction, bobine de filament de 500 grammes, un cble USB, une spatule, une cl USB 16 Go, un outil de dsobstruction et son mode d’emploi.
Branche en wifi sur mon PC, on peut immdiatement lancer un projet (pas mal de sites proposent des projets divers et varis).
J’ai t surprise du peu de bruit mis et de la vitesse d’excution (dpendra videmment du projet choisi).
A noter qu’elle est bien moins encombrante que suppose (un gros four micro-ondes pour vous situer).
En rsum, je ne lui trouve que des qualits. Si ce n’est videmment son prix, mais c’est une Rolls qu’on s’offre.
Die Kamera Integration ist nett, aber ich finde diese knnte man noch ausbauen. Da der Drucker am WLAN hngt knnte ich mir z.B. eine kleine Handy App vorstellen, um den Druck aus einem anderen Zimmer zu berwachen. Aber der Drucker verfgt ber einen Webserver welche es erlaubt die Bilder per URL aufzurufen.
Die Slicer Software von Dremel untersttz unerfahrene 3D Druck Neulinge sehr gut, mittlerweile habe ich auf Simplify3d und andere Programme gewechselt, da wie gesagt die Lernkurve beim Drucken steigt.
Da ich es hier fters gelesen habe, das Display Flackern sehe ich ebenfalls auf meinem Drucker jedoch so schwach das es nicht weiter strend ist.
Mittlerweile habe ich ca. 400m Filament gedruckt (30% ABS, 70%PLA) und kann noch keine Ermdungserscheinungen an der Dse erkennen.
Fazit: Ich bin derzeit noch sehr zufrieden mit dem Drucker. Mittlerweile habe ich auch vergleiche zu anderen 3D Druckern in meinem Umfeld und kann daher sagen das das Gert sehr przise arbeitet. Auch die geschlossene Bauweise ist ein groer Pluspunkt, gerade wenn man mit ABS arbeitet. Ich wrde mir aber wschen das Dremel seine Filament Palette aber weiter ausbaut.
L’imprimante arrive dans son carton d’origine trs bien emballe. La mise en route prend une dizaine de minutes. Au dballage, avec l’imprimante, on trouve 1 plaques de construction, 2 films de construction, une bobine de filament Dremel PLA blanc de 1,75 mm de diamtre et 500 g au total, un cble USB, une spatule pour nettoyer la plaque d’impression, un mode d’emploi, une cl USB 16 Go et un outil de dsobstruction.
Branche en ethernet, l’imprimante peut aussi se connecter en Wifi. Ds la mise en route, la mise jour du Firmware s’applique. Ensuite, le chargement de la bobine dans l’imprimante et l’admission du filament dans l’extrudeuse sont enfantins. Toute seule, la machine ralise la fonction de mise niveau assiste en 2 points pour le calibrage.
L’cran couleur de la machine donne accs toutes les informations de rglages et de construction. Ainsi, il est possible de produire des objets prenregistrs dans la mmoire pour un premier essai. On peut aussi trouver partout sur internet des projets que l’on enregistre vers la cl USB fournie depuis l’application Dremel DigiLab 3D Slicer. L’imprimante dispose d’un port USB en faade. Le site dremel3d permet de charger des dizaines de projet vers la cl puis la mmoire de la machine ou directement d’un Mac ou d’un PC vers l’imprimante.
En fonctionnement, l’imprimante s’illumine et avec les deux portes fermes, elle reste trs silencieuse. Il est important de regarder la dure d’impression annonce pour chaque objet car certains peuvent videmment tre trs longs.
Bien sr, la qualit des objets dpend bien videmment de la qualit du projet.
Au final, une machine simple utiliser, qui se rgle seule et dispose du soutien de la marque et de sites internet pour fournir des projets utilisables directement. Pour les plus dcids, il est aussi possible de raliser ses propres projets avec des logiciels de CAO. Les recharges de filament Dremel se situent autour de 20-30
The item is very well packed; there is ample protection.
No assembly is required. You just take it out the box and unpeel the plastic wrapping and tape.
It is a PLA only machine because it does not have a heated bed.
You HAVE TO use the Dremel filament else it will void the warranty.
It has a decent IPS colour touchscreen. It is very responsive.
The interface is very intuitive.
It’s a single extruder BUT it’s very advanced.
It is comparable with Autodesk print studio software.
You can only “print” one colour at a time.
It comes with a flash drive. (You can plug this in instead of having to use a computer.) (The printer has its own internal memory so you can load items on to it and put the flash drive away.)
The print quality is CONSISTENTLY very good. I have had zero fails.
There seems to more emphasis on printing models created by others than on creating your own models.
This is a reliable, dependable 3D printer. I recommend it to schools due to its ease-of-use and auto calibration.
This printer is very easy to use and setup. I’ve had a previous 3d printer by Dremel, and they’ve really aimed to improve the usability. In particular, changing the spool (which is a lot more accessible) is easier, and changing/levelling the platform is more straightforward.
On the downside it wasn’t obvious how I could convert some previous 3d models – the literature seemed to suggest I could move my existing files across – however, I couldn’t get these to appear unless I ran them through the new software on my mac or PC.
I also had a couple of models fail as I tried to keep them too small, but they still looked well within spec tolerance, so that was slightly disappointing.
However, all in all it’s a very good printer, and easy to get going with.
Well what a gadget. It was straightforward to set up but you do need to have space to put it, it is about the size of a large microwave. You feed it plastic filament rather than paper, tell it via the computer what you want and off it goes. My main issue for us as a family is that we really don’t need one and having agreed to test drive this one I thought I might change my mind, but I didn’t. My 15 year old is doing art for GCSE and she felt she could get use of it for her projects but I would not spend the hundreds of pounds just for that purpose. I can see how an engineer might make great use of it but as a family ink remains our most common type of printing.
As fans of all things gadgety, we were thrilled to be given the opportunity to test this ‘Dremel Printer 3D40 FLEX (230 V, Flexible Build Plate, 1 PLA Filament, 3.5 Inch LCD Touchscreen, Slicing Software)’. It is a sizeable beast – almost 20kg in the box, and does require a rather large amount of desk space, so be warned! As I’m certain is the case with all 3D printers, there is a significant learning curve if you haven’t used one before – while the product description does say it is user-friendly, and indeed it is, this is relative, and you do need to be technologically competent to be able to use the machine. To put this in context, my tester lectures in computing at an FE college and still had to teach himself about the processes etc.
The machine itself is well-constructed – it survived despite damage to the external box from the courier – and has good access and visibility, with both top and front openings and internal lighting. Initial set up and calibration was easy, and it comes with clear documentation – both a quick guide for those first impatient moments and a full manual are included. There are some built-in designs but there are also lots available on the internet, and my tester made a Thunderbird 1 model (see attached photo). As the full-size template would have used the entire reel of filament, he scaled it down to half size which worked well. Printing this 7cm tall version took 75 minutes – 3D printing is a relatively slow process, this is apparently a decent speed – whereas the full-size 14cm version (obviously larger all over, not just taller) would have taken nearly five hours. The control software gives accurate guidance as to how long your design will take to print, and also how much filament it will require. We were pleased to note that the printing process is both quiet and there was no smell from it at all (however one should still make sure that the printer is used in a reasonably well-ventilated area, as obviously plastic chemicals aren’t the best to breathe in).
This printer only uses PLA filament – apparently others can use different materials – and one reel of white PLA filament is included in the box. As I said, half of a reel was required to make the 7cm tall Thunderbird model, so please do bear in mind the ongoing costs of filament before purchase.
Overall we are very pleased with this device, and excited to see what else we can make (I’ve found a template to make Groot once he gets good at it!). It is well-designed, sturdy, and relatively user-friendly. Great introduction to the world of 3D printing.
Although expensive this is a great printer that produces consistent quality prints. It’s super easy to use and nicely self contained. It’s quiet, much quieter that open bed style printers. The smells are kept to a minimum with its inbuilt filter and fan. Fits nicely on a worktop. Only downside is the print bed is a bit small.
First 3d printer I’ve owned and I literally have it unpacked and printing within 5 minutes. So simple and straight forward and comes with some designs on a flash drive so literally off to a flying start. AAAAA*
Es war eine spontane Entscheidung, weil ich selbst drucken wollte und nicht immer wieder “doch recht hohe Betrge” fr externe Dienstleistungen bezahlen mchte.
Ein grundsolides Gert und insbesonder mit PLA luft der Drucker “out of the box”. Mit der Zeit werden die Ziele / Aufgaben und Anforderungen komplexer und natrlich informiert man sich auf dem Markt, was es sonst noch so an Druckern gibt. Eine gewisse Zeit hat sich eine kleine Enttuschung breit gemacht, ob der Wahl fr den 3D40, weil ich mich nicht ausschlielich auf Standard-PLA der Marke Dremel beschrnken wollte.
Dann kam die Experimentierphase und mit ein paar kleinen Manahmen (externer Spulenhalter, MicroSwiss Dsen 0,2 bis 0,6 oder BuildTak Druckauflage…) kann ich besttigen, dass man nicht unbedingt ein Heizbett fr andere Filamentsorten bentigt. Natrlich kommt man ohne Heizbett an seine Grenzen und htte ich geahnt, wie sehr es mir Spa macht, ich htte zumindest auf den 3D45 gesetzt.
Aber es geht auch so!!!! Ich verabreite mit guten Ergebnissen PLA (inkl. Wood oder Flax), PETG, TPU und die Teile sind mit der Zeit immer komplexer geworden. Zum grten Teil handelt es sich um Funktionsteile, welche ich mit Fusion 360 selbst zweichne und als Slicer setze ich Simpflify3D (kostenpflichtig) ein.
In den gut 4 Monaten habe ich efektive Druckstunden von 655 Stunden und keine nennenswerten Probleme.
Ein grundsolide aufgebautes Gert und mit dem geschlossenen Bauraum auch einen nicht zu verachtenden Vorteil.
Warum nicht 5 Sterne?
– Die Druckauflagen von Dremel (die Blauen) sind aus meiner Sicht nicht wirklich zu gebrauchen.
– Ich drucke nur ber den USB Stick, da der Drucker unter Windows 7 zwar erkannt wird, jedoch kein Treiber gefunden werden kann. Auch nicht nach intensiver Suche im Internet und ich scheine auch nicht der einzige Problemfall diesbezglich zu sein.
Wenn ich eine positive Nachricht bzw. Lsung vom Kundenservice erhalte, sei es ein Link zu einem passenden Treiber oder Aufklrung woran es liegt, dann gibt’s mit Recht den fnften Stern.
Qualitativ ein sehr solider 3D Drucker, der zwar preislich etwas hher ausfllt, aber vielfach unterschtzt wird. Mit dem Drucker kann man viel und ohne groe Experimente Kunststoffteile produzieren. Die Grenzen wurden wohl aus Marketinggrnden (eigener Filamentverkauf etc.) enger gesetzt, als das Leistungsvermgen des Druckers.
Was mir noch fehlt, ist ein zweiter Drucker! Aber das ist eine ganz andere Geschichte 😉
Prise en main un peu longue. Tlcharg fichier sur le web, mon Os a eu du mal mais a marche bien et c’est tout fait fascina
(Bilder und ein Update der Rezenssion nach erneutem Test folgen)
Ansonsten bin ich sehr zufrieden mit dem Drucker!!
(Kamera und WLAN habe ich bislang nicht bentigt – von daher kann ich dazu nichts sagen)
I would highly recommend this printer .
There was only one problem I incurred that produced failed prints . The glue stick I was using had left residue on the auto bed leveling micro switch. This would give a wrong reading and upset the machine .
So if you get a failed print the fix is to clean the auto levelling micro switch . Otherwise no other issues .
Ich drucke mit verschiedenen PLA Materialien, Dremel und 3rd Party PLA und hatte noch NIE einen Stau oder Zufhrungsprobleme, wie hier so oft von anderen Nutzern beschrieben. Ich kmmere mich allerdings auch um eine wirklich saubere PLA Zufhrung auf Kugellagern, da ich von der internen Rollenaufhngung nicht berzeugt bin.
Hier und da mal Verbindungsprobleme mit WiFi, welches ich aber auch auf unser Heimnetzwerk geschoben habe. Insgesamt ein ordentliches Produkt, welches ich jederzeit wieder kaufen wrde.
Dann kam allerdings der Quantensprung: Als ich letztlich fr den Druck eines Modellsportflugzeuges “Simplify3d” als Printsoftware installiert habe (und die Suite von Dremel komplett deinstalliert habe), hat sich die Druckbildleistung quasi von Nacht zu Tag verbessert. Ich bin mittlerweile fest davon berzeugt, dass die minderwertige Standardsoftware eine gehrige Verantwortung fr viele Kritikpunkte hat. Seitdem drucke ich mit Raft OHNE warping, habe auf Scotchblue Abklebeband eine irre Haftung, und ein sehr przises Druckbild schon bei Standard Auflsung. KEIN Druck geht schief und die gedruckten Gegenstnde sind DEUTLICH besser als vorher. Von daher gebe ich hier 4 Punkte.
Keine 5, da die Software tatschlich im Vergleich zu der jetzigen einfach nicht gut genug ist und man hier nicht htte sparen drfen. Ich kann diesen Printer fr Anfnger UND auch fr den fortgeschrittenen User im tglichen Bedarf absolut empfehlen. (Photos sind von unbearbeiteten Objekten!)
J’ai toujours eu peur de m’quiper en imprimante 3D. Mon geek de fils avait surf sur plein de forums et autres sites spcialiss et il en tait ressorti que c tait compliqu rgler paramtrer et du coup nous avions abandonn.
Cette Dremel 3D45 nous comble par sa simplicit de mise en service et d’utilisation.
Nous avons nous aussi imprim notre grenouille et nous nous sommes mis chercher des fichiers prts l’emploi ainsi qu’un logiciel permettant d’obtenir ces fichiers.
Revenons l’imprimante.
Elle est imposante il faut lui prvoir une vraie place. tout est assez intuitif.
Nous avons rencontr aucun problme de buses bouches ou de bugs diverses.
Cette imprimante est onreuse mais sa conception le vaut largement.
Bravo DREMEL pour ce bel outil trs bien pens.
Il est un peu dlicat de prtendre valuer rellement un appareil de ce genre au bout de quelques heures d’utilisation, surtout quand on n’a aucune exprience du domaine. Dans ce cas prcis, la tche est d’autant plus complexe que l’exploitation relle d’une imprimante 3D exige de choisir et d’apprendre utiliser un logiciel de cration de modles.
Pour l’instant, je me contenterai donc de confirmer ce que d’autres ont dj trs bien dit :
– l’appareil est assez encombrant (nettement plus qu’une imprimante laser A4 actuelle)
– son installation et sa mise en uvre ne sont pas plus difficiles que celles d’une imprimante “normale” et, s’il s’agit simplement de fabriquer de petits objets (genre figurines, par exemple) partir de fichiers disponibles sur Internet, il n’y a vraiment aucun problme ( part, videmment, celui de “rentabiliser” le cot de l’appareil et la place que celui-ci occupe…).
Je me dbarrasse de tout a et pose dlicatement la bte sur un petit meuble. Un carton bloque le plateau et il faut forcer pour le retirer, a fait un peu peur.
Bon, j’y suis. Je fais l’inventaire. l’imprimante, on la voit bien, pas de problme. Deux btons de colle, une spatule, deux rouleaux de fils, un nylon et un eco ABS, une minuscule cl USB et un truc trange qui je le verrai par la suite sert a dboucher la buse. Puis un annuaire en guise de mode d’emploi. Et une fiche de prise en main rapide (heureusement!).
Je procde aux branchements, secteur, rseau et cble imprimante sur l’ordi. Petite mise a jour logicielle rapide et hop, on tente l’aventure avec une norme A.
Aprs avoir entr les donnes grce au petit cran tactile, calage et rglage du plateau et l’imprimante est prte a svir.
Introduction de la mini cl USB dans la prise prvue a cet effet sur la bte et je choisis la grenouille.
Ben oui, je n’avais pas encore prpar de fichier 3D imprimer alors on fait avec ce qu’on a.
Lecture du fichier, copiage dans la mmoire du monstre, et affichage de la suite du programme.
Il va me falloir 1H40 pour avoir le rsultat. Mais avant, il faut passer un peu de colle sur le plateau, et attendre que la buse et le plateau montent en temprature.La buse a 253 et le plateau 80.
Et quand la temprature est atteinte , a part tout seul.
Un dcompte du temps restant s’affiche pour faire patienter les plus presss.
Une heure et 40 minutes plus tard, miracle, ma grenouille a pris forme et presque vie. J’attends quelques minu…secondes, et je sors la plaque encore tide. puis a l’aide la spatule je dcolle dlicatement mon bb. Je file nettoyer aussitt la plaque sous l’eau chaude et reviens dorloter mon ttard. Je retire les quelques “bavures” a l’aide d’un scalpel et a l’heure ou je vous cris, j’ai dj envoy une photo de ma cration tous mes contacts.
Voil, l’aventure s’est bien passe.
Une exprience incroyable que de voir un objet prendre forme devant nos yeux d’enfants que nous resterons tous.
Plus srieusement, cette imprimante, hormis un prix relativement consquent, est une pure merveille. Pas trs bruyante, assez rapide et trs prcise, elle s’adresse aux plus exigeants et permet des reproductions fidles.
Il ne me reste plus qu’a trouver comment faire fonctionner cette foutue camra cache dans le coin qui permet de filmer le processus de cration du dbut a la fin.
Attention a la facture d’lectricit, certain objets complexes peuvent prendre plusieurs dizaines d’heures pour tre totalement termins.
Il est vrai que le plus dur du travail restent cependant la cration en 3D, les logiciels pour y parvenir tant assez lourds et complexes a utiliser. Mais quelle satisfaction de voir un objet sur l’cran se transformer en un volume bien rel.
Prvoir de faire de la place, c’est un appareil assez volumineux.
I’m sure that we are all aware of 3D printers and of course if you are looking at this one then clearly the idea is of interest. And I’m sure that many will have seen things made on YouTube where a 3D printer is used for a casting object or to act as a test product.
It really is the start of the next thing in industrial engineering. You can literally make things that a few years ago would have been the remit of large industrial factories but now available in your home.
Of course, industry does use 3D printers which probably cost millions and make things like turbine blades which clearly this home gamer isn’t capable of.
But…what it is, is the bestest educational tool that I’ve ever seen.
Now, I’m an engineer. Old school learning my trade back in the 80’s as a marine engineer. I’m therefor old. A dinosaur. However I retain an inquiring mind and I can understand that the engineering of the future will not be what I learned which was probably more in tune with Victorian standards than what is in place today.
And on top of that despite the fact that the UK almost forgot that engineering and manufacturing counted it rather seems that our leaders have worked out that the future lies not with services which are fairly easily turned into webpages but instead in engineering and technology.
This means that rather than push ones children into trying to become a banker or lawyer, instead many understand that their small people will have to look to another direction because this is the future.
Which is where this 3D printer comes in. Dremmel have made this as a learning tool primarily. And a wonderful job they have done of it too. The basic idea is that you can use this to learn skills needed to create objects which inevitably if progressed will mean learning some quite tough things. Mainly CAD as well as the slicing programs that are used to take that CAD drawing and turn it into a real thing. This process is where an interested child will gain huge steps forward and learn what will be absolutely essential skills for their career.
As part of that Dremmel have created a specific website that caters for differing ages/groups. Elementary, middle, higher and industry. The idea being that for each level you learn new and of course progressively more difficult things.
Of course, on line you can find printable files and use them. For the likes of model makers this might be enough as they can perhaps create their own parts for train layouts etc.
However, for those who wish to learn the Dremmel site is a great place to start. Free software that gets you up and started of course. Lots of examples of finished work and a community of like minded people.
Then…you need to start the hard slog. No getting away from it, if you want to use this as a tool to learn, you gotta put the leg work in. And that means not only learning the 3D solfware, but more importantly CAD software. Which isn’t all that easy. I use TurboCAD as I’m learning the new skill of not using a drawing board but instead a PC to make engineering drawings.
So, use this as a tool for your future or hobby, but accept that you really will have to learn some fairly hard stuff. As a grandparent my target is to become proficient enough to teach my grandchildren these skills. I reckon I have about three years grace before I need to start the imprinting..
Now, onto the machine.
Its not small and its not light despite being primarily a plastic case. I’d say about 1.5x the size of a typical microwave so factor in the space needed to place this.
Well made but of course the fairly eye watering price mainly goes into the design and support not the materials I guess.
Setting up is easy. Find a solid base somewhere – bear in mind that the printer will move rapidly and back and forth enough to shake the unit if not solidly placed.
Fit the plastic ‘wire’ into the holder and feed into the printing head. Art this point the quick start instructions don’t mention that on the left hand side as you look at it there is a small tab you gently press down in order to feed the wire into place.
Once done, start up and then follow the on screen instructions. Which also don’t quite match the quick start in that they ask that you cut the wire and allow the head to purge. I did this and to be honest it was a bit of a mistake. Simply do as the quickstart says and fit the wire and then purge but don’t cut.
Then level the base. This is also done via the menu and needs to be done in order to ensure the printing head aligns with the base. Its easy and very self explanatory.
I then signed this into my WiFi connection and updated the firmware.
And then picked out of the menu the reindeer that I’ve photographed to see if it worked. Which it did in the most fascinating way.
Now, make sure that you put the sticky non stick base covers on as well. I did make the mistake of thinking the black plastic one was the only one needed,m but in fact you stick this into the glass base then the blue non-stick one on top of that. The instructions are not clear but take it from me, printing onto the black base directly means a shed load of scraping.
So, for me the long uphill learning curve has started. And I’m really looking forward to it. I’ve downloaded the Dremmel software and I have TurboCAD so here I go on another engineering trip of discovery. And I’m really hoping to drag my grandkids with me too.
SUMMARY
A well made 3D printer with a decent print size capacity. The fully cased design makes it safer to use and increases print reliability. It’s easy to set up and get going quickly so ideal for first time users, and Dremel have excellent product support too, making this as pain free as possible. This machine would be ideal for hobby or educational use.
THE POSITIVES
Fully Cased — protects your fingers and your print.
Easy print base leveling
Print spools can be replaced mid-print (unlike some machines)
Fully cooled work space
100 micron resolution (0.1mm)
Multiple connection options — can be used stand alone or networked.
On-board software and colour touch screen control.
Good value for money given the capabilities and design.
THE NEGATIVES
Touch screen sometimes a little laggy
Print quality a little prone to being affected by vibration ( common to all 3D printers)
Warranty is invalidated if you don’t stick to Dremel filament
The printer arrives in a large and heavy box, and well packaged inside it sits a substantial printer. I’m not one to complain about this being a big tool, because the physical size of a 3D printer has a direct bearing on the size objects it can print for you. So the fact that it resembles a bloated microwave allows it a respectable print volume of 255 mm x 155 mm x 170 mm. The machine itself is 514mm high x 406w x 403d and weighs 16kg without the spool of filament.
The instructions provided are simple and easy to understand, helping you get up and running quickly and painlessly. I do like the inclusion of a USB stick containing sample files that you can print off immediately, once you’ve set the machine up and installed the roll of white filament provided. The thing that took longest for me was using the slightly clunky scroll system of the front mounted touch screen to input my wifi details!
One thing that is very important with any 3D printer is setting it up accurately. A level print base is essential so that the print head can lay down a solid and well attached foundation to the print. The 3D40 has an easy to operate leveling system that helps tremendously. I can envisage a time in future when leveling function will be entirely automatic, but until that becomes the norm, the Dremel system works well. By the way, you’ll need to re-level the base after every print, because the output (if done correctly) is pretty solidly glued to the base, which needs to be removed from the printer each time a print is finished and prised off from it. I strongly recommend you position this device of the most stable platform possible by the way. Doing so will help prevent those birds nest print failures. Ideally a heavy solid bench on a concrete floor would be best – in other words, in a workshop or garage rather than sitting on a wobbly Ikea table in a bedroom with bouncy timber floors!
Some 3D printers — especially the cheaper ones – are in the form of open gantry structures, with no casing. The Dremel scores here in my view because the cover improves both print reliability and user safety. Depending on your output settings a largish high resolution print could take four to six hours to complete. People brushing past, inquisitive pets, insects, the breeze from a window — all manner of things could ruin a print if it wasn’t being produced in a protected environment. The case is fan cooled and the machine runs quietly, with the occasional beep and boop sound, and with a similar noiise level of a 2D bubblejet.
There are certain similarities when using a 3D printer, to using a standard 2D version: You get the same options to vary print quality for example. Just like the saturation control of a 2D printer, the infill control of a 3D will affect how much print medium gets squirted out the nozzle. In other words, the finer the detail you desire, the more ink / filament you will use up, and the longer the finished article will take. For instance, if you print a vase at 20% infill it will be created quickly but it will leak! A Higher infill will cure that. Resolution controls the dot size obviously, so the higher that is set the less surface banding you’ll notice. Personally I think the visible banding of lower resolutions can be incorporated as a pleasing visual element, especially for sculptural pieces. And of course output colour can be altered by loading different colour spools, even mid-print.
Why do we need 3D printers? Personally I think they’re incredibly useful tools. I wouldn’t bother printing simple things like toy frogs myself, but to get kids started and engage their interest that’s fine. For me, the real utility of these devices is in the ability they give to create complex objects that would just be impossible to produce any other way. One example are the acoustically neutral complex lattice covers on my Audioquest Nighthawk headphones. I also love being able to think outside the box with complex sculptural shapes that I could never turn, sculpt or craft if it wasn’t for the Dremel. Other users find them invaluable for modelling prototypes of new products, before sending them off for production. Given the ubiquitous nature of CAD and the scalability of the digital files, it makes it simple.
This is altogether an excellent printer, and the sculptural forms I have managed to create with it are very pleasing. There’s an entire sub-culture out there, of 3D print modelers; connecting with it is proving fascinating, and rather rewarding. I recommend you take a look at the Thingiverse web site to begin with. It’s just one of the many resources.
Works great! Very high quality printing and so easy to use with its built-in touch screen. I love that it can be used without needing to connect it to a computer. The leveling sensor works well and makes a big difference to the 3D print quality. The enclosure effectively cuts down the overall sound of the machine to managable levels. It can literally take hours to print anything decent so you really need a lot of patience. Although it takes time, the end result is always great – I haven’t had any serious problems with the 3D prints. I recommend that you start off printing the supplied 3D models if this is your first attempt at 3D printing. This is a great Dremel product – everything you need comes inside the box.
HIGHLY RECOMMENDED! AAA+++
The Dremel 3D40 was my first exposure at 3D printing; and Dremel made the experience from Box to Model Frog nice and simple. The packaging takes you on a short journey to set the printer up; moving the print base to remove the cables and manuals. The most important thing in the box is the USB thumb drive that had the software and some sample models on it. The theme of easy to get going carried through; and Dremel offers amazing support – though I haven’t needed to call. The printer is controlled by a responsive color touchscreen – though infuriatingly entering a wifi password required scrolling through the letters of the alphabet which for my long password took far too long; and was made worse that they hide the letters so you cant spot a mistake. There is also an ethernet socket so you can connect it to a local network.
By comparison to my color laser print the Dremel 3D40 is enormous – old school CR TV enormous; but the capacious cabinet results in what seems a large printable volume – 255 mm x 155 mm x 170 mm and its lit up like a Hollywood studio with LED lights so you can see whats going on. Dremel provide a copy of AutoDesk Print Studio for Windows on the drive; the Mac version was available for download from the Dremel website. In use the printer sounds like an older bubblejet printer gentle whirring as it moves the head about the print. You can print from the USB drive; wifi or directly plugging the print.
Out of the box to a print starting took about 20 minutes. The color screen helps in levelling the print bed; and two thumbscrews seemingly keep the print bed level. They haven’t put levelling into the select -print routine so its worth levelling every time you remove the print bed and put It back. The prints take a lot longer than getting the printer out of the box; the Alien model I printed from Thingieverse too about 3 hours – not including the multiple print failures (also pictured) that occurred due to a lack of supports. There is some trial and error with the printer and various prints; my early days were full of frustration; but a bit of online reading and trial and error with the software and adding more supports / orienting models to increase the footprint resulted in better prints. Early prints with a small base and tall structure failed repeatedly – adhesion with the base being an especial issue – the base isn’t heated -; though after 10-15 prints I have stumbled onto a strategy using blue tape in a criss cross pattern that seems to work well. Its worth noting you need to put it on a sturdy surface as vibration results in some surface inconsistency.
My Nieces have all been grateful for the models printed in testing the printer – and the PVA plastic seems to take paint well; a few pictures are below. I have also found some useful models for myself – a 6 card SD card holder that is about 3 credit cards thick is a great way to tidy them in my bag. Though they did reveal some interesting issues in the software – you open Print studio from the print file the scale isn’t loaded correctly; clicking the import button if it isn’t sure it asks – the first SD card holder was fractionally too big for the cards.
In the box was a roll of plastic that I have used about 1/3 -1/2 of on about 10 prints so they last quite well; and amazon has a goodly supply.Replacement rolls on amazon aren’t especially expensive. Dremel also include a metal spatula to remove the models from the base (here the tape feels like a better solution as you can remove the strips to release the model.) A tool to push plastic through the print head if it gets jammed. They don’t include some pliers to remove plastic up through the head which I have had to do when the plastic got tangled at the start.
Overall I have enjoyed the printer; and the availability of models online to get you started before you design your own models makes starting nice and simple. The space it takes up is significant. Overall it does remind me of the first HP bubble just printer I had; the quality is nice the noise is quiet but you can feel its a strarting point. I cant help but wonder when we will get 3 head prints that do variable color.
This thing is brilliant, I could bang on about it for hours.
Not only is it a fantastic toy, but with 3D printing technology really coming of age in the last few years, I’m convinced that this is going to be an important tool in our future and being able to introduce our kids to the idea of 3D design and useful making goes well beyond the initial novelty of ‘print your own toys’ and gives us something genuinely worthwhile as well.
As well as the dozen or so generic models included on the machine already, there are thousands and thousands of free 3D models on the internet, ready to download and in many cases print straight away (though in some cases you need to give some thought to supports or splitting the model into smaller printable parts). Have a browse of a site like Thingiverse and you’ll see all sorts of things that are possible.
As a random example, of a very minor and admittedly third-world problem, I have a Renault Zoe which is a lovely car but the microSD card slot is in a daft place where the card is always getting knocked out of the slot by accident. I thought, “I wonder if I could design a 3D cover for it that would stop that from happening?”. I went onto the aforementioned site to discover that there was a Zoe owner who’d already had exactly the same thought and who’d already designed a cover and shared it online. A few seconds’ download and about 5 minutes’ printing later, hey presto! I’ve now got a very effective SD card cover. Amazing. OK so that particular example’s hardly going to revolutionise the world but you can see the potential.
I’d used a Dremel Idea Builder before, the lower model that isn’t the 3D40, which at the time of writing is about two thirds of the asking price of the 3D40 on this site. The 3D40 is a definite step up with some distinct advantages and I’d definitely say it’s worth the extra. Conveniences like the transparent lid (making it easier to see how it’s going) and the pull-out spool holder, which lifts out from the side of the machine, are coupled with genuine practicalities such as the fact that (unlike the lesser model) if you run out of filament part-way through a build, you can load a new spool in and it’s capable of continuing the print.
The 3D40 is also decidedly quieter- yes it’s still got a whirring fan and motors, but the overall noise output is lower. The sound of the motors whirring has clearly been dampened, to an impressive extent. It’s less noisy than an old-fashioned dot matrix printer, which the other one wasn’t, and depending on how easily distracted you are, you could have this one running in your office and still be able to work. I’ll also be able to run this printer in the evenings when my kids are asleep- the other one would have woken them up. In addition, if you leave this printer on after a print has finished (for example it finishes while you’re out or asleep), this printer will automatically turn the fan off when the extruder’s cool enough, which the cheaper model doesn’t.
The WiFi works really well and is really convenient too. Instead of fiddling about with putting .g3drem files onto a microSD card and then going over to the printer, inserting the card and selecting the file, never being quite sure if it’ll work or not, you can now connect your PC directly to the printer (analogous to connecting it to a 2D network printer), and once your model’s ready, it’ll print directly- and warn you straight away if anything’s unprintable. If you don’t want to go down that route, you’ve got plenty of other options- an ethernet socket on the side of the printer, a USB socket on the front, a microSD slot somewhere (haven’t found that yet as I haven’t needed to use it!), and a more old-fashioned USB-A cable so you can plug the printer directly into your PC’s USB socket.
It’s worth mentioning that 3D printing at this kind of level is not wholly reliable. There’s a failure rate involved in domestic-level 3D printing, I don’t know what figure other people would put on it but I’d put it at around 10%. That sounds quite high on paper but when you think about the complexity (and the stickiness!) involved, I err on the side of “well it’s amazing that it works at all”. It can be a little disappointing to start a three-hour print and to go back two hours later to find that the base didn’t ‘take’ and all the printer’s been doing for two hours is spilling filament clumps into ugly blobs. But the joy of all the models that work definitely outweighs the disappointments, especially if you’re patient.
Also, be prepared for a bit of elbow work when it comes to prising the models off the platform when they’re done. It’s great in printing terms that they stick so firmly, but if you’ve printed something with quite a broad base, when you come to lifting it off it can often be very firmly attached indeed. The scraper that’s included helps a bit (and the fact it’s metal is an improvement on the plastic one included in the lesser model), but even so it can be quite tricky to lift the models off sometimes. And be *very* careful with your hands, especially if you decide to use a sharp knife- I’m speaking from painful experience there.
The PLA filament from Dremel is either average-price or marginally above average compared to other brands, but it’s not extortionate. I haven’t tried using other non-Dremel filament in the printer, for various reasons- I don’t want to invalidate anything, obviously, plus I haven’t found any filament that’s cheaper than Dremel’s own that would make it worth trying. Depending on the colour you’re after, twenty quid or a little bit more is a typical and reasonable price. If you do the maths on how many things you can print from that filament then- as another random example- it works out a little bit more expensive to print your own Trackmaster-compatible train track or Lego-compatible bricks than it is to buy the branded stuff. But that’s not really the point- you wouldn’t use this printer to print a plain boring bit of Trackmaster you could buy in a shop. You’d use it to print the interesting complicated junction or turntable pieces that you can’t buy in a shop, but which somebody online has designed and already shared with you!
At first even the Quick Start Guide looks like it’s rather daunting, but then you see that it’s the same instructions in no fewer than 10 different languages and there really isn’t all that much to read before you can get started. The same is true for the larger user guide (11 languages this time), 32 pages per language, most of which is clear pictures and diagrams, nicely laid out and handy for reference.
A SanDisk USB stick is included. 8GB may not sound generous by 2018 standards but 3D print vector files are very small indeed so you’ll be able to fit hundreds of models onto an 8GB stick ready for them to be printed and re-printed on demand without any computer connection being required.
I use a PC not a Mac, so fortunately for me the installer for Autodesk Print Studio was already included on the USB stick- there didn’t seem to be a Mac version on there, not that I could see. However the software is also downloadable from Dremel’s website so if you’re a Mac user you ought to check there first to ensure there is a Mac version (I expect there is but I’m not sure). The version on the USB stick was slightly out-of-date when I installed it, but it offers automatic updates so after a few minutes’ waiting for a download and a second install, it became bang up to date.
Print Studio is from Autodesk, the same company behind Meshmixer which I’d already used to do a bit of primitive 3D modelling. Print Studio is the best bits of Dremel’s own 3D software, upgraded with a handful of the features from Meshmixer- for example the ability to automatically calculate where supports are going to be needed, which is an ideal place for that feature as it means you can design shapes to your heart’s content and then fix all the support issues just prior to printing rather than having to work it out as you go.
Print Studio isn’t a 3D design tool in its own right, so when you want to go beyond pre-existing models, you’ll need some other software. Meshmixer is free and I’d certainly recommend that, but 3D model file formats like STL are fairly open and interchangeable, which is great, and that means you can use things like SketchUp. If you’ve got Photoshop you can even use that to design a 2D shape and then extrude it to make a 3D stand-up version of it.
I really want to develop my own 3D design skills and be more ambitious with what I can accomplish with this machine, and this machine gives me the reason to work harder towards that. In the meantime, even just with downloading existing models off the internet or printing basic shape stuff, it’s still a very satisfying thing to have.
I can’t recommend this printer highly enough. Yes it’s not cheap but as long as you’re going to spend the time experimenting and investigating with it, it’s an investment that’s both fun and worthwhile.
This is the first time I have tried out a 3D printer so I can’t really compare this model to other available options. I was a bit worried that it would be too complicated for me to set up but I found this set up to be quite straightforward and the instructions clear. It has an easy to use touch screen which guides you through the steps very well. It is quite a big bit of kit so you do need to have somewhere to store it when you are not using it. You can download some models which have already been built from the Dremel website to get you started. The length of time is takes to build your model obviously depends on how big and complex you want it to be. It doesn’t smell or make a lot of noise either so it quite discrete. The results are quite astonishing and I’m sure I’ll get much better and more ambitious as I learn to master this new skill.
The printer was fairly easy to set up, although I thought it definitely helped that I had watched a couple of videos before I started trying to use it rather than just going from the quick start guide or instruction manual. Dremel themselves have promotional videos that can be watched on YouTube. Most aspects of setup are relatively uncomplicated. Power up is a little on the slow side, and the touch screen interface isn’t the most sensitive I have encountered and has a quite retro look. The machine makes a fair bit of noise, including a jaunty little tune when it’s switched on, and there is a bright white LED light that comes on and remains on whilst the printer is awake. I found the build plate slightly tricky to fit the first couple of times I did it. The instructions simply say to fit it onto the clips on the bed – you need to thread it over the top of a pair of tabs at the back, and then slide it backwards once it’s on these until it’s back far enough that it will fit behind the two prongs at the front.
Even on first use there was a small amount of filament inside the extruder head that came out as the machine heated up, so it would appear that this is factory tested with filament. I decided to test this first for myself using a couple of the pre-installed designs and made a teddy bear finger puppet and a chess pawn (each of which took tens of minutes to complete). I made these from files in the machine’s memory and without connecting it to my wireless network or my computer. Although the quick start guide and instructions indicated that this would look to connect to a network as part of initial setup, this didn’t happen for me. I set my region/language and the machine then went straight to the main menu.
The machine starts by heating up to temperature, which takes about a minute, and then begins the time consuming task of constructing models with the heated filament. The printer makes an unexpected amount of noise when it’s working – not simply the whirring of the arm moving but beeps and boops that wouldn’t be out of place in a mad scientist’s laboratory in a 1950s B movie. I have added a short video to demonstrate this, as I think it’s something to bear in mind when choosing where to locate this, and before starting a larger print. The large, clear access doors at the top and front of the machine provide a fascinating view of 3D construction at work. The process is quite slow going, building just fractions of a millimetre at a time but after a few minutes you can see some kind of progress. Once a job is completed, the build platform is lowered, the extruder moves to the side and the machine plays a little tune to alert you that it’s finished working. The small number of pre-programmed projects generally have an eye to youngster/school/educational use, but those aside there’s nothing restrictive feeling about this.
The smaller projects I opted to make first are on the poorer quality side, having a lower quality profile programmed that results in quite a ridged appearance. There’s no indication of quality on screen, so you take a bit of pot luck when printing these pre-programmed builds. The bear finger puppet has ridges in it that resemble the grooves on a record. Once printed, items have to be removed from the build base. This is not easy. They stick tightly. The removal tool works after a fashion, but requires patience. The metal-ended tool is not structured in the same way as the one shown in the manual illustrations – the tool I received has texturing on the tip, whilst the one depicted has a textured edge on the side. It takes a good few tries before any kind of separation of object and base is achieved, but once the build does start to come away from the platform it becomes fairly easy to prise off. The difficult part is getting the initial separation, once you have a start on that, it’s reasonably easy to work the tool round the base of your build.
After these first couple of projects, I was ready to pick something a bit different – and started work on an open source case for a Raspberry Pi 3 that my brother had asked me to make. This is giving me a chance to learn to use the Dremel software (a Dremel DigiLab product based on Cura open source slicing software for CAD), and to learn to work through larger, multi-part builds based on open-sourced software. I’m a Mac user, and needed to go to the Dremel website to download the software. Although I’ve not used CAD files before, I have used CorelDraw, and a couple of different Movie editing programmes. I found the software fairly intuitive, though on my first component I did not realise that I needed to switch off a default that added 20% fill (internal honeycomb structuring that strengthens a build) which resulted in a much longer than anticipated build time that took more than 9 hours and didn’t complete until 2am!
The print files generated by Dremel’s DigiLab software and saved to the supplied flash drive from the open source .stl files were not recognised until I had networked the printer and updated its firmware. I have so far completed the two sections needed to make up the base of the Raspberry Pi case, and whilst still a little bit lined in texture the quality is obviously better than that of the two preset jobs I have completed – (profile set to 0.2mm medium quality) the finely textured effect gives the plastic a satin-like look and feel. For the pre-installed item designs, the touch screen menu shows amount of print job completed and time left to go in the build as both a countdown and a graphic highlighting the completed parts on a drawing of the item. For open sourced files sliced using the Dremel software, the display shows time taken on the print so far and a brand logo bubble image. For these, the logo image is highlighted in orange as the build completes – and is almost done when the top frame of the bubble turns from grey to orange.
On this printer you can pause a build if you need to make the background noises stop temporarily, but the machine remains on. There’s no way to suspend a build, switch off the machine, turn it back on again and resume printing. This is a bit of a shame, as anything beyond the simplest of jobs, takes several hours and can result in the machine being left on unnecessarily long – especially if an unattended job starts going wrong. It also means that if your power is interrupted, any in-progress build will be written off.
I think my class and after school club kids will have a lot of fun and enjoy learning with resources we have made ourselves. And whilst there is an initial excitement phase that will probably result in some really unnecessary projects being built, I saw the most amazing project on the ‘Shed of the Year’ programme last year – where a couple of guys working in a shed are manufacturing prosthetics using 3D printers, and have designed an open source template for the creation of prosthetic arms. I’m hoping to ultimately be able to help the truly amazing work that is being done by the Team Unlimbited charity in generating funky, colourful prosthetics.
======
30/06/18
UPDATE:
I have now finished printing my brother’s Raspberry Pi case. I have had one print fail. As indicated in the manual, this was in the first few minutes and seemed to be caused by the first layers of filament for my build failing to stick to the build base mat. The resulting misprint – stopped after about 20 minutes – created a fairly impressive bird’s nest of tangled filament. I couldn’t see any reason for that particular print not to have taken, so it seems that keeping a eye on progress in the first few minutes is worth while to avoid the risk of wasting several hours of printing.
I’ve bought my first filament colours, opting to use the manufacturer’s filament after spotting some rather dire warnings in the instruction manual suggesting that other brands could damage the machine. At the time of writing, there are eleven filament colours available: red, orange, green, blue, purple, pink, gold, silver, black, white and translucent. I’ve bought the first five of these plus the translucent. With the obvious exception of the latter, the colours are all nicely vivid and changing the filament spool is very easy.
I have upgraded my star rating from an initially slightly grumpy four stars to five. The out of the box problem I had with a faulty power cable was a minor annoyance that shouldn’t have affected an item at this level but was relatively easy to resolve and has paled in comparison to how exciting it is to use this, and the useful, unusual things that can be made.
+ alles was man fr den Druck braucht im Paket enthalten, den passenden Slicer kann man sich kostenlos runterladen von der Herstellerseite
+ einfacher Aufbau: Im Grunde braucht man nur das Filament in den Druckkopf einzufhren. Beim ersten Versuch hatte ich nicht tief genug eingefgt und nichts tat sich beim Druckversuch. Einfach immer Einfhren bis es unten wieder herauskommt, dann passt es
+ gute Menfhrung durch groen Display beim Druck, Installation und Einstellungen
+ berzeugende Ausdrucke: Ich habe zwei von Dremel vorgeschlagenen Blumenvasen gedruckt, sehr schne Ergebnisse.
Ich habe einen Star Wars Jabba nach Vorlagedatei aus dem Internet gedruckt. Diese SLT Datei muss in der Slicersoftware (mit einem Klick und superschnell) umgewandelt werden und wird dann vom Drucker erkannt. Das Ergebnis war zwar nicht schlecht, aber hier muss man mit speziellem Werkzeug noch nacharbeiten. An schwierigen Stellen war das Objekt wie mit einem Spinnennetz von Kunststoff bedeckt, da muss also noch was tun fr ein optimales Ergebnis. Werkzeug fr Nachbearbeitung ist im Paket nicht enthalten.
Die kleinen Vasen dauerten 3- 4 h im Ausdruck, der komplexe Jabba 14 h!
+ 2 groe Filamentspulen im Lieferpaket, da kann man schon einiges fr drucken. Nach meinen ersten Ausdrucken ist immer noch jede Menge Filament auf der 1. eingesetzten Spule.
+ keine Geruchsbildung
+ kompaktes Gert, kommt noch gut in einer Ecke in meiner Kche unter
+ Oben und an der Seite einsehbar, sowohl Oben als auch an der Seite ffenbar.
+ Die Unterlage muss vorher selbstverstndlich mit mitgeliefertem Klebestoff bestrichen werden, damit das Objekt fixiert bleibt, mit der beiliegenden Spachtel lsst sich das Objekt dann aber auch problemlos entfernen, wenn es fertig gedruckt ist
+ kinderleichte, displaygesttzte Kalibrierung der Unterlage
+ nicht zu laut
+ vor Druck Einschtzung der Bearbeitungszeit
+ Wlan und USB
+ erkennt Dremel Filament automatisch und nimmt selbststndig die ntigen Einstellung nach Erkennung vor.
Neutral:
0 etwa 20 kg Gewicht
0 nicht mehr gnstig
Nicht getestet (brauche ich nicht): Fernwartung und Gertekamera.
There are a couple of reasons I only give 4 stars however;
It looks good, but the doors and overall build feel a little more flimsy than I expected for the price (1,500) so I would imagine there would soon be something broken in a busy school environment or similar. However the extruder and mechanical parts seem quite good.
One important note for UK/EU buyers is that the cloud services are not yet GDPR compliant and therefore will not be available in the menu options unless you chose United States in the menu when setting up. Dremel told me there is no estimated date for fixing this yet, though the simple workaround of setting the machine to United States seems to work. So if you can’t find the needed token to register your printer with Dremel, try setting it up as United States
My first prints in pla worked like a dream, nylon and abs were effortless.
Tolerances are good given the cost of the machine. Printing at .05mm is amazing quality when using G Code.
The only snag is I had to set it up as if I was in the USA to use the cloud print service which isn’t documented.
The downside.
Filament tracking is a little pointless at the moment as the stocks of dremel filament on the market don’t have the RFID in the real.
So far it seems if it comes in a white box means no rfid. Brown box and your in luck.
This means that the printer won’t track the amount left on the roll of you swap them.
However the cloud software does seem accurate when tracking use.
I’d happily buy another one and this machine is a definite an alternative to the makerbot replicator which is getting mixed reviews.
I got the delivery, unboxed it and set it up and printed my first item within about 15 minutes, it was one of the saved items on the printer it self.
I like the fact that its easy to setup and just works right out the box, i have had other 3D printers and have struggled with getting the bed level, printing and getting the print to stay stuck to the bed. I don’t have any issues with the print staying stuck to the bed, in fact its very much the opposite problem it sticks really really well to the point it can be hard to remove the object but I have found that if I use a blade to slide under the edge just to get it started then used the supplied scrapper to remove the item this seems to work. the supplied scrapper is a little crap as its made of thin soft plastic.
over all its a good 3D printer you are limited to printing in PLA only as there is no heated bed and you have to use Dremels filament otherwise the warranty will be voided but if you just want a 3D printer that just works and is somewhat hassle free then look no further.