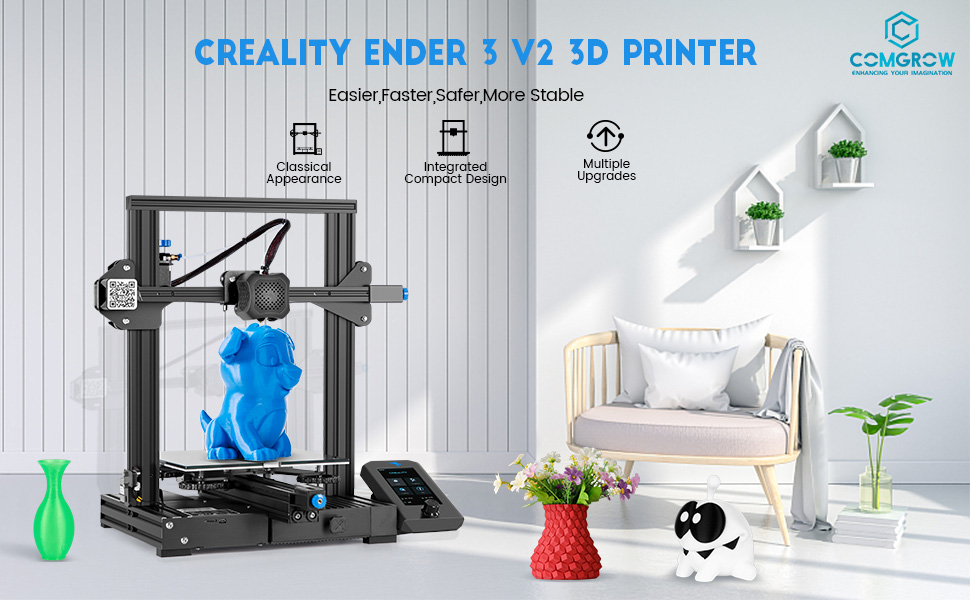
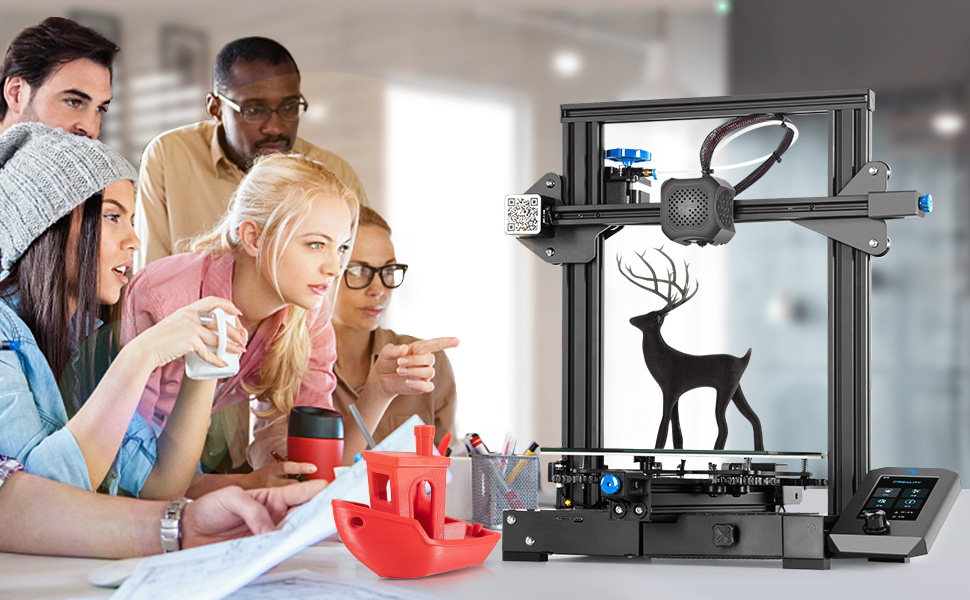
Official Creality Ender 3 V2 3D Printer with 32 Bit Silent Board Meanwell Power Supply Glass Bed and Resume Printing 220x220x250mm

Why choose Comgrow?
Comgrow is the first agency of Creality 3D.
We own more 20 technical staff to provide professional technical support to you.
Comgrow is devoted to provide high quality and economical 3D printer.
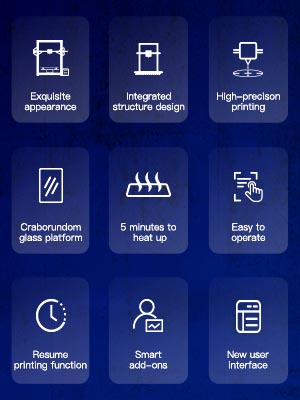
Why choose Creality 3D Ender 3 V2 3D Printer?
1. Self-developed Silent Motherboard
2. Upgraded MeanWell Power Supply
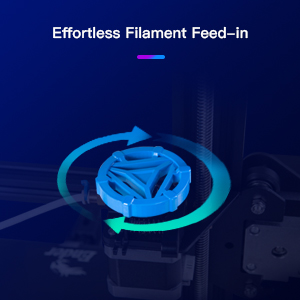
3. Effortless Filament Feed-in
4. Resume Printing Function
5. Carborundum Glass Platform
6. 4.3 inch Color Screen
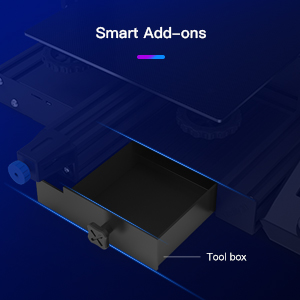
7. Ender 3 V2 Adopt a Tool Box Intergeated to Machine Body
| | | |
|---|---|---|
Self-developed Silent MotherboardThe self-developed silent motherboard ensures smooth movement under 50db, no noise during printing. | V-guide Rail with High Standard Stabe to PrintEnder 3 V2 uses the V-guide rail pulley with stable movement, low noise, wear resistance and longer life. | Effortless Filament Feed-inRotary knob added on the extruder makes it easier to load and feed filament. |


| | | |
|---|---|---|
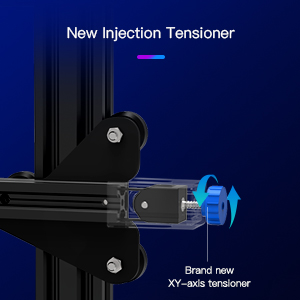
New Injection TensionerThe XY-axis tensioner supports adjusting the belt tension in a quick and more convenient way. | Brand New User InterfaceEnder 3 V2 changes the previous screen into 4.3inch color screen and upgrades the user experience with the newly designed operation UI system. It’s simple and quick to operate. And also this color screen can remove easily to repair, which saves a lot time and energy. | Smart Add-onsWith the tool box integrated to the machine body it is more convenient and quicker for tools organization and storage. |

 |  | 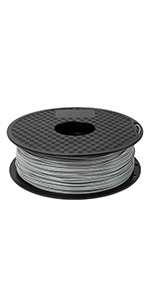 | 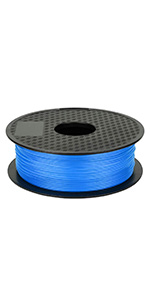 | 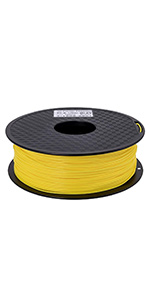 | 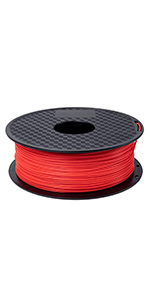 | |
|---|---|---|---|---|---|---|
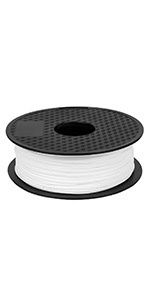
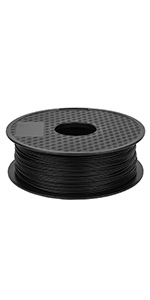
| Color | White | Black | Grey | Blue | Yellow | Red |
| Weight | 2.2lbs (1KG) | 2.2lbs (1KG) | 2.2lbs (1KG) | 2.2lbs (1KG) | 2.2lbs (1KG) | 2.2lbs (1KG) |
| Material | PLA | PLA | PLA | PLA | PLA | PLA |
| Diameter | 1.75 ± 0.02mm | 1.75 ± 0.02mm | 1.75 ± 0.02mm | 1.75 ± 0.02mm | 1.75 ± 0.02mm | 1.75 ± 0.02mm |
| Nozzle Temp | 190-230°C | 190-230°C | 190-230°C | 190-230°C | 190-230°C | 190-230°C |
| Dimensions: | 47 x 47.5 x 62 cm; 7.8 Kilograms |
| Model: | US1-Ender3 V2-FBA |
| Manufacture: | Creality 3D |
| Origin: | China |
1. **Build Quality:** The Ender 3 V2 boasts a sturdy frame with a robust aluminum build. It feels well-constructed and durable, ensuring stability during prints.
2. **Assembly:** Assembly is relatively straightforward, even for beginners. Creality provides clear instructions and pre-assembled components, making it easier to set up compared to some other 3D printers.
3. **Printing Quality:** This printer delivers excellent print quality, especially considering its affordability. It’s capable of producing detailed and accurate prints with minimal layer lines, thanks to its precise extruder and heated bed.
4. **Printing Speed:** The Ender 3 V2 offers decent print speeds. While it’s not the fastest 3D printer on the market, it strikes a good balance between speed and quality.
5. **User-Friendly:** The user interface is user-friendly with a responsive touchscreen display. It simplifies the printing process and offers features like resume printing after power loss.
6. **Silent Printing:** One standout feature is the quieter operation. The addition of TMC2208 stepper motor drivers significantly reduces noise during printing, making it suitable for home use.
7. **Upgradability:** The Ender 3 V2 is highly customizable and upgradable. You can easily modify or enhance it with various aftermarket parts to suit your specific needs.
8. **Software Compatibility:** It works well with popular slicing software like Cura and PrusaSlicer. Additionally, it supports a wide range of filament types, giving you versatility in material choices.
9. **Community and Support:** The Ender 3 V2 benefits from a large and active online community. This means you can find plenty of resources, tutorials, and troubleshooting advice if you run into any issues.
10. **Price:** Perhaps one of its most appealing aspects is the affordable price point. It provides excellent value for both beginners and experienced 3D printing enthusiasts.
In summary, the Ender 3 V2 is a standout 3D printer in its price range, offering remarkable print quality, ease of use, and upgradability. Whether you’re just starting in 3D printing or looking for an affordable yet capable printer, the Ender 3 V2 is a solid choice.
If you do your research you’ll find that many people are obsessed with ‘upgrading’ this printer (and others) but I have found it necessary to change only the springs under the bed plate, installing the stiffer yellow ones you’ll find on Amazon. The supplied ones are weak and don’t hold the bed in position properly, resulting in the need for frequent tramming. I did buy a BL Touch but have not bothered to install it – I decided after all that it ain’t broke so I won’t fix it, and a bit of paper does the job very well. So, don’t be fooled by the upgrade obsessives – change the springs for a fiver, that’s all you need to do.
Bought for a Christmas present. Recipient found it easy to assemble and make relevant adjustments. Printer has been in use most days and proven to be a perfect gift. Make sure to use good quality material. A clean bed is necessary for good adhesion. Excellent performance for a reasonable price.
Kids have been making all kinds of stuff they love looking up and creating different things.
I may not be qualified to give this 5 stars but this printer works well for me.
There was a steep learning curve when it comes to the slicer and getting the settings correct, but once those were dialed in this thing rarely messes up for me.
It good printer, try to buy filament not use free filament because it can stuck, watch multiply videos on how to assembly and download assembly guide from a site, I assembled and it works good, i real like, filament PLA 1.75 you can buy.
As a beginner to the world of 3D printing, this printer helped me get started easily with minimal issues. The only major issues I did encounter was while assembling because of the poorly instructed steps in the official manual. I suggest watching a YouTube guide as there were major factors such as adjusting the belt tightness which were not stated in the manual and could lead to issues if they were not done while assembling. However, despite assembly issues, the printer functions better than expected. The print quality is great, but requires some adhesive such as glue stick to keep the print on the surface. Overall, solid printer and I recommend for people who want to get involved in 3D printing for the first time.
However, trying to upgrade this firmware is one of the most painful processes I’ve ever come across. Why? Because the Creality website is AWFUL. It’s nearly impossible to figure out which firmware you need, and if you pick the wrong one, there’s no indication until your printer won’t boot up.
In addition, I found at least THREE different pages on their website with firmware downloads which link to different files. Finally, their naming convention on the files is abhorrent. You have to download different firmware depending on which hardware options you have, which is nuts. For example, If you have the BL/CR Touch (interchangeable, by the way) then it’s a different firmware than if you don’t have it. There should be ONE firmware that handles both, where you can turn on and off hardware options in the firmware itself.
Here’s an example of two files:
GD-Ender-3 V2-Marlin2.0.8.2-HW-V4.2.2-SW-V1.0.4_E_N_20211230
Ender-3 V2_Marlin2.0.8_HW_V4.2.2_SW_V1.0.7
Anyone have a guess what the difference is? I don’t know, because there are no release notes posted with the files. “GD Ender”?? What is that? what is SW-V1.0.4?? I have no idea. Terrible.
I’m not even going to review the hardware because it doesn’t matter. Works fine, whatever, but I wish I had investigated further before purchasing, because I won’t buy another creality.
This was my second 3d printer and a good choice for a newbie. Lots of assembly required and while the provided instructions were very vague, there are a ton of YouTube videos to assist you.
Once all parts were unboxed it looked like an overwhelming experience was about to happen. The assembly was actually not too difficult and it had the added benefit of deepening you’re understanding of how/why a lot of the parts work in relation to the printing process.
The build was relatively straightforward and all parts assembled and fit as expected. The completed printer had a solid look and feel and once some minor tweaking was done the printer has been performing great.
I added the Creality automatic levelling and the filament sensor which takes a lot of the setup out of my hands. The prints have generally been very good and the printer is relatively quiet.
While the Ender may be a bit pricey compared to a lot of printers on Amazon, I feel it was good value for the end product.
I am going to be ordering a Tronxy printer next as it has many of the Ender accessories already built in at a much better price.
Looking forward to being able to review both the Ender and Tronxy in a side by side comparison.
Creality needs to pay better attention to the English translations in both the printed manuals but especially on the built in dispaly. Some things just make no sense.
I have printed several rolls of filament through this machine already. Mostly PLA, with a bit of TPU and PETG thrown in. Nearly stock (tube and feed upgrade for the PETG, with springs) this thing is a workhorse. It took me a frustratingly long time to get that bed level. But once there, it holds level like a champ. And then it is just a matter of slicer settings. I am not a perfectionist, as that just isn’t what I am after. I want to throw fun parts on to print and let it do its thing. And it does. Not sure how many print hours it has on it, but I have run prints from 30 minutes to 24 hours on this sucker, no failures due to the printer yet. Only my own goofs.
Highly recommended.
My experience with this Ender 3 V2 got off to a bad start. After going through the process of assembly and setup the extruder quit working before I even got my first print done. I contacted Amazon and got a replacement machine and it has worked great now for over a month.
I will say to anyone just getting started with 3d printing this seems to be a good choice even though my initial experience was a bad one. I do recommend getting the CR Touch auto bed leveling add-on right from the get go. Leveling these things manually is a pain in the butt.
I’d also recommend that you use ammonia free foaming glass cleaner between each print to keep remnants of your previous print from showing up in your next print. All in all this is a great printer to start with and really affordable. Sadly though getting support for this thing through Ender is a nightmare. It’s a Chinese based company and getting response from them is a real task.
I added second z axis motor to stabilize the horizontal printing. Added filament detection, AUTO Leveling with the metal headed version believe it is CR not the cheap plastic one. I also added the first $40 Creality branded direct extruder with metal hot end, and wow it works great, and this is the $40 older version head not the latest release one, do not think I even need the recently released head, unit never needs to be adjusted, took time dialed it in, added in gcode so it will auto level off nine points start of every print. I have not had to do anything to this printer for past six months in regards to leveling. I did add the higher quality based springs and knobs for the print foundation board. It printes flawlessly each and every print, I even run NylonC with carbon fiber, PETG with Carbon Fiber, PLA, SuperPla, and ABS with Carbon fiber without any issues. I can push unit to about 120 print speed, though for most objects I like to start base layer at 60 print speed, and my normal print speed is around 80.
The upgrades require time and take less than 45 minutes to install. The autoleveling and the second z axis drive with the direct drive all metal extruder for $40 was a homerun. This is my workhorse 3d printer many hours with about 98%+ print success rate. Invested also in the container for unit to keep temps even, new add. All in spent about $250 total on upgrades during ownership, that was money well spend on the mentioned items. I like to run this with .6mm hardened steel nozzle. This allows prints to print faster with very little loss of detail for the types of projects I run.
This is my first 3d printer so its hard to say something so fast after purchase. But so far its ok.
I love the heated bed. I know people without heated beds use glue sticks or other things to get their prints to stick but it seems like having a heated bed works without the mess.
The assembly instructions were not super clear; however, there are a plethora of assembly instruction videos available on you tube.
I did experience an intermittent fan failure within a month of assembling everything. Since it was intermittent I put off contacting support. Finally, almost a year later the intermittent fan failure became almost constant so I reached out to Crealty support. They responded within 24 hours and got me in contact with the seller – Comgrow – within 48 hours. Comgrow tech support walked me through what I needed to check so that we could get the right parts replaced.
Turns out it was the fan for the controller board and in the process of checking the fans over the extruder I found that during manufacture a couple of the screws holding one of the fans to the shroud had been over tightened and broke the attachment posts in the shroud.
So, a little bit of a hassle doing the diagnosing of the issue but Comgrow and Crealty support has been super professional throughout. New parts took 2 weeks to show up but they arrived packaged well and in good shape.
So far I am not getting prints to the level of quality I would expect with an FDM printer; however, as I mentioned up top this is my first printer and I’m still learning. There might be something I tightened too much or not enough. My biggest complaint with quality has to do with walls… If I have a flat wall, I’d expect it to be flat; however, I get a little bit of a wave to it. Kind of like maybe one of the wheels on the X axis is wobbling or has a bump that shifts the printer head a little each time it comes around.
All in all I’m pretty happy and just need to further diagnose my quality problems.
ASSEMBLY
The provided instructions were pretty good. There was only one part that was confusing (the instructions showed the belt idler attached, but I couldn’t find an idler in the parts list), but a quick search on YouTube showed that the idler was actually inside and part of the tensioner.
A small gripe: I struggled with the T-nuts a bit, but specifically only on the display attachment. All other T-nuts secured fairly easily, but getting those facing the right way was a pain.
SETUP
Set up is really simple. I honestly thought it would be more complicated.
I did the auto-homing, and was ready to go.
I had no experience with the slicing software, so that took a bit of YouTubing to make sure I had things right, but it was pretty simple as well.
PRINTING
Here’s where it took a little bit to get going.
I had Googled enough to know I’d need some glue, so I already had that.
However, prints still weren’t sticking.
Here was my a-ha moment:
The z-axis limit switch actually “clicks” before the lever arm finishes moving.
When I was leveling the bed, I put the z-axis all the way down to where the limit switch bottomed out.
Then when it started printing, it would only lower to the point that the switch actually made contact (a couple mm above where I leveled it).
Once I leveled the bed for the height where the switch first makes contact, I made beautiful prints right away.
It took a little over an hour to get everything assembled, and then another 45 min or so to figure out the leveling.
But, as a complete novice, I think that was pretty good!
Now I just need to learn the finer points of 3D modeling, so I can make more complex objects 🙂
It’s been about 6 weeks and I have printed about 30 items. Some took up to 14 hours, but most have been in the 3 to 5 hour range.
I confirmed that I have the 4.2.2 motherboard.
I made a couple of upgrades — the bed springs are now stiffer, and I added a second Z-axis motor and rod. I could not get the CR Touch to work so that was returned.
I use Cura for slicing.
There is a very strong Ender 3 V2 community on Facebook, Discord, and Reddit, and tons of YouTube videos to guide you for performance upgrades.
I have made several upgrades to the firmware, including a free upgrade to the Jyers UI from Github.
I believe the print quality is comparable to other FFF printers using PLA. I have only printed PLA.
I originally gave this product 3 stars, but I am upgrading my rating to 4 stars because I have learned a lot about the industry — and someone from Creality or Comgrow contacted me to offer their assistance.
So I stand by my original review and comments on the assembly and user manuals — that is the #1 thing Creality should focus on improving. Also, they should throw some white rabbit candies in their box.
Original Review:
I just got the Creality Ender 3 V2 delivered about three days ago. It took me one full day to assemble and configure it, another day to print the Dog and the Cat files, and today I decided to install the Creality Dual Z-Axis option and the CR Touch Auto Leveling system.
I’m remembering my younger days when I used to enjoy building PC’s from scratch and installing Windows 95. It was so much better than Windows 3.3. The feeling I get when interacting with this product is the same experience. If you don’t enjoy figuring things out or researching obscure little bits of data from poor documentation then this product/hobby is not for you — come back in 5-10 years.
If you expect to take it out of the box, connect it to your PC and start printing — come back in 5-10 years.
If you like the challenge of learning new technologies, solving technical puzzles, and experimenting with alternatives — this is definitely a good product for that experience.
(For example, I have just finished scouring all the documentation for a hint about the version of my motherboard. It now appears I need to open the case again and search for that information — is it 4.2.2 or 4.2.7?). There are multiple stickers on the box — product ID numbers, serial numbers, shipping addresses, but no indication of a key piece of data — I have already updated the firmware three times in two days. I believe I have the 4.2.7 based on the word “silent” in the product description — but what happens if I pick the wrong one? Will it print fine or go off the rails 8 hours into a print job? I guess I will find out.
(Another example: How do you load the filament? There is nothing in the documentation about that. Luckily I was able to search YouTube and found 3 videos on how to do it.)
Be aware that the assembly instructions are sparse, little mini brochures, and the diagrams are tiny. They have labeled most of the parts (screws come in little baggies that are labeled in both Chinese and English).
Also, be aware that the system only reads FAT32 format, so prepare to scour your home looking for an old 8GB or 16GB micro SD card, or plan to order one from Amazon — alternatively, you can rely on the one that comes with the machine. (I like to have backup copies of things before I do firmware updates.) Micro SD cards larger that 32GB can not be formatted in FAT32.
Thank God for all the YouTube channels, Facebook User Groups, and search engines. They have truly made this possible. Creality needs to pay them for all the free support they are providing.
If I had had to rely solely on the Creality product documentation and the Creality website this product and all of the accessories would have been returned within the first two hours.
I will sum it up this way. I am excited to start a new hobby and learn new skills, but Creality needs to hire some technical writers and talk to some customers about the out of the box user experience.
d’abord arrive dans un carton bien pli, dedans part le plateau, tout est en pice, et bien entendu, notice en anglais, ou en chinois, il y a bien une vido, mais prsente un montage fait par un professionnel, et bien entendu les petites subtilits ne sont pas dans la vido.
enfin, au bout d’environ 3 heures, on la met en route, bien sur rglage du plateau par rapport la buse d’impression, avec une feuille de papier pour les quatre coins, (un coin de rgl, drgle les autres, mais passons), au moment de commencer une petite pice, boum, l’cran tactile (qui d’ailleurs n’est pas tactile),
s’teint, la machine tourne, et faut savoir qu’au niveau bruit, personne ne parle de la ventilation, mais on sait qu’elle fonctionne, mais plus d’cran, aprs quelques recherches sur internet, j’apprends qu’il faut mettre le firmware jour, via la petite carte SD, tout a pour dire, une imprimante 3D, acheter par des gens qui connaissent, mme moi, qui travaille en informatique, j’tais deux doigts de renvoyer le matriel, car il faut savoir en plus, que faire un objet 3D, est une opration dlicate.
Wrong screen missing features not happy
Has the s1 DACAI screen not the v2 DWIN screen
Update: Reduce to 1 star due to seller
Seller is telling me the s1 and v2 are 2 different models which is exactly the problem
What I got is the ender 3 v2 frame with the 4.2.2 board and stepper drivers (still silent but a cheaper model driver)from the s1 along with the screen from the s1 which is a cheaper screen missing features
If you have any plans to upgrade this machine look elsewhere as this is not an original and the dwin screen firmware does not work with this screen thus preventing it from using most custom firmware
which means this is a closed system not an open system as it’s sold as nor Is it an original anything
Cheap move as this screen has no print preview and uses different firmware
I hate when they switch parts to save money which is exactly what they did
Update 2 now the seller is trying to pull a fast one
Stay far far away buy somthing else creality is being cagy about the entire thing hiding the fact they are selling the wrong hardware with the v2 frame to save money
I would return but I cut the bottom out to open the vents on the power supply before I realized what they had done
I should of checked the hardware first then assembled it
Iv got an original ender v2 and the one I received is not even close to the same
Update 3 ever since I sent a pic proving they sent s1 stuff they have had no contact with me horable customer service
I have added a pic of the back of the screen as you can clearly see its not the dwin screen from the v2 its the s1 screen using different firmware making it almost impossible to use custom firmware
Last update seller fixed issue
Great 3D printer easy to construct and use as this is my first 3D printer i have a steep learning curve with new software but that is only to be expected. Setting the printer up is quite tricky till you understand what the setting do then you can set things up quicker. There are lots of YouTube videos to help you get thing right. All in all very happy with this printer and would recommend to anyone wanting to start our 3d printing
This arrived quickly and in good condition. It took about two hours to put together and was fairly simple. I brought up a youtube video and followed that instead of the included instructions. After spending about an hour trying to get the bed level, I was able to get the beginnings of a print out of it. That’s when the screen went all grey. Creality support was very responsive and, after some troubleshooting, sent me a new screen. I plugged in the new screen and it was working again. Getting the bed level has proven to be the biggest challenge so far. The z axis home goes to a different level every time for some reason. It’s very likely operator error or simply an adjustment needed. I think this printer is a great place to start when getting into this hobby. There is a lot of info online and it can be upgraded as you gain more knowledge and skill. I would definitely buy it again and just might get one for my son. Two thumbs up for good customer support!
I will update this if anything changes.
EDIT: 2-10-22 – The Z axis problem has been solved with the help of Creality support (again… very responsive and they actually took it upon themselves to assist when I mentioned it in a thank you email to them). The problem was a faulty(overly sensitive) Z axis end stop switch. I suspected this was the problem and, using a multi-meter, confirmed that even the slightest touch would trigger it. They responded the next day and confirmed my suspicions. I replaced it with a switch from an old kit printer I could never get dialed in and it now homes consistently every time. I’m printing with it again! The only issue I have now is print adhesion and I’m confident it’s just my lack of experience. I see others have had trouble with tech support but that has not been my experience at all. I will update again if anything changes.
Edit – 8-2-22: UPDATE – Had some troubles with bed adhesion but, based on some forum post, unscented hairspray did the trick. Works great now. We have been printing nearly everyday for the last few weeks. This printer works great once it is “dialed in”. So far the only mod has been adding a printed filament guide. The tension pulley bracket on the feed snapped. I have read that this can be an issue with heavy use. Super glue fixed it temporarily but I have ordered an aluminum feed assembly, which should but a big improvement. Been researching additional “upgrades” but I honestly don’t see any that are needed with the type of printing we are doing right now. For what I have invested to date, this printer has been a great value. I will update as our experience progresses.
Le plastique qui protge l’cran est un peu chiant enlever car pris dans les bords en plastiques.
A l’utilisation elle est assez “simple”, il y a des tas de sites pour vous aider, une grosse communaut sur ce modle. Les outils de base pour vos premieres impressions sont fournis et de bonne qualit.
Pensez a prendre une bobine de fil en mme temps car le PLA fournis est fragile et emml donc autant commencer directement avec une vraie bobine.
Investir dans des ressorts ou des plot silicones est indispensable, les ressors d’origines sont trop faibles.
Investissez aussi dans des petits clip papier pour tenir le plateau en verre car ceux fournis ne sont pas pratiques.
Le logiciel install sur la carte mre est assez vieux, les mises jours sont faciles et ne prennent que quelques secondes.
La carte mre est en 4.2.2 et non 4.2.7.
je suis plutt satisfait de mon achat malgrs les petits problmes cits au dessus qui auraient pu tre inclus d’origine et qui gnrent un lger surcout.
Product is simple and amazing. I am looking at functionality versus absolute quality and this is perfect for me. The product has been handy for making anything u can think of. I was able to quickly draw a repair part for a washing machine and that has recoverd a third of my investment here. With some free 3d online files, i’ve managed to make my printer more compact.
Only cons for any enthusiast is the purchase of 3d drawing software if Tinkercad aint enough.
ecommend watching a ton of the million and one vids on youtube if you’re getting one of these and its your first printer.
i think i’ve already upgraded some of the key bits.. the autolevel addition was / is great.
changing the firmware to jyres is also a must have.. and the ui to go with. makes a huge diff.
As a newbe to 3d printing i must say that I am very impressed with this product easy to put together takes a bit to get bed leveled but just persevere you will get there first test print was good have printed alot since then and all seems good print quality is good adhesion is good but bed must be level and a good price for the package would recommend to anyone
Pour l’instant, avec peu de recul, je suis satisfait de mon achat et les premires impressions m’ont sduit par leur qualit.
Attention toutefois, le mtier d’imprimeur 3D reste dcouvrir pour moi et il ncessite beaucoup d’attention et de temps consacrer pour parvenir un bon rsultat.
Les principaux problmes rencontrs sont :
– Le montage de l’imprimante avec une notice anglaise / chinoise pas toujours facile dcripter telle qu’elle est imprime. Je conseille de rcuprer celle qui est enregistre sur la carte SD et l’imprimer soit mme au format A4 pour mieux voir les dtails des illustrations
– Le nivellement du plateau est une opration dlicate la premire fois et si c’est pas bien fait, l’impression n’adhre pas bien et finit la poubelle.
Pour rsumer : Les bons rsultat viendront rapidement si vous pouvez consacrer du temps la dcouverte du “monde” 3D. L’impression est une chose, mais ce n’est qu’une finalit. Avant, il y a la modlisation et le dcoupage qui vous prendront du temps et mangerons vos neurones.
L’imprimante quand elle, une fois bien assemble et rgle donne de trs bons rsultat la mise en uvre de vos penses.
Pour moi qui ne suit pas anglophone, il pourrait toutefois manquer un support technique efficace pour rpondre toute question dans la langue de Molire.
Un grand merci aux blogueurs qui m’ont apprit beaucoup en faisant partager leur exprience.
This is my first 3D printer. Purchased back in May 2021, and leaving this review after 5 months of use.
If you’ve built PCs before or are mechanically minded then it’s pretty straight forward to assemble. Though one pre-assembled part was mis-assembled when I received mine, but not an issue to correct it. Plus there’s plenty of great Youtube content for this machine to get it all running well.
Just take your time, I spent a good half-day or so on it. And don’t use the included sample filament, use a reputable brand.
Tramming the bed (levelling) is the most important thing to get right, and once you’ve got it set, adjust the Z offset for the right amount of material ‘squish’ and be sure to clean the glass bed with isopropyl alcohol between prints and you won’t have any adhesion issues. Never used tape or glue stick etc. Though I have recently switched to the Creality PEI magnetic bed (PETG was sticking too well to the glass) and adhesion is no longer a worry.
Mine printed PLA well with the OEM components, but had to adjust VREF on the steppers when printing PETG in an enclosure (overheating, filament getting too soft to extrude).
I’ve since added a BL touch (a much have upgrade, but learn how to manually tram the bed before you get one is my advise) and my prints come out fantastic with little to no clean up required.
I’ll soon begin experimenting with TPU, but even after 5 months of on and off use, I’m still no expert and am learning new things about 3D printing everyday.
I hope this review helps.
I bought this machine on an absolute whim, I decided I wanted Valorant props and couldn’t find any. So I thought well I’m just going to make them then.
Ive been aware of 3D printing for a long time but never actually looked into it. I remember hearing of the Tarantula and at some point I heard that the Ender is the best in its price class. I did a bit of research and decided the ender is the way to go. The price and features it packs in are absolutely phenomenal. Anyways down to the product review.
1) Set up, this part is easily the most daunting tas for beginners. Fortunately I highly recommend the YouTube video for setting up the Ender 3 V2. That honestly helped me so much, my Y axis isn’t as smooth as the guy on the videos, I can’t push the Y axis frame up and down easily with stepper disabled like he can. This might mean that the stepper motor has to work harder however it’s fully functioning and not too much of a concern, although I wish I’d have been good enough to set it up flawlessly. The whole setup took me about 6 hours.
2) bed levelling and calibration.
This step is the absolute most important, it also shows my biggest peeve about this product. The build quality you get is incredible but for some reason they really just skimped out on the springs to save 0.001 of a penny. The bed levelling is the answer to 99.9% of my problems I had with this printer. On my first day of use I had failed print after failed print. I couldn’t get it to stick, couldn’t get it to not destroy itself during the print. It’s all because of bed levelling. When I first did it I could not for the life of me figure it out. I turned the springs all the way so that the bed plate didn’t hit the stopper switches. I then twisted it too much the other way and the nozzle dug into the glass when I pressed print and it has left a nice war wound on the bed plate. I had no clue what I was doing and was about to give up on the product, until I decided to raise the Z stopper switch up just a bit higher and then started levelling the bed. I finally got there and got my first successful print. However the really bad springs on the stock bed are deffo worth replacing right off the bat with stiffer ones as I find myself having to recalibrate after every other print. To bed level I take a piece of A4 paper and place it on the bed (make sure it’s preheated but be careful as it’s 60c, this is important though as it expands slightly when warm and we are working with fractions of mm’s here. Make sure the bed springs are tightened a lot so that the nozzle doesn’t ram into the bed like mine did, you may have to raise the stopper switch also so that you can get the right height without the plate being too low for the stopper switch on the bed line to activate. Use the auto home feature to get the printers nozzle to the bottom corner, if when the nozzle comes down it rams into the bed then the stopper switch on the side is too low. I had to raise mine so that the bed springs didn’t need full tightening as when I do this they don’t make contact with the bed stopper switch and it keeps trying to move backwards and grinds the motor etc. Something for beginners to check and troubleshoot as it wasn’t completely obvious.
So assuming you have the side stopper to the point the nozzle isn’t ramming the glass plate and the bed springs are not too tight so that the bed stopper at the back under the bed is still making contact you are now ready to center. Take the paper and place it on the bed under the nozzle twist the springs so that they become more lose and the bed is heightened. Do this very slowly on the bottom left corner and wiggle the paper. The paper should have resistance from the nozzle now but still move around without tearing or being cut up by the nozzle. Once done move to the next corner and repeat. Go around multiple times! Doing it once is not enough as adjusting one effects the others, go around multiple times until you’re completely satisfied that each corner has resistance, not too much and not too little. Once done it’s ready
Now it’s time to print, the Ender software for slicing and gcoding is okay but I prefer to use the prusa slicer program, that’s probably just personal preference though. Make sure to enable support structures in the options tab. It’s not on by default and it will save you many many times. Finally I am using a glue stick to ensure I get full adhesion to the bed when printing.
TLDR amazing tech for the price, it’s gotten me absolutely hooked on 3D printing. A massive headache of a printer for the first few days as you get to learn it and get better at the bed levelling. Just stick at it and it’ll click eventually, once it does you will be blown away at what you can achieve.
If you don’t want any of this headache and are prepared to spend up to 1k. Just buy a prusa printer they auto level and are basically just plug and play lol you can buy it fully preassembled too.
If you want to learn and make a printer farm on a budget just get like 5 of these aha. Moral of the story, throw yourself in there. It’ll absolutely kick your ass at first and make you want to hit a wall but you will get better and take it baby steps at a time to learn and problem solve. You won’t regret it and will reach a point where the things giving you all that headache are now just trivial
I bought this printer as a hobby, and it’s not often failed me, the adhesion on mine is a little janky so I’ve invested in something that helps it.
Can’t comment on the tech support as I’ve never needed to use it, although I’ve heard it’s not very good. People have posted problems and solutions online which have helped any hiccups I’ve come across.
Good little printer. Bit frustrating for a novice like myself but that’s on me, not the printer. A few days after owning it and figuring out how to use one, (bed leveling, adhesion, cleaning clogged nozzles, etc.) I can now print and I’m quite pleased with it.
Would I buy it again? I probably would.
I am new to 3D printing (well I was a few months ago when I bought this) and got this as a relatively inexpensive option. Used recommended (in other reviews) youtube videos to construct without issue. Some things I have learned in the few months I have had it:
Leveling is VERY important – the stock springs are rubbish – replace them straight away, costs just a few quid.
DONT use isopropyle alcohol to clean the base – it trashes the coating – new base required.
Make sure your PLA is sticking properly before leaving the printer (see leveling is important!) – led to the print head (hot end) getting completed coated in PLA and needing to be replaced.
Pretty much every part is replaceable/upgradable at a relatively low cost and without too much fuss.
Would thoroughly reccomend if this is you first foray into 3d printing, relatively easy to correct fairly catastrophic errors!
So this is my first ever printer after years of watching youtube videos. For the price its not a bad first printer but there is a sizeable learning curve and tuning that is not very first time user friendly that i had to work past. Firstly assembly which you think is easy but to get it right requires fiddling that is not explained in the manual or most mainstream guides. When i first built it after a week of tweaking i was close to returning my unit as i believed it was defective until i found a really good build guide.
For a good build guide i recommend “Creality Ender 3 assembly and pro build tips” by “tomb of 3d horrors” on youtube he goes into a lot more detail and tuning that the big guides dont (yes its for the v1 but the V2 and V1 are basically the same unit.
All in all the printer seems good and i have done some handy prints and made some cool things. If you are on the fence i will say its worth a buy just dont expect a plug and play machine but follow his guide and you will have a much better starting point than i did. Wish i had made the leap into 3d printing earlier.
Tips
follow the guide by the guy i linked.
Buy the yellow bed springs before you build as they do make a difference.
Buy some vacuum seal bags to store your filament.
Just take your time building it.
Buy some good quality pla filament like esun which prints at 205c.
Have fun.
Took me a little longer than the hand book said, but it was worth it.
They were printing on it within 2 hours of me putting it together, and they have not stopped since. They have even done their engineering course work on it. Worth every penny.
The official assembly video is much easier to follow than most of the YouTube versions. Took much longer to assemble than their estimate. Worth the wait as it produces great 3d prints.
I am new to this and successfully printed a support for the filament in order to have a more straight-line input.
I am so damn happy 🙂
I did spend a lot of time reading about the newbie mistakes and common issues and that helped a lot. I suggest you buy a few upgrades which I did buy and I will explain why:
– springs: the stock spring won’t keep the bed stay still forcing you to adjust it frequently. A great spring will allow you to print for months without worrying about it. https://www.amazon.com.au/gp/product/B07MYD76X9/ref=ppx_yo_dt_b_asin_title_o01_s00?ie=UTF8&psc=1
– extruder kit: the stock kit is plastic made and it often breaks or cracks: Do yourself a favour and buy a metal one. https://www.amazon.com.au/gp/product/B085VKQVT6/ref=ppx_yo_dt_b_asin_title_o00_s00?ie=UTF8&psc=1
– filament tube: the stock one has a poor push-in pneumatic fitting. You might experience the tube moving when it was supposed to stay still. Some users have bad luck and it disconnects causing a big headache. Buy the kit or a better fitting. If you wanna print over 245c I believe, you cannot use the stock tube coz it will start to release dangerous smoke. https://www.amazon.com.au/gp/product/B07KXW6PFG/ref=ox_sc_act_title_1?smid=A19TILOHIRABXO&psc=1 and https://www.amazon.com.au/gp/product/B07P87XHGL/ref=ppx_yo_dt_b_asin_title_o01_s00?ie=UTF8&psc=1
Don’t rush to assembly it. Take your time, check every screw, angle, everything. It took plus 6h to assembly and install the upgrades. I am happy with the outcome. I still need to improve a bit but that is on me.
Awesome equipment. It is worth the money, every single cent.
Totally gobsmacked with the quality of this machine, took a while to level the bed but after that the quality was awesome, recommended to all
I also ordered the “Ender 3 Springs, Creality Upgraded 4PCS Hot Bed Die Springs with 4PCS Aluminium Hand Twist Leveling Nut for Ender 3/3 Pro/3 V2, Ender 5/5 Pro/5 Plus, CR-10, CR10S/10S Pro, CR 20 3D Printer” kit. This replaces the springs that come with the Ender 3 printer and is a more sturdier spring (hot die spring) instead of the less sturdier spring that comes standard on this printer. It will keep your bed level after several prints.
Also, make sure that you check the belts for the X and Y axis after several prints. All you have to do is to tighten the knobs just a fraction of a turn, but make sure not to overtighten.
My friend printed me some additions, which we found on “Thingiverse.com”, to add onto my printer which really helps, one is a pulley wheel that attaches to the side of the printer to help streamline the filament from the spooler to the extrueder so that it doesn’t crimp when printing. Also, I have printed several items that I downloaded from THINGIVERSE.COM and all of them turned out great. I found out from my friend that using blue painters tape and the Elmer’s Purple glue stick really helps the different filaments to stick to the surface. Put the blue painters tape down and then level your bed and once leveled, then use the purple glue stick on the painters tape and smooth with your finger. I also downloaded the slicer software “CURA” (the “slicer software”) to create the “gcode” that this 3D printer uses to print your items that you download from “THINGIVERSE.com”. There is a “slicer” program that comes with the printer on the SD Card and it looks just like “CURA” but Creality just added a few other things to make it look a little different. Either “slicer program” will work. I have also purchased about $200 worth of PLA (harder) and PETG (softer) filaments. Should not be running out of that anytime soon. Overall, Creality does make a great printer and so far, I have not had any issues to be really concerned about. Overall, I give this printer a 5 out of 5 stars. Just do your research on what you and your friends are likely to use. I am very pleased and recommend this printer to everyone. Those people that are giving this device bad reviews are ones that have no idea on what they are doing and have not done the reasearch in order to make this thing enjoyable. You just can not setup this printer and expect it to automatically print. There is some work involved and once you do the research and learn from those that have gone thru these situations, i guarantee that this device will be the next fun thing that you will ever own and have fun using day-in and day-out. I am glad i had the expertise from my friend or I might be giving some critical reviews also. Do your homework. I think this is the future toy that everyone will have in their household. Happy 3D printing!
19 April 2021
I have had this printer for almost 3 months now, and i can say that I have had no really big problems with this 3D printer from Ender. Yes, there is a few twikking that needs to be done from time-to-time, but if you have the patience, this thing can really be fun for you and the family. Once again, the biggest thing is getting the bed level but usually you don’t have to worry with that until after 8-10 prints. Again, i use the Blue Painter’s tape for the filament to adhere to and i also used the Purple Glue Sticker. For smaller and more detailed prints, using these 2 things can make for removing your print a little difficult. I use a little rubbing alcohol and it will come loose. For finer prints where things are more detailed, you might also want to slow the speed of the print from 100% to about 50-70%. I have printed some pedals or flowers for the hummingbird feeder that i made and the print speed needed to be adjusted and really did a fine job. Using the faster speed (100%), the detailed flowers were messed up. I would still recommend this to everyone. I enjoy my Ender 3D printer everytime i print something. Good luck.
Easy to assemble and first print was good. Had some layer movement on longer prints but this was fixed by tightening the axis pullies with the adjustable screw.
Bed adhesion was not that good at first but this was fixed by slightly increasing the extrusion rate and cleaning / very lightly sanding the glass bed with fine sand paper. If it wasn’t for this would be 5 stars. Have since got newer bed upgrade and adhesion is no longer an issue. ( small prints with low bed area still need raft)
Have upgraded with bltouch and happy with my new printer. My son likes Zelda and have printed some awesome prints from thingiverse ( not my stl creations )
Die Lieferung erfolgte schnell, Verpackung war sehr gut
Der Zusammenbau, dank Youtube Videoanleitung eigentlich kein Problem. Wo man bei den aktuellen Modellen mit Glasplatte aufpassen mu, ist bei der Montage des Y-Achsen Endschalters (der mu ca. 3 mm hher befestigt werden) ansonsten setzt der Druckkopf bei der Auto Home Funktion und beim Kalibrieren auf der Glasplatte auf.
In der Zwischenzeit sammle ich die ersten Erfahrungen bezglich Filament und Druckbett Temperatur beim Druck kleiner Tuningteile fr den Ender 3D V2 (sind im Internet zu finden)
Derzeit bin ich sehr zufrieden mit dem Drucker und hoffe natrlich das es so bleibt 😉
The first one worked wonders. That’s how I know it’s a great machine. Everything about these machines is great, but!
My new one doesn’t work at all.
I set it up, started the Auto home. And it does nothing. The screen just gets stuck on auto home. Until I have to turn the whole machine of again.
As I’ve stated, I’m new to this skillset, so I won’t pretend to be able to compare it with others, but for all you people thinking about getting into 3D printing, I’ll lay out what you’re looking at getting into…
Upon receiving it, you’ll have to do a bit of assembly. Nothing too complicated, and there are many walk-throughs on YouTube, that can guide you through the entire process. Its not a must, but having some experience with tools and a bit of problem solving skills will help you out a lot. By the time you’re done, you’ll have a grasp on how your printer works, which is important when it comes to using and maintaining it.
Once you’ve got it set up, the next thing you’ll want to do is look up installing filament and leveling the bed. Again, search for YouTube videos, especially with leveling the bed, because you’ll want to pick up a good strategy on this, as it’s critical to having success with your prints. The best strategy that I’ve found is the one using the sheet of paper. At first, it might feel a bit overwhelming trying to get everything just right, but as you use this skill, and lay down some plastic on the bed, you’ll get a feel for it, and within a couple weeks you’ll be able to do it blindfolded, and you’ll understand why it’s so important, and what areas you need to pay the most attention with each print. I strongly recommend getting the yellow spring upgrades that you can find on Amazon. Honestly the difference is so drastic, and the cost so cheap, I dont understand why it doesn’t come that way.
Once you’ve gotten bed leveling down and the filament installed, you can print an example that’s included on the SD card, and give your printer a test run.
From here, there are 2 ways you can go about creating things. You can search the web for creations already set up for you to print, or you can create your own. Im not a very creative person, but it made no sense to me to limit myself with other people’s creations. So I’ll just briefly get you pointed in that direction.
To create designs you’re going to need CAD software. I found Fusion 360, it’s free for hobbyist, and I think it’s amazing. Its got a bit of a learning curve, but once you get comfortable with it, you feel the world is yours to create. Using geometry, planes, and extrude tools, you’ll be able to model anything you want in real life, or anything you could possibly think of…
I have no affiliation with this person, but their tutorials have helped me so much with the software, that in about 10 days I am now designing my own creations like an experienced user. Seriously, search for Product Design Online on youtube…you’ll know it’s him because he mentions his name in the videos and it’s Kevin. He teaches so many helpful techniques. Just be aware that his tutorials span 2 different versions of fusion 360, so the interface looks a little different in some, but you’ll get the hang of it easily. One if the best teachers I’ve found on the internet, period.
The next thing you’ll need is a splicer software. This software takes your design and slices it into layers. This is where you’ll set up the parameters for how your printer will behave during the print too. Such as temperatures, speed, layer thickness, etc…the amount of terms you’ll have to learn seems overwhelming, but at first you can just use presets, and learn them as you go. As I’ve said, I’ve been doing this for 3 weeks, and I’d say I understand about 80% of this terminology simply by trying to solve errors in my print, and reading the tool tips.
By far, the best free slicer I’ve found is cura. I’ve tried a few others, but nothing comes close to it. However, I’ve been told Simify3D makes cura looks like a junky slicer, comparatively. The issue for me is that it costs $150, and I dont have that cash flow. If I did,bid definitely want to try it out, and apparently you can purchase it and get a full refund after 1 or 2 weeks if you preferred cura.
So, it’s a lot if stuff to learn and get used to…You’ll be best served if you have a mechanical & technical know-how, but if you dont, you’ll definitely acquire those skills using your printer.
There are upgrades for these printers. Not just creality, but all the hobby 3d printers, and you’ll learn them over time, but as I stated earlier, the bed springs are a must have, and they’re cheap.
I wish you the best of luck on your journey, and if you’re like me, this will probably become your most favorite that you’ve ever owned.
Happy printing & #PrintO
I went into this knowing that a 3d printer is incredible but intro models require a lot of tuning. Setup took me about 1.5 hours because I took my time along the way. There are fantastic youtube videos that walk you through the setup. Use this instead of the directions that come with the printer. The videos will show you all the nuances and bolts to tighten that you might have ignored.
Tips:
* Consider upgrading your bed springs. I’ve seen a lot of people online suggesting this. It’s very cheap and some swear by it. Bed leveling is CRUCIAL
* purchase upgraded Tubing (capricorn is considered excellent) and the couplers. Most videos I saw suggested this as the tube couplers wear down by design. You’ll want spares either way but installing the tubing and couplers before everything is set up may be a bit easier.
* Bed-Leveling. Use the paper technique (google it) and make 3-4 rounds across each corner since tweaking one corner can affect corners you just adjusted. Until I got this perfect, my first prints were awful. I stayed patient though and continued fine-tuning it. After 4-5 aborted stringy prints, I got one to work and after a couple of micro-adjustments to the bed, it’s been perfect.
* Hot-end nozzle height (z-axis) – If your bed isn’t level, you’ll have print issues since the nozzle height will be higher or lower depending where it on the bed. Apparently this is bad as I found it. If your nozzle is pressed up against the bed, that’s bad and if it is too high, same thing. If your initial prints aren’t as desired, continue tweaking the bed and the nozzle height.
* If you have any issue, google it. There’s a giant community of helpful people.
* A BL touch sensor apparently takes the guesswork out of bed leveling and is highly recommended. The kit for installing it depends slightly on which Ender 3 model you have so pay attention to that. And make sure it’s the real BL touch and not a knockoff. And also make sure it comes with a bracket (mine didn’t, but I’m looking to print one). It’s good to learn the mechanics of manual bed-adjustments first and upgrade later but I imagine it’s pretty awesome to not worry about that any more.
Software that works really well with this printer is Cura (I’m on a mac). Grab some print models off thingiverse, slice them with Cura (a slicer converts the design file into printer-executable code specific to your printer profile) and you’ll be off and running. My first prints are little drawers that fit into a tiny drawer holder… for my screws and other little printer widgets.
Highly recommend this printer if you like tinkering. Ikea-level build skills are needed. Slightly above average computer skills are needed to be able to print beyond the couple that come on your SD card.
Ich habe mir die Anleitung noch einmal als PDF heruntergeladen, mit Word geffnet und dann ins Deutsche bersetzen lassen….
Als erstes ist aufgefallen, das das Gewinde des Querbalkens nicht in Ordnung war und nicht hielt. Die Schraube war nicht lang genug und hielt der Belastung nicht aus – Das Gewinde des Quertrgers war hinber. Ich habe mir mit einer lngeren Schraube, die durch den gesamten Corpus reichte, geholfen. Demnchst bekomme ich noch Nutensteine und dann wird das Provisorium behoben. Als nchstens ist der Drehencoder der Steuereinheit ausgefallen und musste getauscht werden. Nur gut, das ich immer ein paar Exemplare fr meine Basteleien auf Vorrat hatte und ein passender dabei war – sonst wre das Weihnachtsfest enggltig ins Wasser gefallen.
Zum Abschluss noch eine Empfehlung: Ziehen sie ALLE Schrauben der vorgefertigten Einheiten nach!
Auf Grund dieser Mngel kann ich das Produkt nur mit befriedigend bewerten, obwohl es ein ausgezeichnet verdient htte…
Der Kundendienst hat schnell reagiert und mir Ersatzteile geschickt !!!
Der Drucker wird in einem mit Styropor ausgefllten Karton sicher angeliefert. Fr den Aufbau habe ich mir ein YouTube-Video angeschaut, da ich das deutlich anschaulicher als die beiliegende Anleitung finde (kleiner Kritikpunkt). Der Aufbau selbst ist aber auch fr ungebte mit etwas Geduld in maximal 2h durchzufhren. Das notwendige Werkzeug ist im Lieferumfang enthalten.
Fr eigene Konstruktionen nutze ich Autodesk Fusion 360 und als Slicer die Software Ultimaker Cura.
Der Drucker ist sehr einfach und intuitiv zu bedienen. Die Druckergebnisse sind fr mich wirklich unglaublich, vor allem, wenn man mt den Einstellungen (in Cura) etwas spielt und das Maximum aus dem Drucker herausholt.
Whrend des Drucks hrt man nur den Lfter, keine Motoren oder Verfahrgerusche. Der Lfter ist aber bei maximaler Stufe doch recht prgnant.
Tipp:
Der Feeder, der das Filament einzieht, sollte immer mal wieder gereinigt / abgesaugt werden. An den Zahznrdern, die das Filament einklemmen und voranschieben, sammeln sich auf Dauer Rckstnde des Filaments. Dadurch sinkt die Reibwirkung des Vortriebs und es kann im Extremfall zum “Durchrutschen” kommen, wodurch das Filament nicht korrekt eingezogen wird.
Fazit:
Abgesehen von der fr Anfger etwas umstndlichen Aufbauanleitung ist der Creality Ender 3 V2 ein spitzen 3D-Drucker fr Einsteiger und auch Fortgeschrittene. Creality bietet eine riesen Community, wodurch man bei Problemen in etlichen Foren immer eine Lsung findet.
Wer in den 3D Druck einsteigen will, macht mit diesem Drucker fr einen fairen Preis nichts falsch. Die leisten Motoren und das beheizte Druckbett sind weitere groe Pluspunkte und liefern ein erstklassiges Druckergebnis.
Trs satisfait de l’imprimante , nanmoins du de l’cran tactile qui n’existe pas sur le modle reu et qui pourtant est bien mentionn dans la description !!
Sinon cette imprimante est vritablement la meilleure dans sa gamme de prix pour les particuliers.
Dommage pour la cinquime toile .
Have noticed it doesn’t seem to save the setting on the printer it’s self. As soon as you start a print from the SD card and set it up to whatever temp and speed setting you want once the filament reaches it’s temp it goes back to default and you have to set the temp and speed again, but that may be something I’m doing wrong. Also tested it from a USB wire direct from a PC and worked great as well.
When using a slicer the settings on the printer get overridden to whatever the settings the slicer were set to. Again I think this is something thats normal as I’m still learning, but still wanted to mention it just incase.