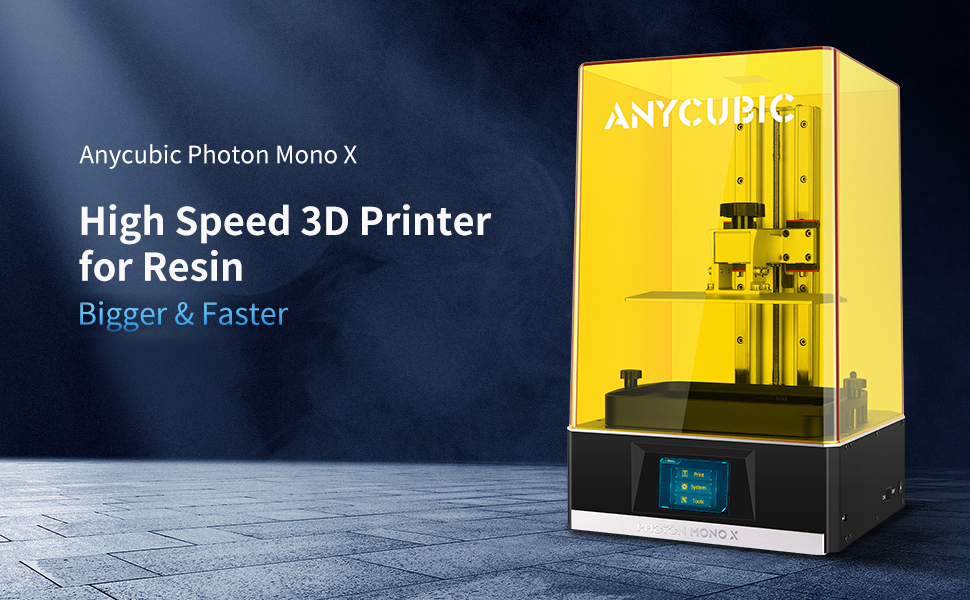
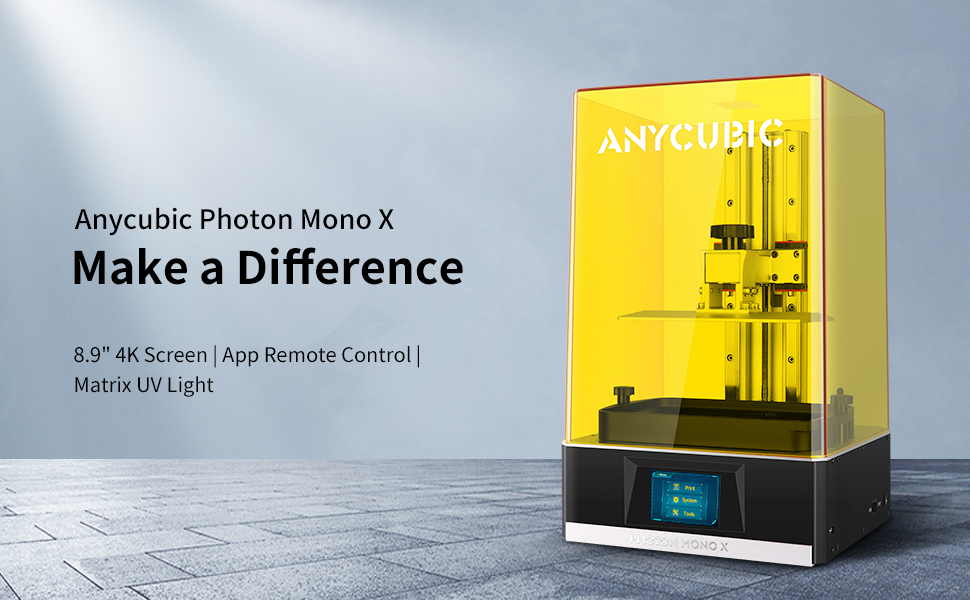
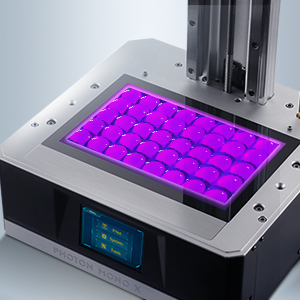
ANYCUBIC 3D Printer Photon Mono X UV Light Curing LCD SLA Resin 3D Printer with 3840*2400 4K Monochrome LCD Screen, Fast Printing and Wifi APP Remote Control, Print Size 192 x 120 x 250mm
| Weight: | 11 kg |
| Size: | 7.55″x4.72″x9.84″ |
| Dimensions: | 39 x 37 x 60 cm; 11 Kilograms |
| Model: | 7.55″x4.72″x9.84″ |
| Part: | UK-PMXA0BK |
| Colour: | Yellow |
| Pack Quantity: | 1 |
| Batteries Required: | No |
| Batteries Included: | No |
| Manufacture: | ANYCUBIC |
| Colour: | Yellow |
| Dimensions: | 39 x 37 x 60 cm; 11 Kilograms |
| Quantity: | 1 |
| Size: | 7.55″x4.72″x9.84″ |
first off i would like to state that i do not print resin items for a job, i am just a hobbies/enthusiast.
i have been using a Ender 3 Pro for a while now and i was becoming frustrated that i couldnt print super fine and high detail prints on it, i sorta walked into it knowing i wouldnt be able to, but still.
i spent a fair few months searching around for resin printers, pondering if it would be worth the purchase, comparing resin prints to filament prints online until i eventually had enough saved up to bite the bullet and go for it.
i chose this resin printer as there seemed to be a high enough amount of good reviews of people having positive experiences with it to just go for it, i dont just look at the negative reviews and walk away, i never have bought into nightmare stories being the end all of products.
the item arrived quickly as is expected with amazon products, the package contained the resin printer pre assembled (it took a few hours for me to build my ender pro, so this made me happy)
inside the box had included gloves, face masks, and coffee filters, the gloves imo was an okay touch, but no where near enough to print more then a couple of times before you will need more, the face masks are worthless and should be binned, if you are concerned about what you are breathing when resin printing then invest in a proper mask with safety rated filtration, the coffee filters are a nice touch, although like the gloves, you are going to need loads more.
as for the printer, it was in brand new condition, no “i received a clearly used product” horror stories from me!
along side this was the USB which holds the slicing program needed to form the prints you wish to use, a test print, which i always advise running first to see if you have set it all up correctly, and plenty of space for any print you would ever want to place on it.
the included instructions i had no issues following, they do lay out the steps in my opinion clearly, yes you have to use some amount of thought process of what is being asked of you, but honestly it wasnt as bad as some of the instruction manuals im sure we have all received as part of flat pack furniture.
so onto the actual printer, i guess i will start with some bad points for fairness before we move to the good parts:
1. the screen isnt super accurate, rather then tapping on the buttons you have to sort of exarate where you tap, for example the back button i have to tap in the very bottom right of the screen to use otherwise it opens up the print next to the back button
2. the screen protector doesnt actually fit the screen, like at all, its about 4mm to big in every direction leaving raised plastic in the corners (screen protector for the resin screen, not the touch screen)
3. this isnt really a negative worth being bothered by, more a note for possible future versions, the UV protection case placed over the printer can sometimes be a pain to get to sit right before it will allow you to print
now onto the good parts, the real reason why you are here:
1. the prints are amazingly high quality, i honestly havent printed anything that has any notable layering (printed at 0.03 layer height)
2. once you get the hang of how to set supports up in the software everything prints on this thing, no matter how complex or fine
3. its quiet when it runs, the loudest part of the entire assembly is the motor, and its almost reassuring to hear as you know your print is on its way
4. the vat does not require you to completely remove the screws to slide out, this might seem small, but it limits the chances of dropping the screws into the resin by ALLOT
5. COST, lets be fair, for 99% of us the cost is super important, and this to me seems like allot for your money, a 4k resin printer for this sort of money is not something you will come by every day
6. touch screen! yeah i know i have mentioned about this in the bad parts, but it is sorta cool to have lets be fair, a commodity, which has the extra touches that make it seem higher quality and as such, higher cost, without actually having the price tag attached
Now i will be the first to admit that you do have to buy allot of other stuff to make resin printing a reality, i opted for a ultrasonic bath and a UV curing booth which is not the AnyCubic brand one, i did this simply due to the cost difference, a ultra sonic bath, and a UV curing booth along side a pack of gloves, and two bottles of isopropyl alcohol (needed for cleaning the resin prints after printing) cost less then the all in one units others offer, but im still happy to report that my resin printer so far has been nothing but a pleasure, if its a reassurance to you, i also was worried when pressing buy, it seemed to good of a deal, but honestly it seems to be holding out so far!
i can not talk in regards to longevity, all screens will eventually fail on resin printers, however im hoping for years of service before this happens rather then months, if it fails to soon i will come back and make a comment updating this, but so far so good!
i also cant talk in regards to tech support, i havent had to use it, so i cant comment on it, hence why 0 out of 5 stars, i cant rate what i havent used!
happy shopping, and happy printing!
Some of the reviews for this printer are not good, various issues and problems and poor quality made me a little bit nervous of purchasing this unit. However, the offer price was good and the vouchers added made this too tempting to pass. I am very pleased that I did.
Mostly I intended to print tabletop figures for RPG and wargaming, so don’t really need a large scale printer. This is why I was looking at the smaller (cheaper) versions. The Anycubic Photon 4k has some good reviews online and in general while it has a small build scale it is more than adequate for my purposes.
I admit I ordered this with some trepidation, bad reviews may be a personal experience of that buyer, but they carry some weight when making a purchase decision. Still, I went ahead and ordered this. I figured if it really was terrible, then perhaps the Amazon returns system would protect me.
Anyway, ordering this over the Jubilee weekend meant delivery was a little longer than usual, but that’s okay, it was a fun weekend. The boxes for this and the wash and cure unit arrived – amazingly undamaged – and I put them aside for unpacking later in the day when we were less busy.
Packaging is pretty extreme for this and the wash/cure unit. Lots of foam shielding to protect the parts and several boxes containing extra parts and the power packs. So, unpack very carefully, you don’t want to leave anything behind in the packaging. Also, I would recommend you keep the boxes and packing for at least the length of the warranty. You never know if you might need it.
There’s more than a few pieces for this and the wash/cure though the main printer and wash unit are only two pieces. Base power and control and transparent yellow cover. Assembly is simple of you follow the instructions, but care must be taken. I would also recommend you wear either silk non-static gloves or a pair of surgical gloves as you don’t want finger prints on any of the surfaces. The resin tray for the printer is particularly fragile and must be handled with extreme caution. There is a thin transparent layer at the bottom of the vat which allows the LEDs to burn through and solidify the photo-sensitive resin. This is quite brittle as far as I can tell and can be easily damaged. Any damage to this can result either in poor quality prints, leaking resin or other issues. So, be really careful with this piece.
Setting the build plate and levelling is surprisingly simple. All tools you need are provided, so you don’t have to go rooting through a tool box to find things during assembly. Follow the instructions as given in the leaflets and you shouldn’t go too far wrong.
It took me about 20 minutes to assemble the printer and level the build plate. At which point the leaflet guides you through the first print. A model is provided on the included USB stick and this is fine for a test print. As it is a relatively complex wire cube with Anycubic Photon labels inside it can take several hours to print – depending on settings you choose when setting up the print.
First print for me was just about perfect. The wire cube printed perfectly, no skips, twists, ridges or breaks in the print showed that I had levelled the plate correctly. Next was the wash and cure (separate review.)
I have since run five more different print jobs through the printer (currently I’m using the Lychee Slicer, though I intend to try out Chitubox next). Each of the prints has come through clean and detailed with no print errors and no problems. I am a very happy person. Now I can print a whole bunch of the tabletop/wargaming stuff that I bought this printer for.
A variety of extras are provided by Anycubic including screen protector, scraper (to remove models from the build plate), paper face masks, hypo-allergenic surgical gloves (large), hex keys for adjusting and levelling the build plate and a plastic scraper.
It may be worthwhile investing in a magnetic build plate addition as this will save you having to remove and re-mount the build plate every time you print something. This will also help to extend the life-span of the main build plate, in my opinion.
Other than that, the only other items you may need are a container for resin left in the vat – you don’t want to leave resin in the tray for too long between prints as it may start to go off. Preferably an opaque container so uv light and other sources don’t turn the resin. As such, do not leave the printer or resin in direct sunlight.
The resin I used is the Anycubic resin, and while there is very little odour, it is still there, so make sure wherever you put this printer it is in a well ventilated area. I’m fortunate that we have quite large rooms so this is fairly easy for me to achieve. You will need to think about this carefully as you do not want to be breathing resin fumes due to close proximity or poor ventilation. I am reliably informed that the various “filters” you can buy for these and other units are mostly ineffective. The other thing that you need to remember is that the printer needs to be mounted on a firm flat and level surface.
Build quality is excellent. Overall finish for the various parts and pieces is extremely good with no rough surfaces, burrs or edges. Everything fits together snugly and performs as you would expect. I presume from the yellow colouration to the cover that there is some UV protection built in, but still take care to make sure the printer is not in direct sunlight or subject to UV light.
General print speed is good, I had four fairly complex figures go through in just over an hour. Resin usage is also good and a litre of resin will give you quite a few models, depending of course on what you are printing. A certain amount of care is required when printing models as they must have drain holes or you will end up with resin liquid sloshing around inside the model. Most good model makers providing models for printers will already have taken the necessary steps for this, but a lot of the free models that are available will not. So, be careful what you are printing. Chitubox and the paid version of Lychee both allow you to make holes in items to drain them, but care still needs to be taken.
Print quality is excellent and it is possible to print models with really fine levels of detail with this printer. As with anything, you need to think what you are intending to do before deciding to purchase a printer. This is fine for my purposes as the majority of what I intend to print is fairly small. If you are intending to print larger models, like busts or figures, you might want to think about getting a printer with a larger build plate. Many of those models can be made with this printer – provided they have been cut into pieces. But the large one piece models out there are too large for this printer, and unless you know how to cut something up in modelling software for assembly – get something larger.
Comparing this to the filament (FDM) printer I have, this is faster, cleaner and much quieter. Print quality is comparable, but to achieve what this printer can do, I’m looking at extremely fine level settings and a 0.2mm head on the FDM printer and several days to print what this can do in a couple of hours. I won’t be getting rid of my FDM printer, it still has a lot of uses, but in speed and quality, this printer beats it hands down.
Costs for running. LEDs do not run away with electricity in general, which is why changing light bulbs for LED is a good way to save money. Watching our smart meter it is considerably cheaper to run the resin printer than the FDM printer. About a quarter of the cost in electricity for the same model. However, the cost of resin is higher than PLA filament, so it all weighs out. In general considering time, materials and electricity, the resin printer is more efficient and cheaper. But, only by pennies, not pounds. The biggest benefit is that the resin printer will produce excellent results with a lot less setting up and adjusting of parameters, and faster, so in time saved the resin wins hands down. The difference here is quite surprising. Taking a relatively basic Scottish Napoleonic war soldier in 28mm, the resin printer is done in just over an hour (including set up time). The FDM printer took 20 minutes to set up the parameters and over four hours for a similar quality print. In close detail the resin print was better, though with careful painting I would suggest this difference is negligible. However, the resin printer will allow me to print a dozen figures whereas the FDM in a day will only print 3 maybe 4
Overall I’m very happy with this purchase. Once the printer is set up there is nothing more to do. Setting up models for printing is a different matter, but most models you can buy will already have supports included. Free models however do not, and this is where it will take a lot of work and time to set them up effectively so you don’t get a messed up print. I am very satisfied with the print quality and the print speed and while I won’t be ditching my FDM printer any time soon, this is definitely an addition to my toolset that will get a lot of use.
In my opinion, with a little care in setting this up, and taking your time to follow the given instructions this is an excellent entry level resin printer that will have you turning out great quality models very quickly. Perfect for the hobbyist and gamer it may struggle a bit to provide for the big scale movie fans.
As a child who never grew up, this is a wonderful addition to my toy sets and will provide hours of amusement. No regrets here. However, my wife might be rolling her eyes behind me.
edit to add photos. My wife suggested that my review might be a tad more viable if I post a couple images of the things that I have printed. The photographs are the three initial prints, the test cube, and some tabletop gaming figures.
Further edit to add:
In regards to the PFE sheet on this printer. The one provided is a plastic frame pfe sheet, which slots into the bottom of the resin vat. You cannot just buy PFE sheets for this, you must buy the actual units for this printer. These are available but you only get two. The alternative is to invest in a different plastic resin vat that fits this printer which has a metal fixing frame, this will save some money in that you will be able to use the cheaper PFE replacement sheets. Cheaper because they don’t have the sealed plastic frame attached. Now, the printer does come with instructions not to use a metal resin vat. I can understand why as there’s a good chance such an item will damage the screen – or if you have used one, the screen protector. The frame that holds the PFE sheet is slightly indented into the vat tray. This I presume is to prevent the metal screws scraping on the screen. This means, that you could use a metal frame from another vat tray to replace the one included. But, to be honest, it’s a lot less hassle to just buy a different resin vat that already has a metal frame in it.
The reason I suggest this is that the plastic framed PFE that fits this printer are difficult to find, there’s only two (as opposed to five) pieces in the pack and they are more expensive than just the sheets. If you try to replace the PFE by cracking the plastic frame open, there is a very high chance that your resin will leak all over the printer. This is not a good thing, and needs to be avoided at all costs.
I kind of get why Anycubic went with this idea, as it is easier for the end user in that you just slot in the complete frame and PFE sheet and fix it down. No messing around trying to fit a plain sheet and keep dust, fingers or other articles off it while making sure it is fitted well and tensioned well. In many ways the sealed frame is much, much easier for beginners and new users. It is just a real pain getting hold of them.
The final thing to consider here is when replacing these plastic frames they do need to be screwed down tightly to the resin tray. But, not too tight. It is a plastic frame, and if you are too heavy handed with them the plastic is likely to fracture. Again resulting in a leak.
Everything with this and probably other resin printers, requires caution and great care when doing anything.
Anyway, just a thought to go with the other stuff here.
Great printer. However for the new starter like me some tips that worked for me. I used water washable resin as it is cleaner to use but do still take care. The Lychee slicer worked best for me. Double check the settings for the resin you are using. Follow the recommendations that come with the resin. Print quality is all in the supports. Someone told me that for a new model it can take on average 5 attempts to get the supports right. The auto support function seldom works so learn how to provide manual supports.
This is my first 3D printer, so I don’t have anything to compare it to. Setup took a small amount of work, as it required a firmware update before it would print anything other than the demo file. Still, it wasn’t difficult to update, and it’s working nicely now. Thanks! 🙂
Easy set up, easy to use however WIFI setup is a little confusing and the protective yellow lid to the printer was very slightly warped (nothing a little time out of the box couldn’t fix).
Other than the above, just user experience to get the print process perfect as have builds sticking to much to the build plate.
Would highly suggest this product for those looking to get into 3D printing OR those wanting a larger build machine.
Had issues with a faulty printer at first. LCD screen was not working as it should and there was a broken cable connector.
Tech support was not of much help. and just told me to take the new printer apart and check the screen connection. in the end, i had to return the printer but it took 2 weeks to get a refund. as i needed the printer for a job i was doing i had to buy another one before i go the refund!
The second one works ok at the moment.
I have really enjoyed using this printer, I’ve had it for a few months now and the consistent quality of prints is much better than I’ve experience. Converting to a mono screen printer has opened my eyes with prints taking much shorter to finish. The build quality is amazing as expected and I love the large build volume giving me much more flexibility in what I can print. I’d definitely recommend this printer to anyone who want’s to get into resin printing or is looking for an upgrade.
Great printer with a good build plate size.
Only thing to remember is you need space above the printer to remove the cover.
bought as got sick of waiting for saturn
lovely machine, only gripe is lid should be hinged at this size
Overall I’m very happy with this purchase and it will produce many amazing prints for me! Thanks Anycubic!
I bought this printer on recommendation from a friend , I already have multiple resin printers . And this is my second larger format resin printer . This is a well built machine very robust , and quality materials used . I would highly recommend anyone to get one if you are looking to go into the larger format of resin printing .
After a few iffy test prints, I finally started to get the printer dialled in for my resin. One thing I noticed was the lack of any obvious layer lines on vertical parts. My OG Photon was fitted with an after market linear Z rail, but even that could not match the Z stability of this printer! Amazed.
The much larger build area and mono screen combine to give a far faster production speed, so print jobs that would have taken weeks, will now take days. That was the main reason that I wanted this upgrade, so I am very pleased.
The machine is also built like a tank. It has a solid metal chassis, vert sturdy linear z-rails, and just screams quality.
My only slight gripes at this early stage are that the firmware is still a bit buggy (which I’m sure will be sorted), the screen, while mono, appears to have a plastic top face, which is a definite downgrade from the glass in the OG Photon. Also, my preferred slicer is Chitubox, which is not currently compatible at time of writing this review. Still, I can add supports in Chitu, then export the supported STL to the Photon Workshop for final slicing. No big issue.
If you are looking to upgrade a smaller, non-mono printer, then I would highly recommend the Mono X. If however you are looking for a first printer, you could try one of the more forgiving and lower cost ones first to ensure the workflow is for you – you can always add a Mono X when you get the printing bug!
The printer arrives very well packaged from amazon double boxed for protection and weighs 14KG, care
will need to be taken when moving it.
Inside the box you will find a fully assembled printer that just needs to have the build plate added.
You will see the instructions on how to do the initial levelling of the build plate, just follow the instructions
and you can’t go wrong.
The printer is a very good-looking machine and certainly does not look “cheap” it is very well constructed
and looks fantastic alongside my other printers.
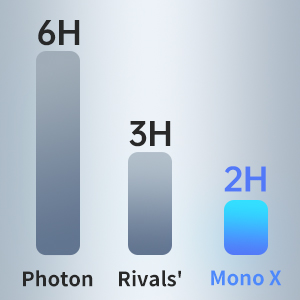
Print time is fantastic and depending what resin you are using you are looking at between 1.5-2.5
seconds per layer compared to the Anycubic Photon S which is around 8-10 seconds per layer.
If this is your first resin printer i would suggest you do a read up on the printing process as you will need
to buy some extra bits for cleaning up your prints.
Isopropyl alcohol
paper towels
UV Curing light
Gloves
These are just a few bits you will require
You are provided a few pairs of gloves, face masks and some resin filters but only a small quantity so i
suggest you stock up on them.
I have posted some images of my setup and some images of prints I have done using the Anycubic
Photon Mono X, i highly recommend this printer and I am sure you will not be disappointed.
Don’t hesitate to ask questions and i will try to answer if i ca
Setting up the Photon was simple, following instructions which are clear and concise; the only assembly required is the door knob, and all the required core tools and accessories come with it. There is a learning curve to getting the machine functioning properly — which can seem intimidating — but once the basic steps are put in place, you’ll have amazing prints time after time. With some testing you can rapidly get how to set up your models to print optimally, in terms of time, quality and resin use.
To start with, environment. Temperature seems critical. The warmer the better. My first error was placing the Photon in a heavily ventilated but very cold utility room: I just couldn’t get any prints to work when I first received the machine at the beginning of the year, and parked it during a busy period. With the last month’s enforced isolation coinciding with unseasonably warmer weather in the UK, I relocated and haven’t looked back. Secondarily, obviously a stable and level surface. Have windows open: I haven’t experienced particularly bad odours, but it’s just safer — and nicer for anyone else in the house!
Next, set-up. Levelling the build plate is where a lot of people seem to go wrong, but having checked out many online guides the one that works every time is this:
1: Put a sheet of paper over the screen.
2: Lower the build plate in 10mm increments so it’s close to the screen, before switching to 1mm to bring it within a couple of mm. Switch to 0.1 and bring the plate down in increments, sliding the paper in and out until you can’t slide the paper back without it crinkling.
3: The crucial added part: lightly hold the build plate evenly with one hand and tighten the screw with the other. Then raise the plate by a couple of mm and repeat the process.
4: Back out of the menu system and hit the Z=0 button to set the correct minimum level height. Retract the plate in 10mm increments so you can get printing.
Tightening the plate can sometimes make it retract a fraction, which is why you have to repeat the levelling process again. Don’t miss this step! There are plenty of online videos to help show you the process. It takes seconds, and saves wasted hours and resin.
Prints: PPE appropriate to our current situation is necessary. Gloves and a mask to be safe. Shake your resin well, then pour into the vat. Select your print from a USB stick and you’re good to go. The results are just great, which takes us to the next learning step: slicing and structures.
The included software is fine, although Chitubox is a popular alternative. They all work the same way, and don’t require overt software knowledge to use. Import your STL file and orient it on the print bed for optimum printing. Simpler objects (walls, accessories) can print ‘normally’, level with the print bed. Figures, which the Photon excels at, can be typically orientated at 45 to avoid overt build lines being visible at lower print resolutions, but it’s not always necessary.
However, I would always use a support structure with raft, no matter what, and that’s where some trial and error comes in: there is no ‘right’ answer to that, as it depends on the model. Start using the automatic support structure functions to learn what does and doesn’t work (which will likely be the former for a lot of things). Then start building your own supports, which is as simple as selecting the type (light, which have tiny contact points ideal for figures, medium or heavy) and clicking where you want the contact point. Again, there are lots of guides for settings to use, but common sense works here, and Chitubox in particular highlights weak areas in red.
If you print any larger objects then use the auto-hollowing tool (in Chitubox) and slice with infill turned on. It will turn a massive lump of money-wasting resin into a strong, light and efficient print. Slicing is another easy part, where the software does the heavy lifting; you just need to remember to use the settings correct for your resin type and model (does it need infill, basically). There’s a great online spreadsheet for resin settings available on the Anycubic Photon Reddit channel and also the Facebook group
So, I couldn’t be happier with my Photon. My house is quickly filling up with an insane amount of prints, as the unstoppable excitement of ‘what can I print next’ takes over! Learn the process, experiment and expect some mistakes, follow the correct steps each time and you will see this printer shine. I’ve stuck at 0.05mm resolution, and I’ve never been disappointed, but the printer can print at double that res for even more detail (at the cost of print time). It’s just an excellent tool that opens up a world of possibilities.
This is a great starter 3D printer. Its great value for money and easy to use. There are online tutorials for those who may struggle. The quality is fantastic, no lines and perfect for small models for example D&D. I am looking at upgrading to a larger printer as the build plate on the Photon is small but like i said perfect for small models. Software for supporting and slicing is also provided with the printer.
I was a little reluctant to buy this 3D printer as I knew there was a learning curve to 3D printing in resin and I’d never owned a 3D printer before. Decided to take the plunge – there was a few failed prints and a learning curve but these were all my own fault. Once I got the knack of levelling the print bed and ensuring my models were properly supported I’m now able to crank out pretty neat models that I’ve made in Oculus medium or from Thingiverse. Really satisified with it!
This is my first time with a resin printer, the ease of use has made experience a joy, yes there has been a learning curve ensuring you wear gloves, cleaning the print, getting supports right and and curing the finished print. (not much sun in the UK at the moment) so a way of curing needs to be sourced
Ensuring you level the bed, plenty of advise for that on-line
The photon community and forums makes the use of the printer a pleasure.
I think this is a great and not too expensive introduction into the resin community, especially if you get it on a sale
I’ve had the AnyCubic Photon for around 3 months now and had owner an FDM printer for several months before purchasing it and despite that the learning curve with the Photon was pretty brutal.
The first issue I had was that the files on the USB that came with the printer were corrupted. This meant that I had to jump in blind. I had three weeks of prints sticking to the bottom of the vat, thinking the issue was the printer before finding that the problem was the exposure settings I’d googled were twice what they should have been. After some successful prints I had issues with getting cured resin sticking to the models randomly, turns out the previous fails had damaged to FEP.
After changing the FEP, I had issues regarding prints not sticking to the build plate and then eventually getting semi-cured resin on the FEP. After some help, it turned out that the issue was the ambient temperature in the room (it had been too low) and the FEP loosening from the fails.
Now, after all that, I’m in the zone. For the past three weeks I’ve churned out almost a hundred high quality prints, on par with, and sometimes better than store bought miniatures. Using 3D builder I’m able to combine and customise models in ways that would be impossible with traditional kits and the cost is minimal. It is great, I love this hobby, printing anything I want to is incredible.
Basically, don’t get disheartened, speak to people with more experience, change one thing at a time and persevere. The Photon owners group on Facebook has been a huge help.
If you’re on the fence about getting a resin printer; just do it, you won’t regret it.
I bought the printer to mainly print wargaming vehicles that are difficult to get hold of from traditional sources. E.g. the Austen “Tilly”, a British light utility truck made in the 10s of thousands but is impossible to get in 1/100 scale.
For this purpose it has greatly surpassed my expectations, with the prints being accurate and crisp and in many respects better than some manufacturers. Some print lines can be seen but most of these are shallow enough to be hidden by the normal painting process. Only on near horizontal surfaces (e.g. the bonnet of the above “Tilly”) have I had to do some slight sanding. The quality was such that I have also printed several 28mm Sci-Fi figures.
Setup was simple, with easy to read instructions on how to level the print bed which is pretty much all there is to it.
The bundled software is also simple to use (there is an updated version on the website but I actually prefer the older version on the USB drive) and after a bit of practice it takes very little time to prepare a model for printing. My 10yo son did a homework of making a spaceship from scratch using online 3D modelling software with very little help, I just did the handling of uncured and partially cured resin for safety.
Not everything was plain sailing, however. I bought the printer without knowing anything about printing with resin so was ill equipped to deal with the whole process. As well as the printer you will need some cleaning alcohol (99% pure IPA) and a suitable container to wash each print, a box of nitrile gloves and a method of fully curing the prints (I bought a strip of UV LEDs and made a curing oven from a plastic box and aluminium foil).
I also had a few early print failures; I wanted to use the printer in my garage workshop and as the lowest working temperature was stated as 10C I thought this would be fine, but the prints just wouldn’t stick to the print bed. As soon as I brought the printer into the house it’s been nearly flawless.
So I’m very happy with the printer and it has already more than paid for itself compared to getting items printed commercially. I just need to get around to painting all of the stuff I’ve printed!
If you’ve been considering it but have been put off by the resin mess, that’s fair. But from my experience (and I’ve been printing on this thing for 6 months now) the mess is minimal as long as you’re sensible. And the practically invisible layer lines means you make up the time by not having to sand it down as much.
The main thing you may want to think about is whether the print bed is large enough for what you need. Though, the images I’ve provided were all printed on the Anycubic Photon so you can get large prints if your crafty about it. I am a character sculptor and so can factor the print bed size into the design of the characters I make.
So if you have the money and you need amazing quality prints, get it now. You won’t regret it.
I’ve had my photon for a couple of months now so think i can offer some insights.
First off, you can’t just open the box and start making things. You need to do some research. Fortunately the community is excellent. Use the “flint reed” method to level your prints and the community spreadsheet for settings and you’re good to go. I’ve had no failed prints since i’ve done that.
I’ve printed miniatures for our current PF2 pc party, I’ve printed objects for set pieces …dungeon furniture. Its lovely. Now i want a bigger printer
Strongly recommend.
I’ve been using the Photon to print custom miniatures I create in ZBrush.
It’s not been a completely stress-free time, but the issues were 99% my fault.
There was a lot of trial and error and failed prints, but that was to do with my print/support settings.
There’s plenty of websites out there that help with this kind of thing now.
Overall I’m extremely pleased with the printer and also Anycubic themselves. I had an issue with the screen and they were more than happy to send me a replacement.
If you’re on the fence, go for it. It’s a great feeling seeing a print come into existence, especially if you’ve created it yourself!
The printer arrived well packaged and after following the instructions included was able to print the test piece within an hour. It might take a couple of tries to get the levelling height, but that’s the nature of 3D printers that lack an autolevelling probe. Once it was levelled, I have been able to print many intricate models that a traditional 3D printer would not be able to do.
Be warned, due to the level of detail this printer achieves, prints do take a very long time, even smaller ones. Overall I would recommend this to anyone with a bit of experience with 3D printing that doesn’t mind getting their hands dirty with resin printing and is looking to make some very intricately detailed parts or models.
This is a great printer – good quality prints and easy to use, well worth the price.
Like any 3d printer, there is a learning curve to using a Anycubic Photon, but honestly, I actually have fewer problems with it than I do my inkjet (2d) printer, let alone my filament printers. I’ll try to distill some of what I’ve learned over the last 6 months in this review…
Overall, the quality of the resin prints are fantastic – I usually print at 100um layer heights which I find to be perfectly acceptable for my purposes (miniatures for dungeons and dragons). Layer lines are occasionally visible but only if you look very closely, and would be even less visible if I printed at a lower resolution.
The only print failures I have had with the Photon were when I had not properly levelled the bed, but it’s easy to do on this printer. I now routinely do so before starting a print by 1) removing the resin vat, 2) homing the (alcohol cleaned) build plate, 3) inserting a regular piece of printer paper between the build plate and the screen, 4) lowering the build plate in 0.1mm increments until I can pull the piece of paper out towards me but cannot feed it back into the gap (usually 0.2-0.3mm lower than the home position on my printer, ymmv). If either side feels looser than the other it’s time to readjust the ball joint too, but it is usually months between these instances.
I use Chitubox as my slicer, and I always run the .photon files through the photon file validator by photonsters (available on github). This ensures there are no ‘islands’ of resin not connected to the main model that just get stuck on the FEP. I have been through 1500ml of resin so far (all anycubic transparent green), have yet to change my FEP, and it is still printing reliably because of the relative lack of failures and lack of damage to the film.
I recommend getting an ultrasonic cleaner and fill it with isopropyl alcohol for cleaning of prints when they come out of the printer. This allows you to see much finer details that would otherwise be clogged with the viscous uncured resin from the vat that clings to it. Always use gloves and a respirator when handling the uncured resin and alcohol and finish curing the models after cleaning them either in direct sunlight or under a uv lamp.
This is a great entry level resin printer, with a ton of community support on the internet as it’s such a common and popular model. For example, there is a community collated spreadsheet of resin settings for this printer (google “anycubic photon spreadsheet”), which is hugely valuable for giving you a decent starting point for experimentation with exposure times, as well as the aforementioned file validator. I highly recommend it for anyone looking for better detail on their prints than a filament printer can provide, or wanting to produce many identical but small items at once.
Pros:
-As stated in the title, Great and high-resolution print quality
-Easy to set up if all safety precautions are taken
-Extracting prints is very easy
-Easy to navigate menu
-Very nice looking and the door for the printer is quite neat for reducing the risk of spilling resin on the work surface
-Basin plastic sheet very durable, Haven’t had to use replacements
-Very easy to select prints
Cons:
-Build plate can get loose at random, Sometimes it will be fine after 5 prints, other times it goes loose after 1
-Can be quite pricey compared to the competition
-No other cons really
Suggestions:
-Add a dripper handle to allow for build blate to be on its side and drip back any residue resin
-Provide a few more gloves for people who might not have immediate access to nitrile gloves
-Allow connection via wifi
Tl;DR
Overall great printer for its price point, perfect for anyone interested in resin printing and trying to get started
I am using my Photon for printing scale model parts, particularly rc model boat fittings. I just love it. I can get sub-millimeter detail that prints cleanly and accurately. It has totally changed how I go about modelling and the results are very good indeed. In fact I can get better results with the Photon than I can buying commercial model fittings. I can print really complex shapes such as model propellers and they print with no seam lines, unlike molded fittings. The only slight issue is in leveling the print bed. That involves a fair bit of trial and error. In a future model of the printer I would like to see a fixed permanently level print bed that is factory calibrated. However that is a minor issue and I have no regrets on my purchase.
I have had an FDM 3D printer for a couple of years, used mostly to print terrain for RPGs etc. Always quit fancied being able to print my own miniatures. Picked up the Anycubic Photon as it came recommended on the miniature groups I follow on Facebook. Blown away by the results so far! Attached are some photos of minis printed on it, from Cast N Play Patreon.
Set up was straight forward. Had to repeat the bed levelling a couple of times as I wasn’t quite getting it right, but since I got it bang on, I haven’t had to level it again for easily 20 prints! 🙂 Would recommend this for anyone looking to give resin printing a try.
I purchased this printer to produce parts for my model boats. This printer is very easy to set up and if you need there are loads off “you tube” videos to help you. The print quality I’ve been getting is outstanding. You will need a uv lamp to cure your prints. I use a uv gel nail lamp. The items you can make with this machine is limitless.
If you are thinking about getting one don’t wait get order one now
Having purchased the Anycubic Photon as an absolute newbie to 3D printing I was incredibly surprised at how easily I got everything going out of the box.
My intentions were to mostly print terrain for Warhammer 40k, as well as experement with some 3d modelling myself. However, after a couple of prints I was amazed at the detail and quality of the prints considering the price!
If you’re purchasing one yourself make sure to watch loads of videos to educate yourself about how to get things set up correctly.
I would also recommend printing the test cube that comes bundled on the USB stick to ensure your next prints will turn out as well. Once you’ve got the test print perfect hop onto Thingiverse or get some STL files elsewhere and get printing!!!
This was my first 3d printer and all I can say is wow amazing.
The quality is amazing on the prints and the machine is built very well too. Once you have done the correct initial level of the build plate then you shouldn’t have any problems with prints. I have printed about 30 prints so far and each one has been perfect. I have even moved the machine from my workplace to home a few times and never had to re-level.
If your looking for a good 3d resin printer then this one is a must. Easy to set up and even easier to print!
As an owner of many 3D Printers.
Both FDM & DLP
The ease of use and level of quailty control that went into the photon is beyond a amazing.
Super simple to level, Super simple to print.
You get a bottle of resin included which is enough for many prints. I’d highly recommend running the test file as a guide. Just to make sure you’ve level probably. By far one of the best printers I have used.
So my printer arrived dead on arrival, the LCD screen was not functioning.
Anycubic support team me through the basic trouble shooting and confirmed the dead screen, so sent out a replacement part I could fit.
Once done, I was up and printing and like other users was blown away by the print quality.
Love the printer, fantastic purchase!
I’ve had this printer for almost a year now and have been 3d printing for about 4 years now with FDM printers (5 printers). This thing is a totally different beast from the FDM printers, it’s quiet, doesn’t need any tinkering to make it work. I’ve leveled the build plate only once and never had to do it again (try that with an ender 3 or a cr-10!). The small print bed and high detail of this printer puts it in a different usage bracket obviously.
So far any issues I’ve had with prints not completing have been due to my own errors in preparing the 3d files, either not having enough supports or supports that were optimistically thin. But overall my success rate has been very high.
Everything I’ve printed has always been my own models, they invariably come out looking super detailed, whether it is small mechanical details or more organic shapes.
My fdm printers are feeling very sorry for themselves, hardly being used now except for my very large format cr10-s5.
I’ve been using this printer for around 5 months now.
Being new to 3d printing in general, it took me a couple of weeks to get up to speed and overcome some of the common issues.
Now I’ve been using it for a while, I can’t be happier. I rarely get failed prints and, if I do, I’m confident it’s my fault due to my settings/supports etc.
I mainly use the printer for miniatures, but I’ve also printed lithographs, ornaments etc and it works well for all of these.
I’d definitely recommend joining some anycubic photon groups on social media as it’ll get you around any troubleshooting issues quickly.
I already used an AnyCubic I3 Mega filament printer, so chose the Photon UV printer as I had not had any problems with my previous Anycubic Machine. I have had the Photon now since mid July this year add have enjoyed using it. I was looking for something to print more details than I can obtain with my filament printer and I am more than happy with the results I can achieve with the printer. As I 3D model for a living , I can now produce what ever I want for my Hobby by combing the printing abilities from my Filament printer and the extra detail parts of the Photon I can now produce .The image of the two post boxes show the difference between a Filament printed version and the Resin printed version of the same model.
The world of 3D printing is massive, consuming, but ultimately rewarding.
Firstly a disclaimer – if you are thinking of getting this for kids – don’t. You will want a FDM printer instead, the one that prints off a spool. The materials involved in resin printing are toxic, smelly, sticky, and in no way suitable for kids.
If, however, you have somewhere decent to put it – this little printer will get you some absolutely fantastic results.
The initial setup was easy enough following the instructions, and once the bed is levelled (see the flint reed method on YouTube) you will be away.
There are infinite worlds of tweaking to be done – including custom firmware, custom slicer tools, different post processing methods… But the one thing is for sure is that the AnyCubic is accurate and reliable once configured properly.
What a great little printer! I got this to print toy prototypes. It is really simple to use, once you’ve leveled the bed. Which is easy enough to do just remember to tighten the grub screw very tight! Or else the bed will shift during printing. The build quailty is solid as the photon has a metal body.
I do have some z wobble but I am yet to fix it as its not that bad. But I’ve seen that it’s easy enough to fix with some grub screws on the carriage. I’ve been using the prusa slicer to add supports and then chitubox to slice the model ready for printing.
I have been using anycubic green translucent resin and so far I have been very pleased with it. Print time for my alien was nearly 10 hours. It’s so fast and the quality is so much better than an fdm machine. I am very pleased with it so far.
This is such an easy printer to use. There is very little set up and build plate tramming is a breeze.
I also have an FDM printer and slicing (using ChituBox) for the Photon is far simpler, with way fewer parameters to consider.
Post print cleaning of prints is necessary but nowhere near as bad as people make out IMHO. If you have ever used spray paint then I’d say the spell is no worse, with the strongest spell being from the IPA used for cleaning rather than the resin. There is a slight smell given off during printing but I’ve hardly noticed it.
The quality of the prints is fantastic and perfect for printing miniatures which is what I mainly use this printer for.
Update Feb 2020.
Printer still going strong and I’ve been a good amount of resin printing miniatures and scenery for wargames. The quality still amazes me and once painted you cannot tell the printed miniatures from the plastic injection moulded ones (so long as you get good 3d models t begin with).
Seriously considering more of these (yeah I know the Photon S is available but the plastic body puts me off) for my business to print items for sale.
I have been using my Anycubic Photon for just over 3 months now and am extremely happy with the results I am receiving.
Out of the box and with very little setup (levelling the build plate) the sample model of a lattice cube printed well using the supplied green transparent resin, with only a couple of tiny air bubbles in the base. These bubbles were probably due to my shaking of the resin prior to use and not allowing the bubbles to clear before I started the print.
I have printed a number of tabletop gaming miniatures with this printer and am very satisfied with the quality — no visible layer lines and precise detail.
When printing items which require a mechanical fit (e.g. one tube sliding inside another) some experimentation with clearances in the model is required. My understanding is that due to the process of using a UV light with an LCD mask outer dimensions may be slightly enlarged, and inner dimensions may be slightly reduced due to “light bleed”. This is a function of the printing technology and would be seen on all printers of this style, it is not the fault of the Anycubic Photon.
The Anycubic Grey and transparent green resins that I have used are more brittle than FDM printed materials (e.g.PETG or PLA) but meet my requirements.
The clean-up process with resin printers is reasonably time consuming and does require personal protection items (rubber gloves and safety glasses as a minimum) and cleaning items as follows: lots of paper towels, Isopropyl Alcohol for cleaning resin and 2 plastic sealed containers for cleaning the models in IPA. Due to the smell of the resin and IPA, and the potential for resin spills I have my printer set up in my garage rather than the house with my other printers.
At this point I have only re-levelled the print bed about 5 times and these were only because I carried out a full stripdown for cleaning. I have not changed the FEP sheet yet and cannot comment on how easy or hard this is.
Having used FDM printers for about 10 years I must point out that there are several differences required in model orientation and support for printing between FDM printers and the Anycubic Photon. I would strongly suggest viewing the videos of YouTuber 3DPrintingPro which helped greatly with my initial setup attempts.
Overall I am very happy with the models produced by my printer and would recommend it to others.
After a slight learning curve with how to support STL files properly so there are no overhanging parts of the print, every one of my prints has been pretty much perfect. So impressed by this little printer. I’ve used Anycubic Green, Skin, Grey and the new plant based Macaroon Blue… all have been excellent for miniatures. Honestly…it is mind-blowing how much detail you can get out of this printer. Tiny modified hands and weapons for my 28mm Warhammer guys…some no more than a few mm in size, yet all the detail is still there.
Highly recommended.
**** UPDATE December 2019 **** I have just ordered and had delivered a second one of these in the black Friday specials as I am so happy with this 3D printer… The problem is, when I get a chance to play with my hobby of 3D printing, it obviously takes time to print something, and often I want to get more than one print running… But with the cheap cost of this printer, now I can set two prints rolling, come back later to see the fruits of my imagination!
**** End of update ****
I have been 3D printing for about two years now, originally using a Creality Ender 3 (which is a molton plastic or FDM machine), but found that there are drawbacks to FDM printing, which is that obviously the plastic you are printing is designed to melt, which means your final print can melt. Not a problem for most people, but I am an engineer who designs parts for cars. So I needed something which could print parts which hold up to heat in engine bays and inside cars on sunny days. which resin printing (what this printer does) is perfect, as it withstands higher temperatures, but also produces more detailed or smooth items and in many ways the printed parts are stronger.
So I bought the Anycubic Photon after many weeks researching and using many other machines owned by other engineers, and to be honest I am so pleased I chose the Anycubic Photon!
The build quality of this is great, it is housed in a metal case (not flimsy plastic like some) so it will take knocks in it’s stride.
The product, although so similar to many other resin printers on the market, actually has many improvements over many. You can spend much more money and get one which will print faster, but what people do not seem to realise is that the faster printers make less accurate and weaker prints, as a chemical side effect of them using higher power light sources, which makes the resin crystalise in a weaker orientation than a machine like the Photon (meaning this machine might be slower than some, but it produces stronger and more detailed parts as a result!)
I have had this machine now for three and a half months, and my experience of it just gets better the longer I have it, and the more I learn.
I would also like to commend Anycubic on their customer service. I have not really needed them as the machine worked great just out of the box, but when I did once need their help, Jessi at Anycubic helped me quickly and precisely (in perfect English) and had me up and running again in no time at all.
Anycubic also have self help videos on Youtube should you need any video instructions, or need to troubleshoot a problem, but even without any of this, on Facebook, there is a group for this printer which has a community of thousands of members all helping one another to learn about the printer, to support each other, and to share their progress on their 3D printing journey.
Anyway, I really can’t say enough good things about this printer and Anycubic.
I will go on to say that I have experimented with several brands of Resin with my machine, and can honestly say that the Anycubic resin is as good as every other brand I have tried, if not better… I would go further by saying some of the brands I have tried (well known brands) for resin have been more problematic to use than the Anycubic ones, and in the market, the Anycubic resins to to be priced at a really reasonable price (you might save a couple of pounds shopping around, but the resins bellow this price are really not as good)
Anyway, stop procrastinating and buy this printer now! You will not regret it.
The anycubic photon is my first SLA based 3D printer having had some experience with FDM printers in the past. The setup is very simple, bed leveling took less than 5 minutes and initial prints made came out great.
Been running it none stop for the past 6 weeks and have no major issues at all. Would advise to purchase an air purifier unit though to limit the smell of the resin.
Overall very happy with purchase, great community support. Is an ideal printer someone wishing to start into 3D printing.
I started printing with an Ender3 which is great if a little lacking in detailed prints. So I bought the Anycubic Photon, it really is fantastic, I’ve been printing and painting minis in my spare time ever since I bought it. The quality is amazing and really once its setup and working there’s not much else to do. I only ever re-level the build plate if I get a failure, which is very rare. The reservoir gets cleaned out about once a month, or if the resin that’s being left in there between prints, and topped up, gets gloopy. I highly recommend for all D&D GM’s or anyone with an interest in models.
This is my first ever resin printer and i was amazed be the quality of the initial test print and also how simple it was to set up, I have a PrusaMK2 FDM printer so i was familiar with 3d printing before i bought this product and i had done alot of research into the setup of the machine and also safety and cleaning, you can find great videos on youtube about these subjects and i would recomend people look up some info before buying this printer so you are aware of what needs to be done because if you prepare properly then this printer will be very simple to setup and use with minimal effort.
I setup my machine and leveled the print platform once when i first bought it and never had to do it again, the printed have been perfect every time although i have had a couple of small issues but they were down to my own fault of not preparing the moel properly.
For the price you are paying the quality is fantastic, I use this more then my Prusa now although i stll use the Prusa for larger parts.
I highly recommend this printer but just make sure to do some research first as there are safety issues using resin that require you to use gloves and keep the work area clean. 🙂
It’s great that this runs with a USB mass storage device – it means I can operate it from arbitrary sources of data and have a lot more fun. The print quality and easy of use is truly amazing – in a really good way.
The software that comes with it is a bit rubbish so you have to find other software – they recommend getting an account with a 3rd party. This is why there’s 4 stars instead of 5. They tried to help me get the 3rd party software without an account but that was unsuccessful unfortunately.
Their support people are really helpful, open and honest which puts them at the top of my list of good companies and this device at the top of my list of recommendations.
FANTASTIC! That is the only word to sum up this product.
We have been using the ANYCUBIC Photon UV Photocuring 3D Printer, Ultra Precision 2560×1440 2K HD Masking LCD with Smart Touch for 4 months now with a 100% pass rate for all the teeth that have been prepped. Traditionally, we were using wax to give a impression of the prep surface, contours and fit but with less of a success rate.
IF I HAD KNOWN THAT CHINA HAD SUCH A MACHINE I WOULD HAVE PURCHASED IT A LOT SOONER!
TOP TIP: Read the instructions and have a few experimental attempts first. There is a knack to using it so do not be put off by the first monstrosities that YOU produce, it is not the printer, it is the user. Practice makes perfect for sure.
This is my first resin printer, I have over 2 years of experience with PLA printers.
As with any printer there is learning curve – here things are much more complicated than with PLA printers.
The whole process is more messy, it is more smelly (if it matters to you you can easily install a fan or a proper filter), it takes some time to get things right bot once you do the results are just breathtaking. You can’t even remotely compare PLA prints to the resin ones.
The printer itself is high quality – they didn’t cut any corners. I use it mainly for wargaming so quality of prints is my priority 1. Any failures with my prints so far were only my fault (model support mistakes). I’ve not had a single problem with the printer at all so far. Within the time you may start to modifying it – e.g. like mentioned ventilation fan. There are plenty of suggestions online.
The only thing you should keep in mind is that this is not like your normal paper printer – this is a hobby and it requires a lot of time and research to do things right. Don’t take me wrong – you can use it out of the box and print provided examples, but after that you will need to learn by yourself how to print things downloaded from the Internet. Luckily there are many youtube tutorials and great facebook page.
If you’re not afraid of the learning curve (and this will apply to any resin printer), if you’re fine with investing your time to learn that hobby, then I really recommend that printer.
Talking about bad things or not as good as I would like to (Photon, not Photon S): no ‘turn off after printing’ option, small ventilation fan with a filter is not doing the job at all (disconnect it right away), the ball-type plate mounting is not great but you can print a great 4-screw mount, USB stick – bin it, sooner or later you will have Z-axis issue – you would need to adjust it every now and then or upgrade to dual axis. It sounds like a lot but trust me those are little things only. Also keep in mind that LCD screen is consumable like in any resin printer – expect to replace it every 6 months with 24/7 printing.
Overall – it is an outstanding piece of equipment.
After thinking about it for a while I finally decided to bite the bullet and order a Photon around 4 months ago. I’m a scale modeller so the fine detail of resin printing over more traditional methods was a no brainer and the Photon came out as best bang for buck.
If you read around forums and Facebook groups there’s plenty of horror stories of these things being a nightmare to set up and use but honestly even as a complete newcomer to 3d printing it was an absolute breeze. Most issues people have stem from incorrect levelling/the build plate being too close or too far from the screen at the bottom (sometimes 0.1-0.2mm can make the difference between the print sticking or failing) but I managed to get mine bang on first time using the paper levelling method, and once set up you hardly ever have to relevel. Most other issues are commonly either insufficient supports or incorrect resin parameters. Both of these really come down to practice and a bit of trial and error. In 4 months I’ve had maybe 3 properly failed prints, 2 of which were insufficient supports, 1 was the build plate being too far from the bottom of the vat, the rest of my prints have been pretty much perfect.
They are inherently a bit messy to use due to the cleaning process but just have a good supply of disposable gloves and paper towel to hand and it’s no big issue. The smell is very much down to personal sensitivity, when I first bought the printer and used the included green resin the smell seemed incredibly strong, however you do get used to it, and some resins smell far less. I mostly use Elegoo Grey for model components and the smell is almost non-existent. There’s no need to empty and clean the vat after every print, unless your last print failed and stuck to the bottom. I’ve left a full vat of resin in the printer for weeks and after a quick stir it’s ready for printing again.
After 4 months of regular printing (perhaps 3-4 prints per week), I’ve still had no need to replace my FEP, despite it being fairly scratched and cloudy, nor does my screen show any signs of failing. Both of these are apparently easy, quick and cheap replacements though and can both be classed as consumables. One thing I would highly recommend is placing a strip of thin Kapton tape around the edges of the screen so in the event of a resin leak or spillage, the resin can’t get into the inner workings of the printer and should be much easier to clean up.
If you’re on the fence, I’d highly recommend taking the plunge, this printer has literally opened up an entire new world of possibilities as a modeller. The detail achievable is just stunning.
The machine is built quite well which is the reason why I bought this old model rather than new plastic one. The first print did not work, due the screws on the vat being too loose. Then got few fails due the wrong settings in the default program, so I adjusted settings to the ones on reddit. The exposition time for green resin have to be longer as it does not transmit light as good as the transparent resins. So when I got that figure out I managed to get some prints done but they get usually strached od deformed if they have flat surfaces, so to accomodate for that, you have to angle the object on 45 degrees more or less, and add more supports, and make the model hollow so it does not pull itself off the supports. remmember internal supports are nescessary too.
The calibration of this device is quite important and you have to really get it right otherwise it wont work at all.
The smell is not that bad I I attached a fan a duct and a carbon filter on the end to remove any residues.
The vat is not heated so beware of printing in the winter you have to keep the resin heated to at least 25-30 degrees.
The machine would be silent and nice if the fan on the bottom would not be that loud (to cool uvLED array).
Important you cannot work with this printer in the room that has window and sun, as it will cure resin of course, so keep that in mind.
The level of detail due the 4k display is great, the downside is that you will have to replace it one day because its a consumable so buy a spare one when they still make them.
The slicer (chitubox) is ok but for some reason I still have dimensional innacurate prints so there is no use for engineering parts that would fit into each other. But its ok for figurines and models .
Its higher detail than fdm, but its more messy process, takes more time to cure, and you have to varnish or paint the models, or if expose to sunlight will turn yellow, so make sure you paint them.
I have got a photon as a cheep replacement to handle prints when my more expensive resin printer had a fault and was waiting on parts, only to start using it more and more as it was faster than the Moai I use due to the difference in technology. During a screen replacement I pulled a connector off the front screen, within a week of contacting support I had a spare screen and was back up and running, with no charge. This was something I was not expecting for a cheap printer I got as an emergency to keep printing and customers happy. Would recommend this to anyone looking at MSLA printing, however please remember that this is not printing with PLA, its messy, the resin is harmful and should be put in a garage or other place outside the home. The screens will need to be replaced regularly, and consumables will cost a few pennies, please read about SLA/MSLA/DLP printing before buying as to know what you are getting into.
I had been on the edge of buying into the 3D printing hobby for a couple of years, but hearing some of my friends experiences of messing around and constantly having to fine tune and adjust their machines, I was put off. Not to mention the higher costs a couple of years ago, I wasn’t going to drop my money into a pit.
However – I am so glad I bought this Photon! It is an extraordinary machine for the low price! Very high print quality with smooth finish, even at 0.05mm layers. The slicing software feels somewhat basic in comparison to others, but it does the job. However I would recommend the ChiTu box software for hollowing/creating supports.
Overall, I am more than happy with my Photon and would highly recommend it to anyone thinking of getting a resin printer.
This printer is great as an entry level to 3D printing; the print quality is great considering the price. Although it may not be as detailed as SLA printing machines (which are relatively more expensive), the Photon’s DLP is still great for highly detailed models that require little work other than removing the support structures and a bit of sanding. This printer is perfect for printing small detailed models and has a large enough build plate to print separate parts to piece together for a larger model. There is quite a learning curve with the process of printing with using the machine and the software but once you have the hang of it, its as easy as slicing your models and running your prints.
The only issue I have with the overall experience is the slicing software, which feels quite limited and could have some work done on it. From experience, it doesn’t seems to import my 3D models to the true scale that they were exported as.
Bought for 260, delivered by Amazon prime.
I love this printer. I’m not new to 3D printing. I’ve used and abused a Creality CR-10 for some time- it’s so heavily modified now it’s something else entirely. I used to use a friend’s DaVinci 1.0 AIO, and I’ve spent longer than I should on my local hacklab’s delta machine. I’m happy to report this is nothing like any FFF printer I’ve ever used.
Why? Because it just bloody works. You slice the stl, put it on a USB stick, and you hit play. You don’t have to check on it every fifteen minutes to make sure it’s not reverted to a spaghetti gun, you don’t have to worry the bridges are going to come out saggy or the nozzle’s going to block. You just wait for it to beep and wash your model off. The detail and precision you can achieve is astounding, particularly when you compare it side by side to FFF. I’ve had success printing tiny mechanical parts, and gears I designed with 0.7 module worked first time.
It’s not zero setup, but it’s pretty minimal. It comes assembled, and it’s a nice set-contained unit that’s surprisingly small. You just need to level the bed and run the test print. Between parts you need to check the FEP is clear before your next print, which I do by using the plastic spatula. Post-processing requires washing the parts in IPA to clear off the unused resin, which I suggest is best done using a series (two or three) of IPA baths (pickle jars) in a constant sequence. Then you leave them in the sun to harden properly.
It’s not perfect, and sometimes parts’ll get stuck to the FEP or come loose from the bed, but it’s much less fiddly to make the process work than FFF. Most problems I’ve had related to exposure times (if it’s too short your parts won’t stick to the supports properly), or model and support placement. But it’s surprisingly forgiving, and at least when it fails the bits stuck on the FEP stop any further plastic being deposited on the broken areas so you don’t waste anything but time.
The one thing that put me off resin printers for a long time (well, apart from the cost) is the resin. It’s not benign stuff, and it’s expensive. But anycubic’s resin is only about 40/kg, and while that’s about twice the price of FFF plastic, it’s not a huge problem particularly considering that these machines really excel at printing small parts rather than furniture. With regards to chemical safety, you should never let the uncured resin contact your skin (it’s an irritant and a sensitiser), and it can apparently smell a bit although I’m not sure about the health effects of the fumes. I haven’t noticed much smell from Anycubic Green, although I run the printer in an unoccupied room with the windows open. You should respect the chemicals, and always wear gloves and eye protection when working with them, but I find I only rarely have to do more than pour a little more into the vat.
This printer had been dogged with problems for me since day one, mainly issues with the prints not sticking to the platform no matter what I tried. I became an expert at cleaning up the mess caused by failed prints being stuck inside the resin tank, but occasionally managing to get a successful print by creating a platform to fill the entire print area. Most of the green resin that came with the printer was wasted like this, and when it was all used up I put a dust cover over the machine and let it sit for a few weeks, having lost interest in it.
I decided to come back to it because I needed a print for a project, the only difference this time is that I had bought clear resin instead of green. It was like a completely different printer!! Successful prints first time every time, sticking to the platform nicely, no slipping, no hanging off, no failed prints to clean from inside the resin tank. I couldn’t believe what a difference it made, and I had much better surface finish post-curing than I did with the green.
Goodness knows why they include the green resin as a starter instead of the clear. I can’t be the only person who experienced these issues with it. My only reason for 4 stars is that there are sometimes holes in my prints where an air bubble has been trapped under the platform, so it’s still not perfect.
Been waiting for resin 3D printers to come down to a ‘hobby’ price and have been really pleased with the results so far – I am using it to create parts for my car models – worked straight out of the box with amazing results – although there are alternatives, I have been using the software that came with the printer, and have also found the Anycubic resin to be great as well – although the printer will work with any resin of the correct spec. Easy to use, and a great support group online (Facebook etc) – has allowed me to produce parts that I could not make in any other way. Bought with the confidence of Amazon UK. Excellent product.
Coming from an FDM background, I thought I knew what I’d be getting into with resin – I was wrong! Initially the printer seems quite intimidating but in reality it is very straightforward to set up and use and I have not had a single failed print yet. The quality has been very high, and any defects on models have been due to me not placing supports correctly.
I had a small issue where I had a power cut and the printer stopped working after but a quick email to AnyCubic and the issue was resolved within a day – despite the timezone difference!
I mainly use the printer to print miniatures for Dungeons and Dragons and it is more than I could ever have hoped for in a machine. Learning to level the bed took a few tries but once it has been done properly once, it doesn’t need done very often at all. I would definitely recommend the Photon for someone wishing to print high quality pieces easily.
I use ChituBox slicing software and the Photon File Validator to make sure there are no islands left unsupported.
Overall, would definitely buy another Photon if I needed a second resin printer – it’s user friendly, great quality and has been very reliable so far.
I’ve had myAnycubic Photon for about a year, so thought it was time to post a quick review.
As well as a general curiosity with regard to 3D printing, I mainly bought this printer with a view to using it for 28mm miniatures, an application that I have been extremely happy with. Setting up the printer for the first time, in particular getting the levelling right, is a bit tricky, and I was initially frustrated. However, having persevered and tried a number of methods, I found one that worked for me and have had no issues since.
Some people seem to object to the smell of the resin, so you might like to think about where you’ll keep it when printing, and you will need a ready supply of nitrile gloves, isopropyl alcohol and kitchen roll, plus a couple of tupperware-style containers for cleaning up your prints. It’s not a quick process and can be quite messy, but that’s part of the fun.
The resolution and quality is truly astounding, I hope the pictures give you some idea (10p coin for scale) – it seems neither of my cameras is capable of capturing the close-up detail – I think that tells you something of the detail the printer is capable of producing.
I had recently bought the i3 Mega from Anycubic and have been looking at SLA printers to do fine detail prints
My hope is that at some point in the future I’ll be able to create miniatures and studio models and using a combination of an FDM (i3 Mega) and an SLA (Photon) will allow me to create what I need in a timely manner
The printer itself is 99% pre-assembled – the only thing i needed to do was attached the door knob at the front
I ended up with the transparent green resin which does create some really cool prints
Again with the i3 Mega if you follow the instructions in the Manual that comes with it you’ll have no issues setting it up and be printing with in about 15 minutes
I had read reviews and watched videos about the resin being smelly but honestly i can barely smell it – i would still take all the safety precautions though
I would recommend that you buy some additional things along with this printer:
– safety gloves
– safety glasses
– 2 x large containers
– 99% alchohol
– tongs
– UV lamp
The print quality is amazing and i cant wait to use it with my miniature production
I will say that i’m still getting used to the cleaning process – make sure you really do clean it thoroughly because if you dont and then cure the print you’ll end up with smooth artefacts where some left over resin was on the model
Also the resin is very brittle especially around the supports that are generated when creating the model code – so be careful when removing the support material
If you’re looking for a cheap and reliable SLA printer then you cant go wrong with The Anycubic Photo
I think the build quality is excellent, the level of detail that can be achieved left me speechless (I’m used to FDM print quality) and it was easier to use than I expected.
Out of 8 prints so far only 1 failed and that was due to my not cleaning the plate properly after the previous print (the print popped off the plate half way through).
Also the resin is probably not as robust as filament, so delicate items that require a high degree of detail would be recommended.
Ive been looking to buy this printer for a while now, and was pleased to pick this up on prime day
Printer was shipped quickly as usual and well packaged. It comes with a few tools, spare FEP sheets, gloves, instructions and 500ml of resin
I was pleasantly surprised with how easy this was to unbox and set up. Levelling the build plate was straightforward and the instructions are easy to follow.
I chose to print the test print that comes with the printer as it’s a good baseline to work from. Set the print away and after a couple of hours I could see print stuck to the build plate as it should be (its a relief when you are able to confirm that) the print finished successfully after about 6 hours
Cleaned the print up, and cured it and was happy to see the finished cube! The detail is great, and I was chuffed at the quality, especially for a printer in this price bracket
The one thing I’d recommend is working in a well ventilated area, and always using gloves when dealing with uncured resin. The fumes are noticable and theres no getting away from the fact the cleanup and post processing can be messier than FDM printer.
As with Anycubic FDM printers theres a great community out there to help and give tips/advice for anyone starting out with resin printing. There are also slot of help videos available from anycubic should you get stuck
Properly pleased with the Photon so far, it’s a cracking printer especially when you consider the price, and capable of putting out some fantastic quality prints. Glad I took the plunge with it!
It did take me a bit to get the printer working correctly but now it works every time.
Hints and tips
1. Make sure it is in a level AND stable location. I originally had it in my shed and had no end of problems with prints not sticking to the bed. Then I realised the shed vibrated a bit when my other printer (an fdm one) was printing. I moved the Photon to a different location (a spare bedroom) and have not had a failed print since.
2. Don’t use auto support (except as a guide). The auto support adds too many supports which make it difficult to remove them. The T-80 suffered from this and the track broke and had to be re-glued, the bottom of the tracks are also to ‘blobby’. If I’d of used my own supports I don’t think this would have happened.
3. Thicken small parts before printing. If you look at the last picture you can see the incredibly fine detail this printer can produce. The tanks at the rear of the turret are connected via tiny strips, which is spot on for the model but very easy to break. If you look at the final model you’ll see that I broke them off while painting. Obviously this can be a positive if you are wanting very fine bits to print.
4. There is a bit of a smell, I keep the window open a crack
5. I always use disposable gloves
6. Have a system. I have a tupperware box with Isopropanol in it. When a print is done I use the scarper to scrape the model off the print bed into the tub. I then seal it with the lid and swish it around for a couple of minutes. I then place it in my home model UV box (a nail polish dryer on a cardboard box with silver paper liner and a cheap shop display turntable) for about an hour. After that give it a good wash with normal water and its good to go.
7. The models are a bit brittle. If you look at the first picture you can see its missing a mud guard, that’s because I dropped it!
8. I undercoat with Vallejo Grey primer.
9. When making the model hollow make the exit holes as large as possible otherwise you’ll have problems draining the insides out.
That’s it. It does take a bit more work than a fdm printer to get a print but the quality is exception.
This is an excellent printer, especially for the price. It’s fairly easy to set up, but you do need to ensure your levelling is perfect (both the machine and the build plate) — if not, prints will fail to adhere to the build plate. In my case the standard levelling process was insufficient as I needed to tighten screws inside the build plate hub that had come loose during transit (or not been sufficiently tightened in the factory). This involved removing 4 hex screws from the platform to gain access to the internal screws. It was fairly straightforward and worth bearing in mind if you have any movement at all in your build plate after levelling. Once this was cleared up I have had no failed prints.
The quality and detail of the prints is very high. I highly recommend searching for the Photonsters Github resources online as there’s an invaluable wealth of information from users of this printer to help achieve the best possible prints. The resin exposure finder tools from this resource enable you to find the optimal exposure settings for your chosen resin in a matter of minutes. In the attached photo you can see the AmeraLabs Town Calibration part printed in Anycubic Skin — with a ruler for scale. This part is tiny and filled with minute details designed to test the capability of resin printers.
This is my 2d anycubic photon purchase and I have attached some pictures of items I have printed the rotodyne (heleplane) is 22 inches from rotor tip to tip and the Mirage 3 is 22 inches long all printed on that tiny bed all be it in parts.
The printers do an amazing job for their price and I have spoken with people who have a formlabs printer and they say the quality is just as good, the customer support cannot be faulted in any way any issues they are on hand to help figure them out in a very fast and timely manner.
Print quality 10/10
Support 10/10
Resin quality !0/10
This is my second 3d printer after starting out with an Ender 3.
I decided to get a Photon as my printer for miniatures (heroforge and various patrons) after seeing the quality others were getting.
I must admit I wasn’t disappointed, the quality out of the box was incredible. I no longer have to order my miniatures from heroforge. I can download and print them with quality as good as the best heroforge were delivering.
Resin handling requires consideration as does the location of the printer however if your looking for a cheap good quality printer for miniatures you can’t go wrong with the Photon.
I picked this printer up to print small items for N scale train sets. Original I wasn’t expecting a huge amount from it but boy was I blown away.
This printer lets me go from design to realisation in a few hours, the quality is unmatched and its pretty idiot proof. It takes a little trial and error to get the perfect supports but it has been able to print me 1/150 people for my train sets. Its been the most fun I’ve had in years and added a huge amount of accessibility to the miniature and scale modelling market.
Cleaning takes about 15 mins after each printing session and It’s a little bit of a chore but its getting quicker as I get more efficient. The smell might put a few people off but in reality I rarely share any space with the printer. I make my 3d files, load them into the printer, hit print and then set my phone alarm. Few hours later I come back and clean up my print and we are done.
I recommend you order a few “Sistema KLIP IT Utility Collection Round Food Storage Container with Strainer” to help with print cleaning and a UV nail dryer. Both these things make the whole work flow much quicker and only add about 10% to the cost.
I cant recommend the printer enough and encourage anyone sitting on the fence to make the leap and enter the world of 3D printing! You really wont regret it.
It is a great printer! I loved it.
Resolution is great and the printing quality as well.
I am a 3d artist working for games and films and I am always trying to print things with a hi level of detail, and the printer is able to print it all, even the smaller parts.
I’ve used FDM printers in the past, but needed something a bit more precise for development projects, so purchased the AnyCubic Photon as a way of introducing myself into the technology. I have to say, it took very little tweaking before I was printing away, and the accuracy is spectacular.
I was really impressed with the quality of the prints, and the range of different materials means that it is applicable across a range of applications from my own personal use, to professional prototyping. I would highly recommend this as an entry point SLA printer, or even someone who just wants a cheap, simple and effective printer.
Everything you need is provided, from a USB memory stick to get your prints from PC to printer, to the gloves, masks and filters you’ll require to handle the resin (which, by the way, I don’t find has nearly as much of an odour as some people seem to. It’s either subjective based on your sense of smell or it’s wildly variant based on resin batches. I’ve used green and maroon and it’s extremely tolerable).
Expect a slight to medium learning curve if this is your first foray into resin printing. The models essentially print upside down, so your supports have to be placed accordingly and, if you’re hollowing the model out, you need to think about orientation so the resin can drain, as well as ensuring you don’t accidentally put too much of a suction force on the FEP. In short, do your research and it’ll pay off massively in terms of successful prints with insane detail.
If you’re looking to print stuff on a smaller scale with higher detail, you could do far worse than this printer. I have plans to print everything from custom sculpted minis to jewellery and, while the learning curve for processes like accurately supporting a model is definitely worth mentioning, once you’ve got that knowledge dialled in you can get some truly amazing results from the Photon.
Models shown painted by me but sculpted by some very talented artists: “Bearded Yell” by Bendansie on Thingiverse, Samurai is a Heroforge figure, Yuki Onna, Hill Giant and Dinosaur by Duncan Shadow Louca on Patreon.
When I first got it, I did the unboxing and followed the set up to the letter of the booklet and the accompanying video that comes with the product. Unfortunately, my prints failed for the first few weeks of trying it. There were two errors that seemed to come up, the resin that came with the product and the proper zeroing of the build plate. Despite the problems I had, I still give 5 stars simply because the customer service was absolutely phenomenal and they walked me through every step of the process and even sent me a new bottle of resin.
A good all round machine but many people seem to report that they cannot run the slicer software that comes with the machine because they do not have a good enough graphics card and/or processor. I found that the free software slicer Chitubox was a good fix for this problem but the manufacturer should make this clear to potential buyers in the description that they must check their hardware specs before purchase. Unfortunately the slicer software included is no longer going to be developed as stated on anycubics website. All round however a very good machine to buy and i highly recommend it. PS. I also recommend the manufacturer recommends a castable resin, where to buy, and the correct exposure settings for castable resins as this is critical info for many buyers of this machine.
This is my first resin printer and it does exactly what I expected. With a little bit of care it is capable to producing some amazing results. The print above was drawn by me and then printed using Anycubic resin at 0.05mm layer height.
I use it mainly for producing wargaming vehicles in a variety of scales and it is ideal for that purpose.
Like any resin printer it requires cleanup and care when handling the resins but this printer comes with tools, facemasks and gloves as well as a resin to get you going. The only thing you will need is IPA to rinse the final prints off.
I had one problem with the printer freezing but this was easily resolved by Anycubic customer support within 24 hours.
I did a lot of research before jumping in to my first 3d printer. This has not disappointed.
Pro’s
– Setup and unboxing is easy as can be. You must follow the levelling/zero-height instructions carefully…and these are easily forgotten (not sure if I needed to, but a couple of days after using it first time, I thought I’d ‘jump in to setup’ and forgot a step…leading to an embarrassing clean-down and start again with instructions…my fault entirely.)
– Print quality is as good as expected, which is great. The printer tries to do the most ridiculously thin strands… It produces models at the limit of what UV-cured resin can do.
– Software and slicing is good. I learned quickly that manual support creation is sometimes more effective. Still learning about the best orientation and settings for layer height.
Cons
– Yeah – the clean up is a pain…very messy with lots of surgical spirit being used. Not too bad as the bath is small. A good working area with prepared surfaces quickly sorts this out and makes life easier.
– The smell – a bit of a pong…but I set up in a small kitchenette, on the hob, with the extractor fan going. No problems! Shut the door, fan on, walk away for a few hours…all good!
– The size of print. This is the main trade off… quality vs quantity. I am considering getting a PLA printer for larger items that don’t need the fine detail. You are limited X/Y in size…but this is expected. Z dimension normally isn’t an issue. Not upset about this aspect as it does 100% of what I wanted it for. But when I see some large models I immediately thing ‘nope’…
Comment on Resin itself
– it has it’s own rules…not tied to the printer.
– One model which has a globe as part of the make up was hollow…which should mean less printed material, right? Yeah, except the globe was sealed with uncured resin inside due to being inverted. This wouldn’t normally be a problem as it will cure over time, except the shrinkage caused one of the models to buckle and leak resin on to my shelf.
– I now think about free-draining points and orientation of models…
Overall…this is an awesome printer, with good software. I would happily buy this again and recommend it to others.
On balance, for the money as compared to the results this is a very good package.
I mainly had problems with the software, it refused to run on either my Windows 10 laptop or a Windows 7. It wouldn’t open at all on the Windows 7 machine, and would open on the Windows 10 machine but then crash when I clicked “file open”.
Finally, after a lot of experimentation I got it to work on the Windows 10 machine. I installed drivers as supplied by Anycubic, that alone wasn’t enough. I made sure that Windows was fully up to date, and updated my graphics card drivers. I configured Windows to use the graphics card by default. Still however the 64 bit version wouldn’t run. Lastly I went back to the 32 bit version (something I tried at the very beginning) and with the subsequent updates this version did work.
Once running the software is pretty capable but it appears to crash frequently so I recommend saving often. Worse still it can corrupt the saved when it crashes as I discovered when re-opening files from crashes, so save plenty of duplicate versions.
The machine is well built and easy to use.
I had been printing for some time with a FDM printer (Flashforge Dreamer) but could not get the detail I wanted especially for some challenging pieces designed by my friend who is a 3D artist. The prospect of spending 3k+ for a commercial SLA resin printer was just not possible so after reading some good reviews of the Anycubic Photon I decided to give it a try.
On unpacking it I was immediately impressed by the quality of the machine considering the budget price. It took me a few attempts to get good results as it is a bit of a learning curve and the documentation is a bit flimsy but fortunately there is an excellent Facebook group full of enthusiasts for this machine which was a great help. Once you know what you are doing though the results from this printer are astonishing with really detailed prints that cannot be matched by FDM printing.
For the money I can really recommend the Anycubic Photon although anyone considering buying this type of printer should be aware that the resin is toxic and needs to be handled correctly also cleaning the prints is a bit of a chore as they need to be washed in Isopropyl alcohol . Also due to the smell it needs a well ventilated area to be used in.
To sum it up a great printer at a great price with great results possible but you will need to invest some time in working out how to get the best out of it.
Great 3D printer, the prints I’ve posted are of the bearded yell and Viking. Printed them to sort of stress it out and see what quality comes, and for only 0.05mm layer height (printer can go down to 0.01mm) the quality is outstanding. Not had one issue so far. The auto support with the slicing software has never failed on me – only failed prints are from me doing my own supports which has to be down to my experience. Easily set up in 15 mins. Very intuitive slicing software, nice and simple.
If you’re looking for a fair priced resin 3D printer, I highly recommend this brand. Excellent packaging, customer services. Manual very well payed out and helpful advice. Can’t fault anything bar the scraper you get issued, but easily solved with a set of Harris branded ones from B&Q for less than 2. 10/10 in my opinion.
Hey everyone. I recently purchased this printer after having owned several FDM printers previously. I was expecting a rough transition between the 2 mediums going to resin printing.
Boy was I wrong. This machine is so much simpler to use than anything I have ever used before. A slight learning curve with the supports but not horrific at all. For the most part I have used the auto support from both the photon software and chitubox without issues.
Now onto the print quality…. all I can say is WOW….. as you can see from my pictures all parts look like they have come from a factory no signs of print lines or flaws in any way. Almost perfect prints from the moment I got the printer.
The printer itself is well built with a metal frame magnetic clasp keeps the lid closed and keep out that pesky sunlight. Metal print bed and resin vat are also a nice touch and instills a feeling of quality. Being the price it is against many of the other resin printers I was not expecting too much…. but my mind was blown it blows everything else I have had out of the water quality wise. . The FDM printers still have the use for larger items and things not needing detail. But the photon will be used for minus scenery and many other things besides…
A side note. If you do get one of these join the anycubic photon fb page what a community a fantastic community always striving to help everyone with problems large or small.
In short BUY THIS PRINTER. You will not regret it.
It was very easy to set up, only the door handle needed putting on. The instructions were very clear and easy to follow.
Now it is a bit messy, BUT if you are prepared for it then it is dead easy. I have a print bench which has everything set out in the order that I need it. Printer, paper towels, Isopropyl Alcohol, towels again. I get very little mess and the alcohol bath is big enough I don’t need to touch the print with my hands, I use pointed nose pliers and pick the model up on the base layer. I then wrap it in a paper towel after its alcohol bath and then into the house for a rinse under the tap before curing on the winodow sill in the sun/daylight.
I use the beta 2 software on my Mac (slicer 1.3.6) and it is fine. software is easy to use and once you work out how to adjust the supports (you need way less than auto generate uses), it is very quick to get going.
Make sure the spatula is dead flat. Mine had a very slight curve to it and slightly scored the pep film. Not caused issues with printing but it could have.
Buy a funnel to put the filters in. The resin soaks through the paper and on my first attempt to filter back into the bottle it went everywhere. With a funnel I have very little wastage.
All my prints have been with Anycubic grey resin so don’t know about other resins or colours.
PROS:
– Print quality is A+
– Easy to use software
– Extremely well made piece of kit and user servicable.
– It is quite quick, if you plan ahaead and have it start in the evening they are ready for the morning. Extra time to drip off the resin is always a bonus anyway.
– Manufacturer is very good with advice and help on their site and facebook groups. Not had to use support thankfully so can’t comment on how good they are.
CONS:
– Can be messy if you don’t prepare, if you do then a non issue, at least for me it isn’t.
– Smell could be unpleasant, I really don’t mind it so it doesn’t bother me.
REQUESTS FOR THE FUTURE:
– I would like more detail of what each setting in the software is for so that I don’t have to use trial and error as much, there are groups and forums but a good Anycubic explanation would be good.
– Sleep mode for the printer once a job has completed, I use a timer plug that turns off 3 hours after the projected finish time just to be sure as I don’t want to stress the electronics with it burning away when I am away or asleep.
– Network connectivity or add on so we can sent staright from the Mac/PC without the need for USB.
In conclusion, I use this for printing miniatures for RPG and the STL’s I download from HeroForge print like a dream. Yes it is an expensive way of printin miniatures but over time the cost of my prints will drop the total cost of ownership the more I print. I would definately buy this again if I needed to, looking forward to the next PHOTON printers released.
It worked straight out of the box. Only had to attach the door knob and off we went.
I’ve not used a 3d printer before, we were outsourcing, but this is so simple to use. The slicing software is very easy but make sure you write down your settings for each resin.
The build plate is relatively small but it prints very fast at the layer size we use and we don’t need to print large models. The accuracy is amazing. We have had no problems making dental models where the accuracy is very important. I have also seen someone who has this printer carefully planning the support structures and printing 21 of the type of models I print in one go.
Cleaning up is a bit of a chore but buy some gloves and some isopropyl alcohol and it’s fine.
I’m a very happy customer and will soon be buying more to run along side the one we already have.
I’d been waiting years for an affordable, reliable resin printer to appear.
After looking around I recently came across the AnyCubic Photon, so I decided to give it a try.
Set up was extremely simple. It took only a couple of minutes, and only required a piece of paper.
Once it was set up I connected the included USB drive and started printing the provided example file.
In comparison to a traditional FDM printer, the Photon is very quiet with the loudest component being the fan.
It’s also fast, completing the print in just under 4 hours. It’s worth noting that thanks to the way resin printers work, you could print multiple copies of the same model at once without it taking any additional time unlike an FDM printer.
Once the print was completed the results were amazing.
An object that a traditional 3D printer would have struggled with was no trouble at all for the Photon and didn’t even require support material. There were no visible layer lines, no imperfections, sharp edges were sharp, rounded edges were round. All this on the first try with default settings.
It looked like a professionally manufactured part from a factory.
The main down side when compared to FDM printing is that resin can be a little messy, and requires the machine to be cleaned out if it’s not going to be used for a few days. But compared to other resin printers, it’s very little work for incredible results.
The resolution I achieved with this on my first test print was great, and I’ve had very few failures that weren’t the fault of the design of the object or my choices of support. Supplied slicing software is no-frills but works well. No WiFi option yet (even though it’s on the board), and it seems to lose leveling pretty quickly. Apart from that, a great printer for the price.
I have been wanting one of these machines for making model kit parts.
The build quality is pretty good, the machine is very well packed and feels quite solid. It doesnt take up much space either. It is quite fast to get started with, and it comes with a small bottle of resin and a comprehensive tool kit. You need to install the build plate and level it, the printed manual is very good compared to the sparse documentation you often get with 3d printers.
There are a couple of drawbacks though. My machine’s masking LCD didnt work properly and returned an error code. A firmware update fixed this, but it took some digging on google to find out how. You need to download and unzip three files from Anycubics website and put them on a USB drive or adapted SD Card. Anycubics website explained this quite well, but I found it only worked as described if I put the three update files on a USB stick on thier own.
I have only tried one print so far and it failed because it stuck to the FEP film but I have not had a lot of time to get used to it yet so I need to learn and adjust the settings.
The slicing software supplied on the USB card was tempramental and wouldn’t run, however downloading it off their website and installing it as Administrator lead to it working on both windows 10 and a windows 7 PC. It is quite basic compared to fdm slicers and I have not tried using the support generator yet. The lack of an alternative is a bit disheartening as with FDM printers you can just use another if one program doesn’t work for you. Note that if you open a .photon file in the slicer it will show a layers display but no model, I was confused by this because both .stls and .photon files use the same icon. The .photon is what this machine uses instead of .gcode
I found the resin didn’t smell too bad to begin with but being nearby without a respirator gave me a headache, definitley needs a well ventilated room. The pack includes a generous number of disposable gloves and a basic mask. You are going to need a lot of paper towels. I’m going to look for some iso alchohol tomorrow.
I am satisfied with my purchase so far, it loses one star due to the software installation not being a smooth as it could be.
I’ve been 3D printing for about 4 years now with FDM printers and decided to try a resin one. This little printer was excellent value for money!
I’m dead impressed with the quality of the stuff that it’s able to output. It’s pretty much been able to handle anything I’ve thrown at it, to a really good level of detail. If these guy’s ever did a bigger build volume resin printer I’d be interested! I’ve been able to do solid and hollow models, and it’s done them really well. Some of the wall thickness in these prints is about 0.2 or 0.1 mm and it’s still solid.
Software is relatively simple, but honestly it does what it needs to and unlike FDM printers there isn’t much that needs configuring. Really happy with this printer.
I do recommend joining a facebook group or two to help answer questions if you get stuck as different resins have their own unique curing times but thats down more to the resin than the printer.
The printer arrived very well packaged and it leveled easily and quickly. It wasn’t long before I was printing. The fumes do smell a bit. I’ve known of a few hobbyists who’ve created exhaust pipes connecting from the vent leading the fumes outside. If you are new to 3d printing do research into the safety and post processing involved. I converted a old food dehydrator and wrapped a UV LED strip inside to assist with curing and drying the models. The second image is after the print and the first image is after post processing and with a few layers of clear lacquer sprayed on. This printer is the best valued DLP printer money can buy.
The print quality is just amazing and the printer itself is a solid piece of kit. I’m not sure my photos do it justice.
If I had to list any down sides, the only real one is the smell during printing and that’s easily solved by adding some washing machine tubing and a small inline extractor to direct the fumes straight out the window. If you check the reddit or facebook groups for this printer you’ll find a backplate you can print to connect the pipe to the rear of the printer. Some have said they don’t mind the smell, but I’d either print in a spare room, or sort out an extractor.
Whilst this printer is just about as easy to use as it gets (with no assembly beyond screwing in the build plate and door knob), it is also not just as simple as download a model, load into printer and hit print. This is not a fault of AnyCubic, it’s just the nature of all 3D printers, there’s a degree of experimentation with supports needed, build plate leveling and a little post processing to clean off the resin.
Accept that you will run into failed prints and waste time cleaning them off the FEP sheet until you gain experience in where supports are needed and when you can get away with none. Once you get used to that though, it really does become hit print and watch the magic happen. I’d recommend watching some youtube videos on the post processing steps for using resin printers so you know what you’re getting into. It’s really not as hard as it appears if you are methodical in your approach.
Whether you’re better off with a filament based printer or resin only you can decide. Many will want both as they cover different use cases, I certainly want an FDM printer to complement the Photon. However as far as resin printers go, the AnyCubic Photon is just such unbelievable good value for money considering the quality of the prints. If you’re into miniatures it’s well worth consideration.
Suggestion: buy a tall form plastic jar with a clip down lid. This makes a really good parts washer. Allow the excess to drain off and then peel off the whole finished part away from the blue mount. Put a few squirts of Isoprop into the jar and the part, clip down the lid and give it good shake. Pull out the part and stick it on a lint free wipe to dry. This uses a lot less solvent than just bathing it. The solvent should NOT go down the drain as it will rot your pipes and also be bad for the environment, put the waste in the jar and put it outside for the solvent to evaporate. The grot left over should be put in a glass jar and wrapped in paper then binned.
Printer: Robust and sturdy, seems very well built. I moved house and didn’t even need to recalibrate it. Quiet too. 5/5
Ease of use: It is important to know the details of finishing resin prints before getting started, but this one is as easy as any resin printer can be. Finishing a print will take around 10 minutes and require some chemicals. You have to use gloves as handling any resin directly is not 100% safe. 4.5/5
Software: This is the only thing that isn’t ideal with the machine. the Photon comes with its own software, which works well most of the time but can be annoying to work with sometimes. Especially if it crashes while saving print files! Updates seem to be fairly frequent so I expect this will improve. 3.5/5
Print quality: We’ve been using the default settings that come with the software and they are extremely good. We are so happy with the print quality that we have started selling custom prints from the machine. We haven’t tried any higher resolutions because we literally cannot see the layer lines. 5/5
All in all, I highly recommend the printer if you are looking for a resin machine.
If large prints is your thing, then this isn’t for you, it’s not a massive build platform, but to be fair, since I’ve had it, I’ve not hit it’s limits. If you’re printing a 300x300x300 vase, then this isn’t for you, plus it would be really expensive in resin..
My only complaint is the slicer software, if you’ve used any FDM slicer, (I normally use Simplify3D) then this software is really, really, basic, it works, but very soon you realise the support structures it generates are fairly useless vs just flat on the bed, or your own design, and you can’t save different resin profiles, so if like me, you like to experiment, you have to manually make notes on exposure times etc, which gets really annoying really quickly, is it 8sec exposure or 14 sec, at 0.05mm layer heights, these are massive time differences…
But the whole resin thing is a different subject, I’ve been using resins for different things for 40yrs, so if there are ‘long term effects’, yea way too late for me, but if you’ve never used them, then beware, everything gets sticky, and smelly and may have long term effects.. just get lots of 99% IPA to dissolve it, wear gloves, mask etc and wipe everything down. I’ve also vented the printer out the window, which helps a bit..
I bought the AnyCubic Photon with printing miniatures and scenery pieces for boardgames in mind (so the small build plate was not a problem), but nothing really prepared me for the absolutely amazing quality of details that can be achieved, even at the comparatively coarse setting of 0.05mm layer height (it will do half that at 25 microns). The machine itself is quite compact. The only thing you have to do out of the box is screw the included knob onto the door, then you can set about setting the 0-level (I watched the AnyCubic video which was perfectly fine). Since there’s only one moving component (the z-axis), the calibrating process is simple. The build plate itself is mounted on a ball joint that gives it rotation in the other two axes, which is then braced in position when flat by screwing in a nut that clamps the ball joint. Note that you have to do this nut up extremely tight to prevent the build plate from moving away from level – I was worried I was going to shred the threads. I would say this is probably the weakest part of the system.
I got the version with the yellow screens. I did a very brief and unscientific test with a UV torch, a piece of paper and some UV ink. I can confirm that the yellow perspex does indeed block a large chunk (but not necessarily all) UV light.
I upgraded the firmware straight away, and it seemed to work. It’s a slightly odd process because you have to actually print two of the files to apply the updates – and there’s no confirmation that it has worked, and I haven’t found anywhere to check the version numbers in the LCD menu. After that, fill up the reservoir 1/4-1/3 full with resin, and hit print. The test model printed cleanly first time in about 6 hours – I suspect it’s printing at the highest resolution, but it doesn’t use very much resin. There are helpful maintainence videos on the AnyCubic website for post-processing and cleaning up.
Slicing: The Photon uses a proprietary slicer and file format (.photon). The slicer tool is pretty basic, but relative easy to use. The support generation is actually quite good, but editing existing supports can be a bit fiddly. Many people add supports in Meshmixer first, and then import them into the Photon slicer. Note that the approach to slicing with a DLP/SLA printer is very different than with an FDM printer, in that you will be wanting to support the print enough to prevent the suction forces pulling your print off the clear screen from pulling it off the build plate – but not too much support that the model requires more post-processing to remove than is necessary. This is where most of the fettling happens – tweaking your supports, the rotation of the model, looking for islands, etc. Once you’ve sliced your model(s), you copy the .photon file onto the supplied USB stick.
Operation: Printing is as simple as selecting your model and hitting print. The downside of the vat based approach is that you can’t see the model being created until the build plate clears the lip of the vat. This is quite frustrating as you don’t know whether your supports have worked until after at least an hour or two’s printing. Having said this, in general, failed prints tend to stick to the clear FEP screen, which effectively blocks the UV light meaning that you don’t lose a load of resin.
Resin: The supplied AnyCubic Clear Green resin is excellent. You get 250ml in the box. I’ve tried the AnyCubic White, and my subjective view is that there’s less detail. The White certainly takes longer to slice (as you need to up the layer time to about 15 seconds from 10 with the green). I’ll be going back to the green as I will always be painting the resultant models. The one downside is that resin is expensive.
Post-processing: You will need a large supply of 99.9% isopropyl alcohol in sealable containers. Dunking the model in two consecutive IPA baths, and then a separate bath of fresh water should be enough to remove any excess resin (I bought a load of beakers for this). You must then complete the curing process with either sunlight or a UV curing oven. This just cures the bonds between the layers and hardens the model all the way through.
Cleanup: There’s no getting around it, resin printers can be messy, and the cleanup process is unpleasant. I recommend acquiring or printing a funnel and placing the supplied filters in there to strain out any cured bits of resin. AnyCubic have published a bunch of very good videos on.
Summary: If you want a printer for small highly detailed pieces, this is definitely worth a look. Zero fettling, unbelievable price, and it just worked. Extremely pleased.
If you are looking for a printer that comes with easy to use software and a manual that is written for the absolute beginner, this is the printer for you.
If you are looking for a printer that is quick to assemble and has rock solid build quality, this is the printer for you.
I also own a ‘traditional’ filament 3D printer (Prusa i3 clone) and this quite simply blows it away in just about every aspect. The resolution of the print it is able to produce is production quality – there is simply no other description for it.
The software is super easy to load and use, and with websites like Thingiverse there are hundreds of thousands of free designs that you can download and use yourself. You then simply save it on the included memory stick, connect it to the printer, press print and wait for the magic to start.
To watch your finished design slowly emerge from this pool of liquid is pure sci-fi and very compelling.
The last 2 pictures show a Christmas decoration, with a floating reindeer inside – something my other printer was simply not capable of producing.
You can spend an awful lot more on a resin printer than this little beauty, but I honestly can’t see how the quality could be any better – it is that good.
I know some reviewers have complained about the smell produced by this type of printer, but to be honest, i never noticed anything that gave me cause for concern – and I use this in my living room.
Whilst resin printers are messier than a filament printer, the quality of print far outweighs this inconvenience.
Would I recommend this printer? Absolutely. It has far exceeded my expectations in terms of build quality and the quality of its finished models.
I downloaded a 1:200 scale stl file of a Tiger 1 tank and turret, imported it into the software, followed the instructions to the letter and 4hrs later I had another perfect print.
If you are looking for a high quality low cost DLP printer, look no furthe