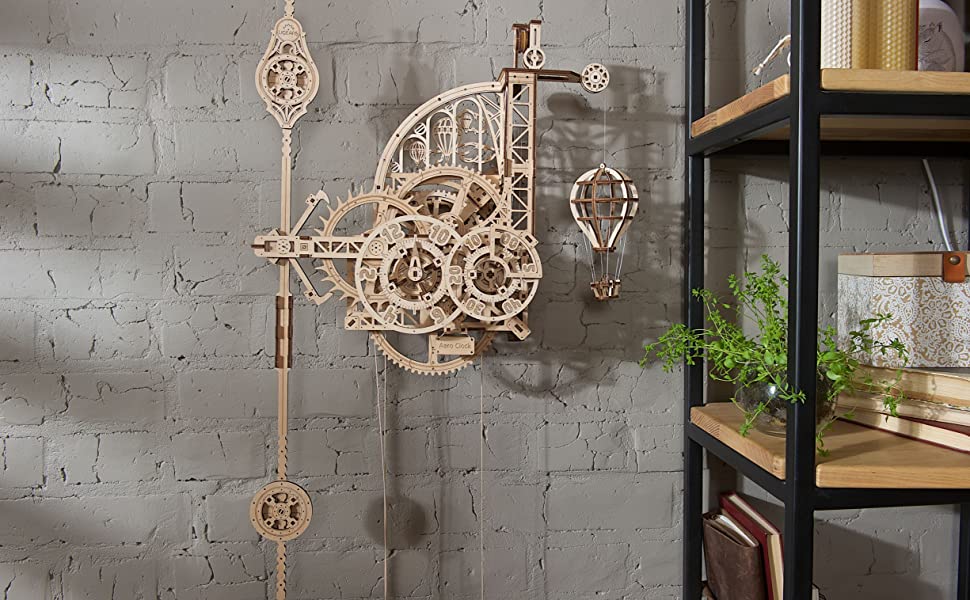
UGEARS Aero Clock 3D Puzzles – Wooden Model Kits for Adults to Build – Vintage DIY Wall Clock with Pendulum Wooden Puzzle – Self-Assembly Mechanical Clock Christmas Birthday Gifts For Teens and Adults

Ready to make your own clock? The time has come.

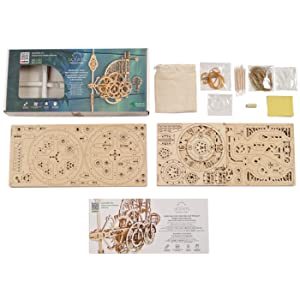
| Dimensions: | 75 x 47 x 16.5 cm; 1.3 Kilograms |
| Model: | 70154 |
| Material: | Wood |
| Pack Quantity: | 320 |
| Batteries Required: | No |
| Batteries Included: | No |
| Age: | 14 years and up |
| Assembly: | Yes |
| Dimensions: | 75 x 47 x 16.5 cm; 1.3 Kilograms |
| Material: | Wood |
| Quantity: | 320 |
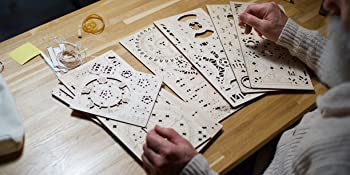
The instructions a very good but you do need to pay a lot of attention to them and understand exactly what they are trying to tell you. The instructions are very pictorial with very little text.
The most complex part is the final assembly and threading of the cord.
The best tips to ensure your clock runs are:
1: spend a lot of time with the sandpaper making 100% sure the edges of the cut wood are smooth and free of ridges left by the laser cutting.
2: The small round washer things are actually bearings that run on their outer edge, so make sure these are really nice and smooth and test them in the holes they go in to make sure they don’t bind or have any tight spots. Slide them onto the stick tool so you can rotate them against the sandpaper to get them are true and smooth as possible.
3: The wax is applied as a lubricant. I used a lighter to melt the wax after I’d applied it, so it soaked into the wood.
4: When you assemble the gears, make 100% sure they run true. There’s no obvious way to ensure the gear is sitting dead square on its shaft unless you make up a jig. You just have to tap the gears home and make sure they are seated flush. Then check that they run true and don’t wobble once put into the clock. This is the main reason the clock will stop itself. Mine still are not perfectly true and you can see them wobble a little as the spin during the ‘spin test’ (see no. 5)
5: Once assembled, disengague the pendulum and let the weight run the mechanism at high speed. Do this a few times. It helps bed in the gears and bearings and it also allows you to see if you have any wobbly gears. You’ll also hear if anything is rubbing. It should all spin smooth and at a consistent speed. Then put the pendulum back in and it should run perfectly.
Its a fantastic kit. It’s ticking away as I write this and the balloon is just about to do its hourly drop!
My wife bought me this model for my birthday. I have thoroughly enjoyed making it as the pieces are very precisely made. The instructions are very good my only slight complaint is the position of the cords is not as clear as they could be. I really had to study the positions of line cord for the clock mechanism and the ‘line’ for the balloon. I took the line connection cog for the balloon apart several times before I got it working correctly. But the clock all works now and has a lovely ticking noise. Brilliant model all in all.
still working on this but it has been fun – looking forward to having it working
My son has still not finished it. Finding it quite difficult at the age of 25!
It has been a pleasure to build, made with care it all goes together beautifully, and is a delight to watch and hear ticking gently away
Only slight problem is, as others have said, the hot air balloon is a bit fragile, and tricky to put together. It’s easier if made from the bottom up rather than top down!
Loved all of it. Wonderful fun to make and frustrating to get the time right!. It works well. I’ve never made anything like this before and didn’t find it hard
poor assembly instructions but clock kit is very well made
when making this it helps me no to smoke only problem is i finished it and need to save cash for anothe
This kit was designed by a genius! The instructions were clear and the parts very precisely made.
Building it became an addiction, it took a week of evenings to complete and I was proud of the result even though it was “just a kit”.
The excellent quality of the pieces and the detailed instructions make it a pleasure to build. It took two of us about 16 hours (over several days) to build. It’s running nicely now.
Great model, gives hour of work to build it , presision of cutting is exceptional, great quality with clear instructions